

Sims 4 How To Use Design Tool
The Sims 4 Building Guide has been written exclusively for SimsVIP.com by Ruthless_kk. Additional contributions to this guide have been completed by Adelaidebliss . All images and text for the guide below are property of SimsVIP. Any unauthorized use of the guide or images will result in legal action.
Copyright ©2011-2015 SimsVIP – All rights reserved Click here for The Sims 4 Game Guide
❗ Click the links below to jump to a specific section of the guide, and use the floating "arrow" on the bottom right of the website to scroll back to the top.
The Sims 4 Building Guide
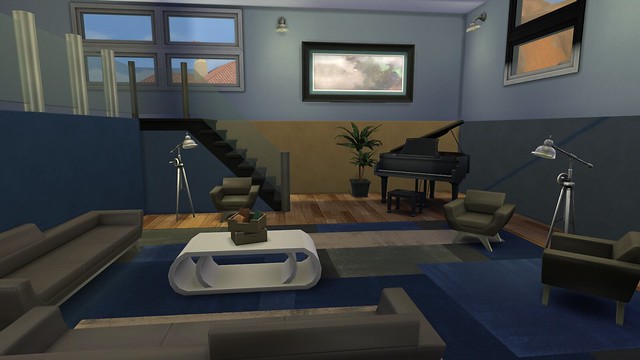
If you are a fan of The Sims but have shied away from building, now is the time to dip your toe in the water! The Sims 4 offers many new and exciting ways to express yourself creatively with innovative new Build mode tools. Building as never been faster and easier…or more fun.
This guide will walk you through everything you need to know to get started, including a ton of tips to eliminate common frustrations and help you become a more confident creator. From foundations to roofs and everything in between, we have you covered with tons of pictures and examples to show you the possibilities.
Getting Started
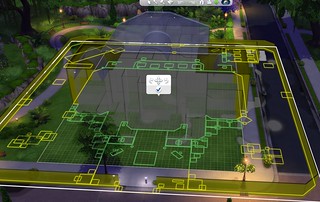
You no longer have to be in a lot before entering build mode. From the map view (manage worlds) just select any lot and choose the tool symbol. You will immediately be taken into build mode for that lot.
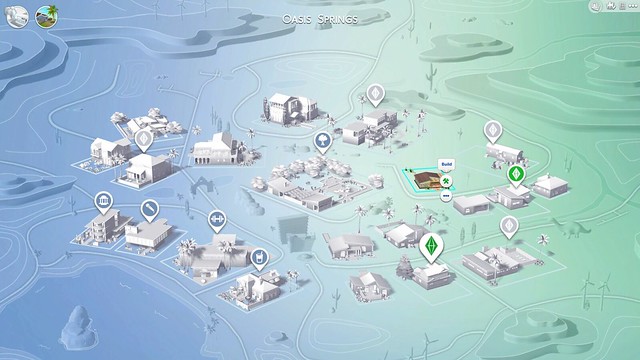
Best part? It doesn't have to be your active household. You can enter any lot whenever you like. No more evicting Sims to make changes to a lot. It no longer matters if the lot is occupied because any lot can be changed or modified regardless of status.
A few things to remember:
• Your active lot is the one you are in at the time. Once you enter a lot in live mode, it becomes a played household.
• Any changes made to a played household (green and white plumbobs above the house in map view) will come out of that household's budget.
• Any changes made to an empty unoccupied lot are not restricted by budget in any way. Any Sim you attempt to move into the lot will, however, have to have the funds to afford it.
• Any changes made to a venue/community lot are unlimited and do not cost you anything.
• Changes made to an unplayed household (grayed out plumbob above the house in map view) will not come out of that household's budget if you enter build mode from the map view. If you hit the "play" button to enter the lot in live mode, the household becomes a played household.
Build mode changes to played households come out of that family's budget. But if you don't play the grayed out household and enter directly into build mode, you can make any changes you like without it affecting the household funds.
Don't want to worry about price at all? Use the Free Real Estate cheat. In map view with a Sim selected, hit CTRL+Shift+C to open the cheat menu. Type in "freerealestate on" and hit enter. You will then see that all of the residential lots in the world are edged in green which means you Sim can move in.

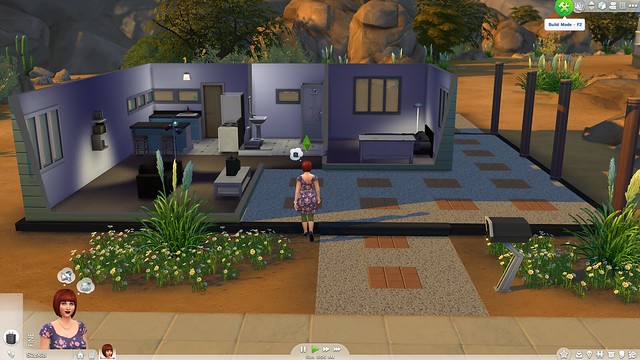
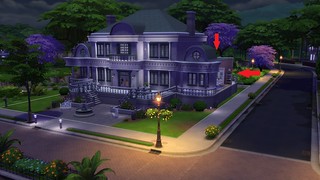
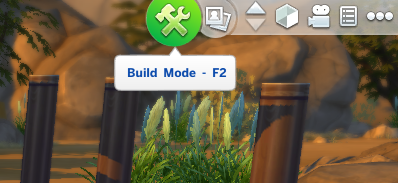
To enter build mode from an active lot, click the build mode symbol in the upper right hand corner.
Build Mode Controls

Once in build mode, you will see a tool bar at the top of the screen. The controls from left to right are:
• Select: Used to make an object or element active.
• Eyedropper: Used to copy an object. At this time certain objects like rooms and roof sections cannot be cloned with the eyedropper tool.
• Sledgehammer: Used to remove an element or object. Whatever is highlighted in yellow is what will be demolished. To delete multiple things at the same time, click on an object and while holding down Shift, drag the cursor across the things you want to delete. Remember that if you accidentally delete something you wanted to keep, you can hit the Undo button to reverse your action. You can also get rid of an item by "grabbing" it using Select and hitting delete on your keyboard.
• Design Tool: With the design tool selected, you can click on an item or element to see the different color options that are available. Pick the swatch you want to change the color of the object. Please note that the design tool does not work on all objects.
• Undo: Use this to undo the previous action.
• Redo: Use this to go forward in the chain of actions.
• Lot Information: Opens a sub menu. (see below for more info)
• Save to Library: This control places the lot or room in your library for future use or to share in the Gallery. To save a room, you must first select the room while in build mode. When you see the room is highlighted hit Save to Library and select the Save Room option. You can use this feature to see what the picture of your lot will look like if you share it on the Gallery. You don't have to actually save it.
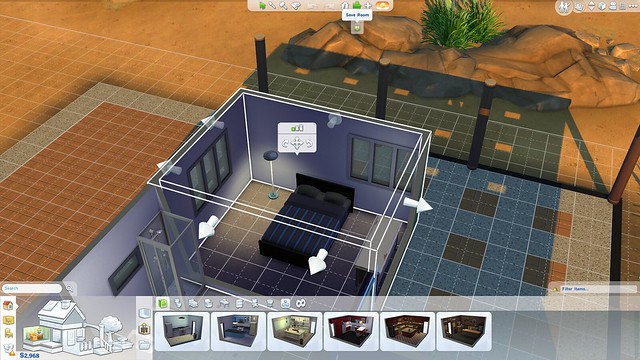
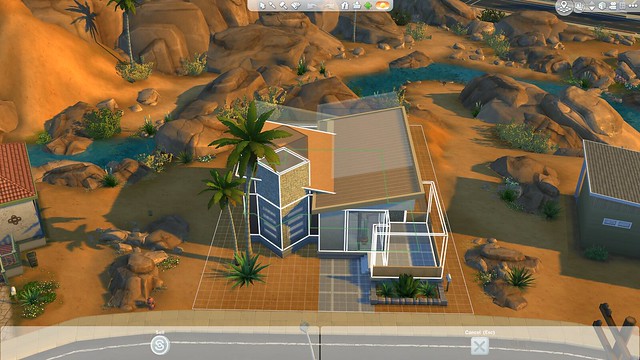
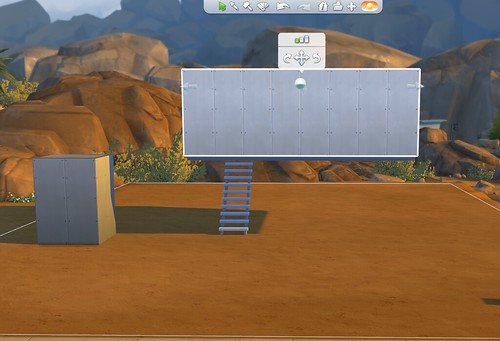
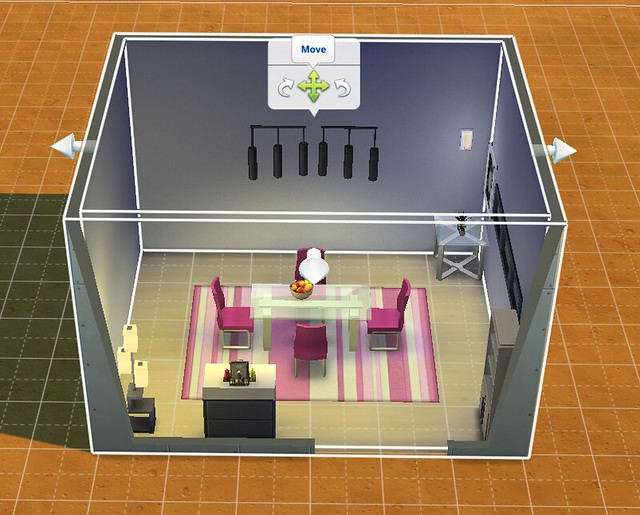
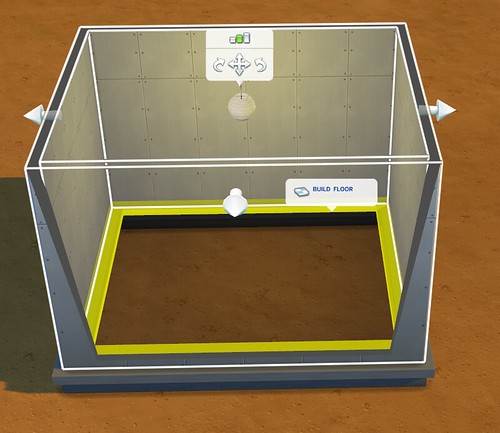
• Move House: This allows you to re-position the house anywhere on the lot. Click on the tool first, then click on the house. You will see white outlines around the house and the movement controls.
Use the curved arrows to rotate the lot 90 degrees in that direction. Click the middle symbol to "grab" the structure and enable free movement. You can now move it anywhere on the lot it will fit. You will see a green footprint outline on the ground to make it easier to tell where the moved structure will end up. If the outline turns red, it means you can't place the house in that location.
Things to remember about using Move House:
• Moving the structure does not move landscaping or fences…so if you have landscaping you want to keep in tact, you will need to use the "Move Lot" feature instead.
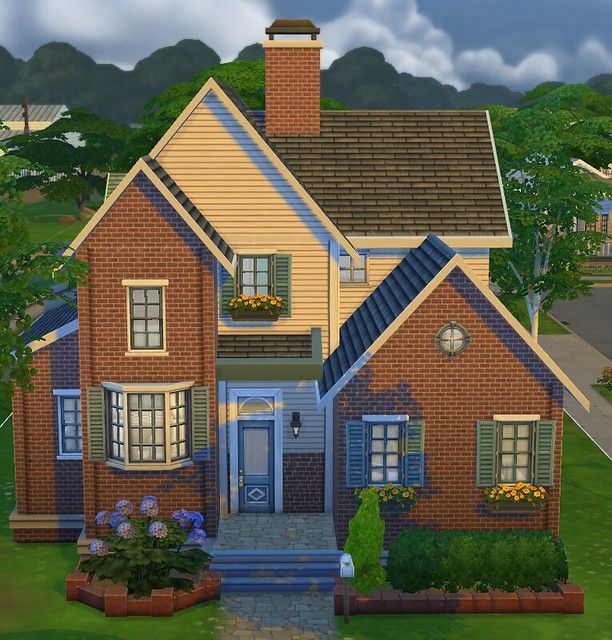
• Check the position of the house by hitting Save to Library and looking at the picture. If you can't see the entire front of the house, you probably want to move it back a few squares. If you plan on adding some landscaping in the front, will it show in the picture? If not, now is the time to scoot things back a bit.
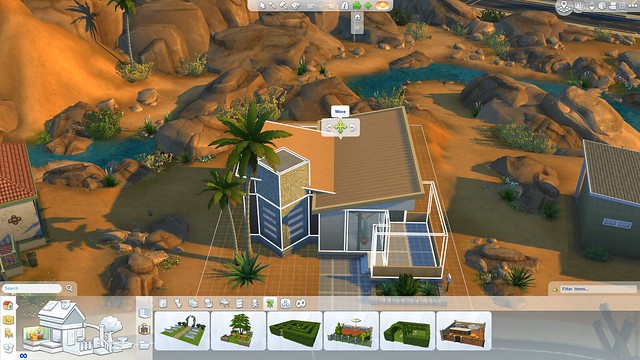
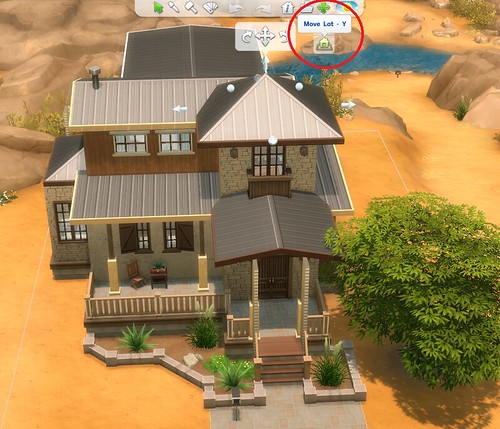
• Move Lot: Underneath the icon for Move House you will see the option to "Move Lot". Move lot picks up and moves everything on the lot including landscaping, lawn décor, and terrain paint! It enables you to reposition the structure and keep all of the landscaping intact, so if you need to move a house from the Gallery or you decide to change things up but you have already made an elaborate garden, this is the option you want to select.
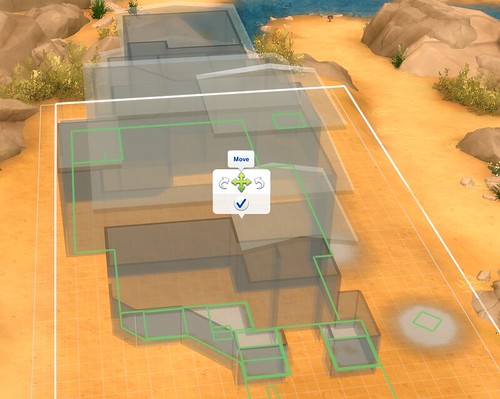
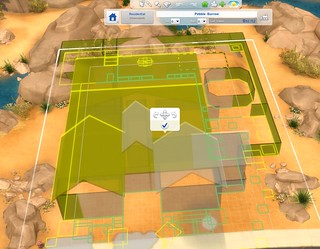
Once you click on the Move Lot icon, you will see the lot become a shadow outline to help guide you with the placement. You will notice that, in addition to the outline of the structure, individual items like trees or lawn furniture are also indicated to help you decide where things will end up.
Click on the Move arrow in the center to allow free placement of the lot. The arrows on each side will rotate the lot 90 degrees.
As you move the lot, you will notice that some of the outlines will change from green to yellow. Anything highlighted in yellow (including furniture, walls, plants, and even terrain paint) will be deleted.
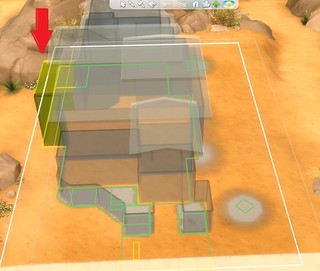
 
Once you feel you have the lot positioned correctly, click the check button to accept the change. Don't worry if you don't like the result, you can always use the undo feature to change everything back and start over.


TIP: It is important to note that, unlike rooms, roofing sections cannot be cut apart. A roof segment must be entirely on the lot or else the whole section will be deleted. When you see the roofing highlighted in yellow, those parts will disappear once you accept the change. Unless you feel confident with your roofing skills, pay careful attention when you see a roof highlighted in yellow!
 
In addition to being able to reposition your entire lot, the Move Lot function also gives you the freedom to pick a creation from the Gallery that is larger than your lot and trim it to fit. If the item you select from the Gallery is larger than the lot you are attempting to place it on, you will see a warning sign.
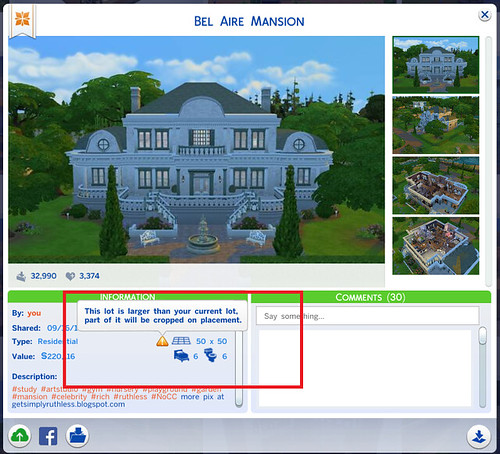

When you see this sign, be aware that there might be large portions of the build that will not fit in the selected location. Use the yellow outlines as a guide to decide which parts you can afford to lose and realize that you might have to do a little "reconstruction" afterwards to clean up missing walls or roofing sections. The Move Lot function gives you the potential to use any creation from the Gallery anywhere in the world!
 
 
• Time of Day: This control changes the time of day so you can see what your lot will look like in different lighting conditions. If you entered build mode while it was evening for your sim, you can change it to morning so you can see what you are doing. You can also change it to evening or night to see where you might need outdoor lighting.
TIP: Whatever the time of day is set to when you Save to Library is what will be shown in your Gallery picture. Sometimes a night shot can look very dramatic and cool, but other times it might keep great details from showing. Check out how your lot looks with all of the different lighting schemes and pick the one that shows your work to advantage.
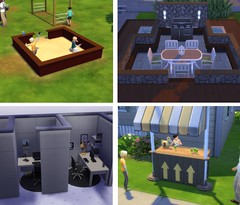
Lot Information
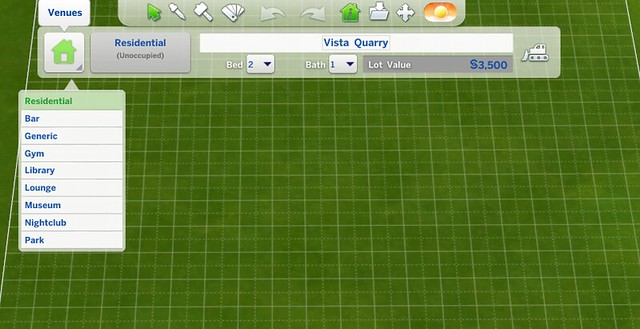
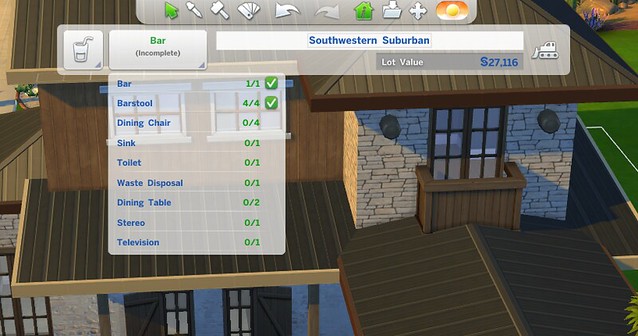
• Lot Type: Here you can decide whether or not your lot is a residential lot (a place for Sims to live) or a venue (a place for Sims to visit). When you change the lot type to a venue, a progress bar appears. This is basically your "shopping list" as it contains everything the lot will need to function as they type of venue you have chosen. You can add more, but you must have these items.
As you add the required elements, they will be checked off the list, which makes it very easy to keep track of your progress. Venues do not have a budget of any kind so you can go as elaborate as you like without worrying about the cost.
TIP: Sims on a budget might not have the funds to afford some of the pricier skill building objects, so consider including a few of them in any venue you build or remodel.
TIP:Have an idea for a venue not on the list? Use the Generic lot type. There are no specific requirements for this kind of lot and no shopping list to follow but Sims will visit the lot. Currently there are known issues with using the generic lot type. For now, you might want to avoid using this category
Sims enjoy visiting venues, so make sure there is plenty of room for a crowd. Leave empty spaces for Sims to gather and move around easily. Before sharing your creation, playtest it and send a group of Sims there to visit so you can see any potential issues.
• Lot Name: Here you can decide on the name of the lot.
• Number of Bedrooms and Bathrooms: if you plan on sharing your lot, it is important that you indicate the number of bedrooms and bathrooms before you Save to Your Library. When you load a lot from your Library, you no longer have the ability to change these numbers.
• Lot Value: Indicates the value of the lot.
• Bulldozer Tool: If you want to completely clear the lot you are working on, click the bulldozer tool. Make sure this is what you want. Unlike the other tools, once you use the bulldozer tool you cannot undo the change.
Navigation Controls
• Build Mode/Live Mods: If you want to make changes to your active lot without leaving it, toggle into build mode here.
• Gallery: Click here to enter the Gallery. Remember that you can swap out your active lot for something new at any time…no evicting sims.
• Move Up/Down a Floor: Change your view to a different level.
• Walls Up: Toggles between a view with no walls, cut-away walls, and all walls up.
TIP: If you plan on sharing your creation, make sure you switch to walls up view and take a look around to see if there are any walls you may have forgotten to paint or if there are any misplaced objects.
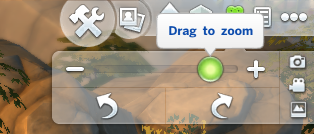
• Camera Controls: Everything you need to adjust your camera angle, take pictures, and record videos.
• Notification Wall: Any notices regarding your sims' activities will appear here.
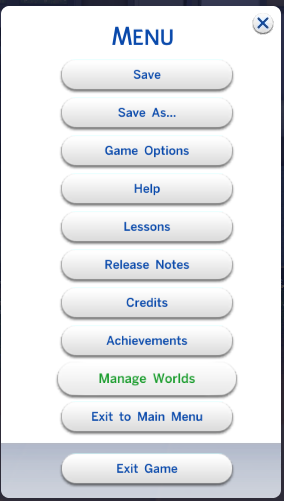
• Options Menu: Clicking here will enable you to save your game, exit the game, open up game options, enter map view ( Manage worlds) and check achievements.
TIP: Save your game frequently! Whether you are building or playing, things can happen. It's easy to get caught up in what you are doing, but you will save yourself a big headache if you remember to save your work.
Build Mode Hot Keys
- Object Control
- Rotate held/selected object, block, roof, anything rotatable: < / >
- Move object to next slot in surface with a slotted object selected and on a slot surface: M
- Copy held/selected object on placement: Shift
- Inventory held/selected object: Backspace
- Delete held/selected object: Delete
- Undo: Ctrl + Z
- Redo: Ctrl + Y
- Tools
- Eyedropper Tool (toggle): E
- Hand Tool: H
- Sledgehammer Tool (toggle): K
- Design Tool (toggle): R
- Wall Tool: B
- Toggles Day/Night in B/B: L
- Allow off-grid placement while dragging around an object: Alt
- Toggle Grid: G
- Cycle Between 1/2 tile and 1/4 tile grid snapping for object placement: F5
- Flood Fill a single wall while placing wall patterns: Alt
- Flood Fill floor & wall paint while placing floor or wall patterns: Shift
- Toggle to 1/4 tile floor paint while placing floor tile patterns: Ctrl + F
- Reduce Terrain Brush Size while Terrain Paint catalog is open: [
- Increase Terrain Brush Size while Terrain Paint catalog is open: ]
- Move Terrain Brush Softness Slider to the Left while Terrain Paint catalog is open: ;
- Move Terrain Brush Softness Slider to the Right while Terrain Paint catalog is open: '
- Toggle Terrain Paint/Eraser while Terrain Paint catalog is open: Ctrl
- Move Whole House tool: U
- Toggle Video Recording: V
- Capture Screenshot: C
- Camera
- Toggle Top Down View: T
- Go to Next Floor Up: Page Up
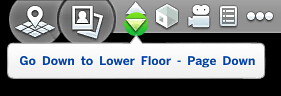
- Go to Next Floor Down: Page Down
- Walls Up: Home
- Walls Down: End
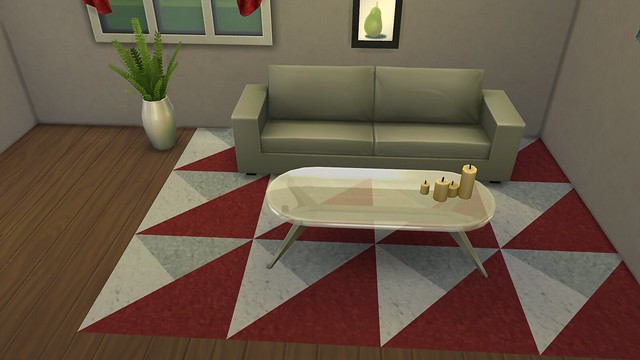
TIP: Can't find a floor rug you like in the catalog? By mixing different carpet colors and the ¼ tile placement, you can create your own custom carpet pattern! Try experimenting with other types of floor tiles to add areas of interest to your floors.
Start Building
Now that you know how to get around Build Mode, it is time to start building! At the bottom of your screen, you will see everything you need. Click on the house symbol to access the Build tools.

When an active element is selected, you will see it highlighted on the house icon, and the catalog of choices for that element will open across the bottom of the screen. Need a Wall? Click the wall.
Foundations
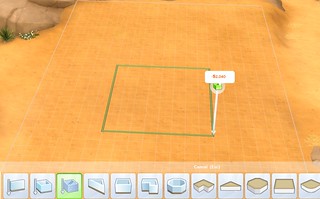
One of the best new features to build mode is the foundation system. You don't have to decide if you want your lot to have a foundation up front. At any time in the build process, you can add them.
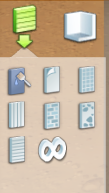
When you open the foundation menu by clicking on the picture of the foundation, you will see a slider that allows you to choose from multiple foundation heights. You can use this slider at any time to raise or lower the foundation. You will also see a variety of foundation textures. Clicking on a particular style will reveal the different color swatches available for that look.

Foundation Facts:
• The lowest setting is completely flat/no foundation.
• The first setting is a very low foundation that does not require stairs. Sims will simply step up or down.
• The foundation slider applies to everything on the lot. This means if you use a foundation, everything on the lot will have foundations. At this time, there is no way to have a structure with a foundation and a structure without a foundation on the same lot. There IS a way to do a split level, however. (see below!)
• Foundations do not add to the cost of your structure, but the stairs they require do. The higher the stair, the bigger the price you will pay. Something to consider if budget is an issue.
• If you have already added stairs to your structure, you don't have to get rid of them before changing the foundation height. The stairs will automatically adjust up or down along with the foundation!
• Foundation textures are applied by the room unit. (more on room units in a bit!) This means you can have multiple foundation textures/colors on the same structure.
TIP: When changing foundation textures, take a spin around the entire structure to make sure there are not any sections you missed.
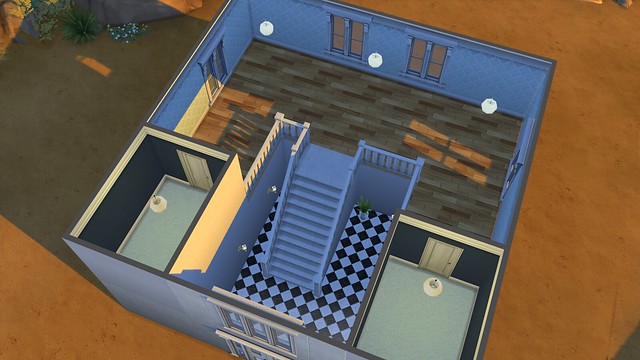
How To: Split Levels
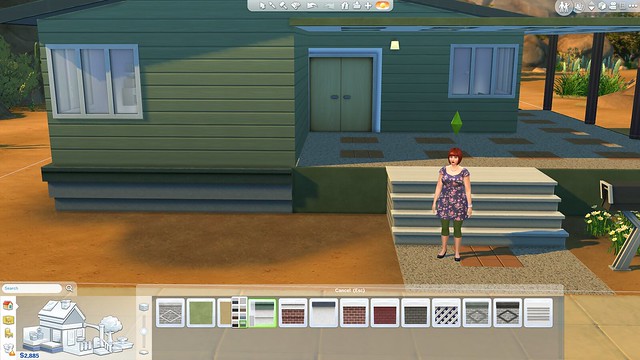
Step 1: Make a structure with a high foundation.
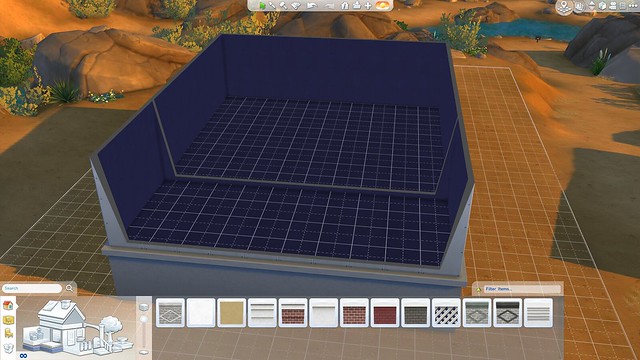
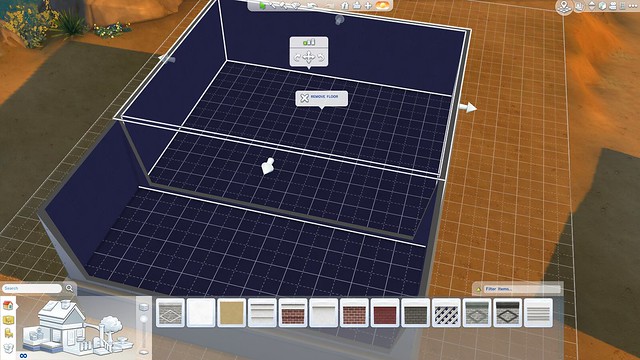
Step 2: Click on the floor of the section you would like to be "sunken" and delete the floor.
Step 3: Add stairs down to the lower level.
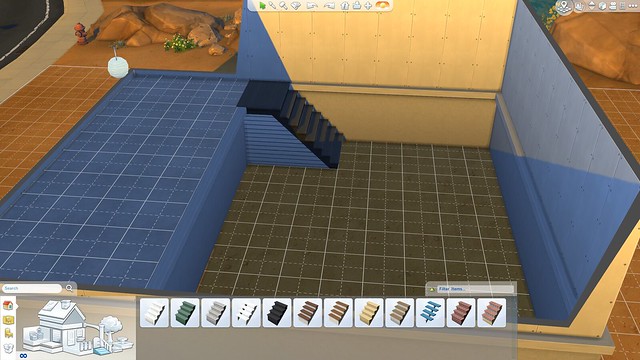
Step 4: Add flooring and decorate your space. Remember that in the lower level the "walls" are actually the foundation. This means that whatever texture you have on the exterior foundation will be the lower part of your "walls" inside. It also means that you cannot place windows or doors in the foundation part of the "walls".
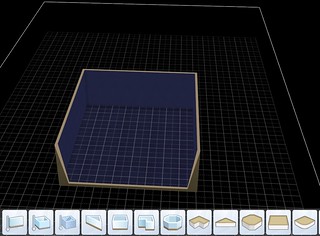
Rooms
Room units are another feature new to The Sims. Rooms are now moldable units that can be pushed and pulled into the desired shape. A room unit (or building block) can have walls, not have walls (a deck) or have fencing. For many features, the game thinks in terms of room units, so you might want to think that way too.
Rooms with Walls

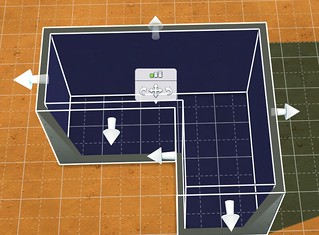
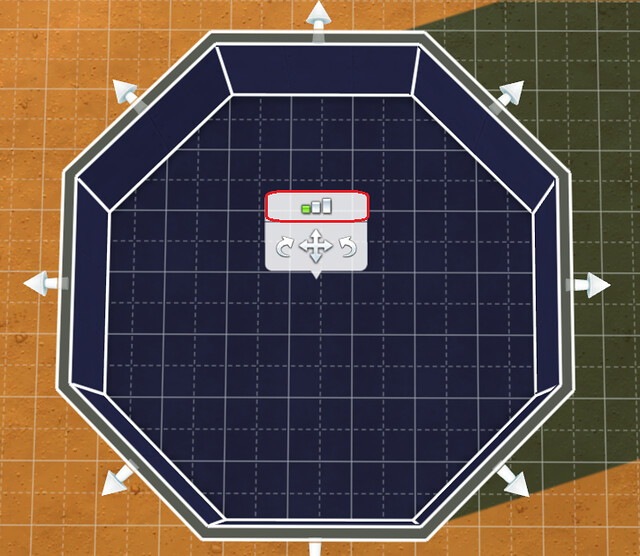
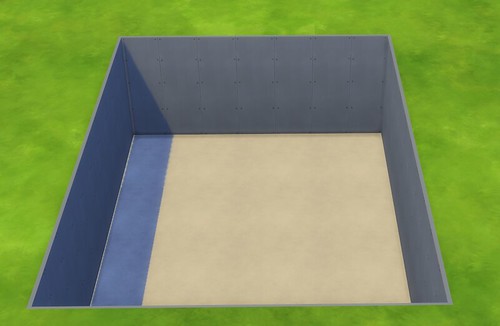
The first several options in the room catalog are rooms with walls. Each shape is just a starting point, as you are free to push and pull the walls in any direction. Grab the arrows to adjust the room.
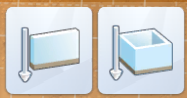
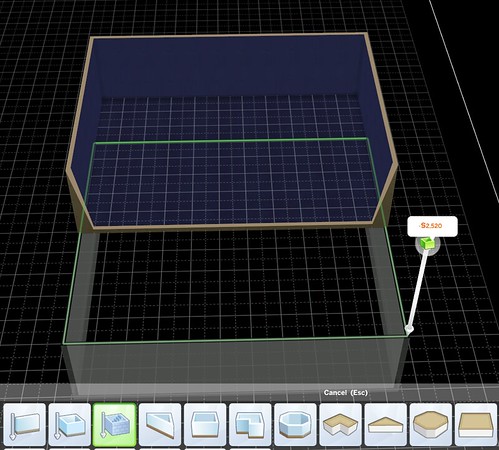
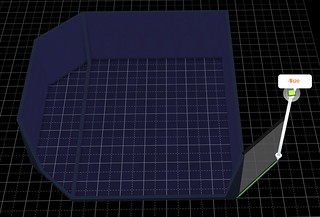
If you don't see a shape you like, there are two options are for drawing shapes free hand. The first is a straight wall tool. Once you connect 3 or more walls together in a closed circuit, the shape becomes a room unit. You may then use arrows to further adjust the shape you have drawn.
The second will automatically draw a four sided box when you drag the cursor in any direction. You can then adjust it by pushing and pulling on the arrows.
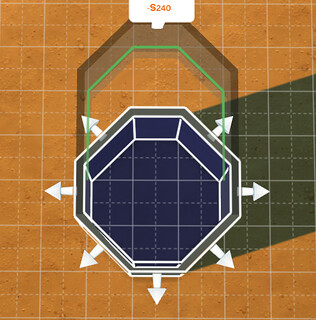
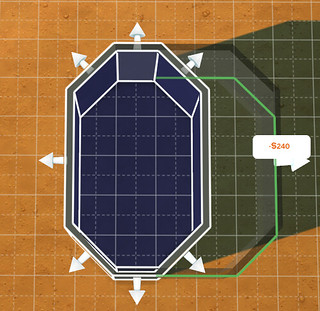
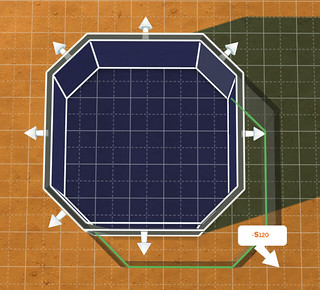
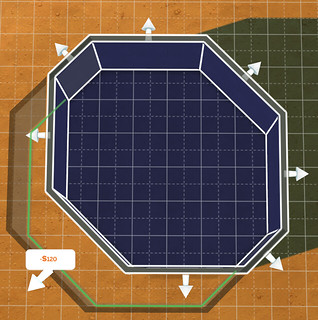
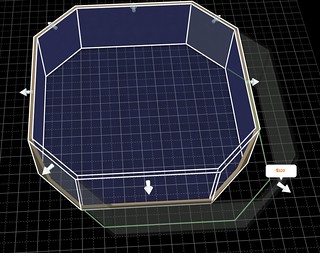
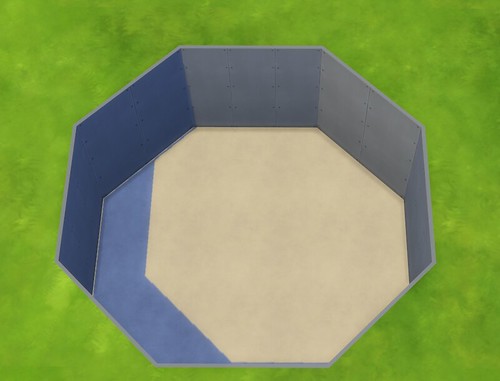
TIP: to expand an octagon and keep the shape from distorting, you must pull the walls at 12 o'clock, 3 o'clock, 5 o'clock, and 7 o'clock. Although it might sound complicated, it is actually much faster than drawing an octagon free handed.
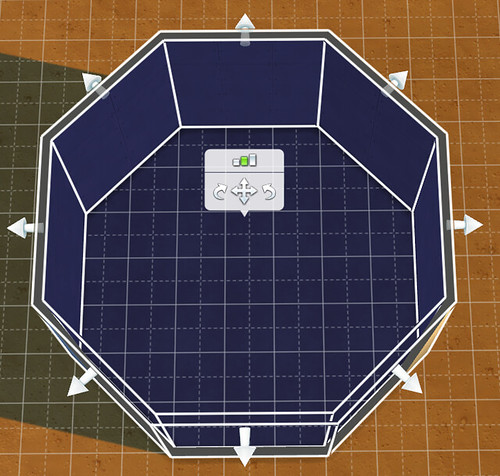
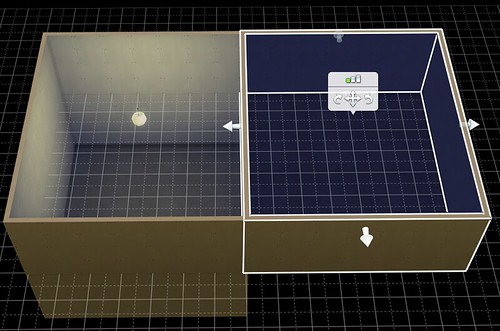
Once you have a room selected, you will see a small menu of additional actions you can take. The curved arrows allow you to rotate the entire room 90 degrees in either direction. The center symbol allows you to pick up and move the room as an object. No more demolishing walls and redrawing in a different location. Just pick it up and move it anywhere on the lot as long as the footprint stays green. And anywhere also means at any level.
Floating Walls
Room units do not require any support for placement. You have total freedom to place them where ever you like regardless of what is underneath. The only requirement is that you have a way for your Sims to get there.
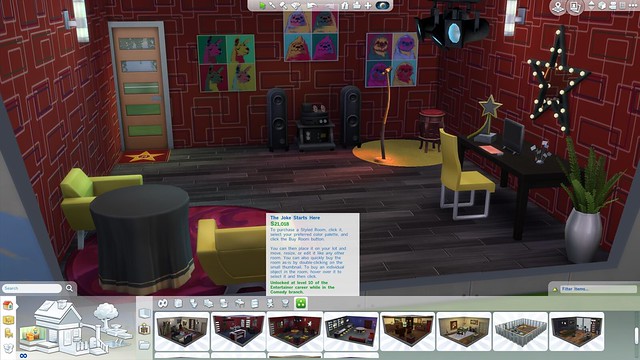
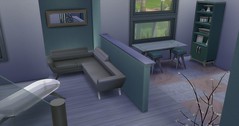
Styled Rooms
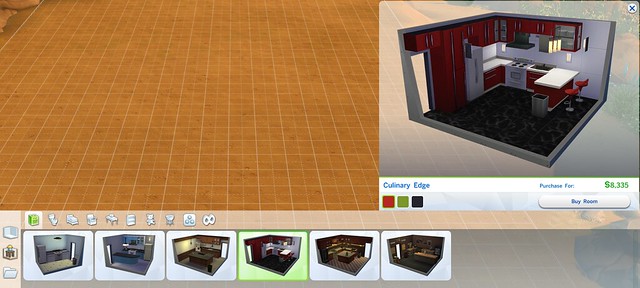
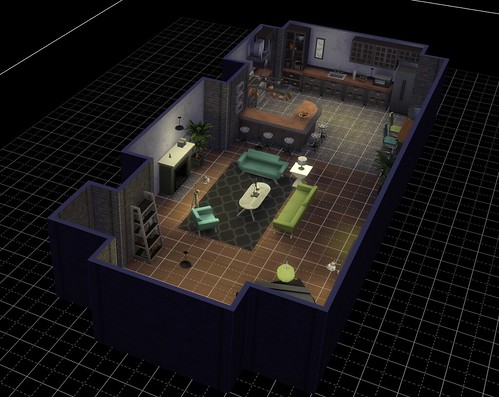
The room units you place do not have to be empty. If you are in a hurry, or don't like decorating, you can place rooms that already come fully furnished. To do this, click on the image of the room with furniture in it to open up the Styled Rooms catalog.

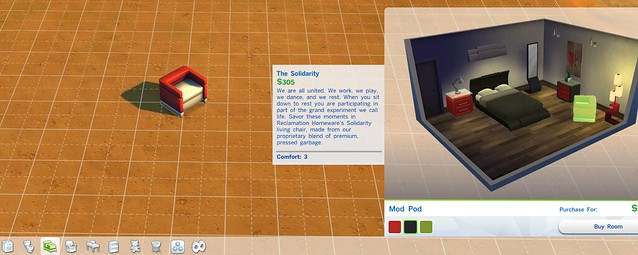
Here you will find rooms sorted by function. Within each category, the rooms are arranged by price with the cheapest ones to the left and the more expensive ones to the right. Click on a room for a closer look at the objects included and to see the price and alternate color options available.
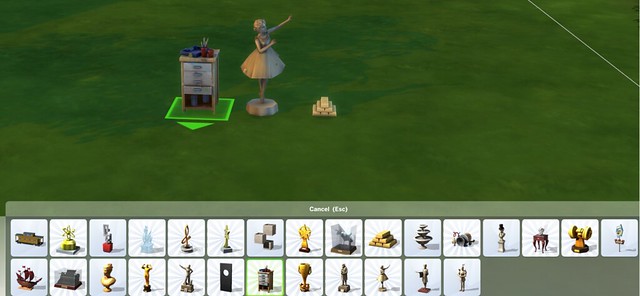
TIP: You don't have to buy the whole room. If you see an interesting object you think you might want, just click on it to highlight the item and place it anywhere on your lot.
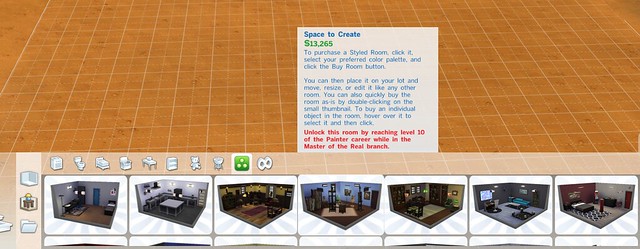
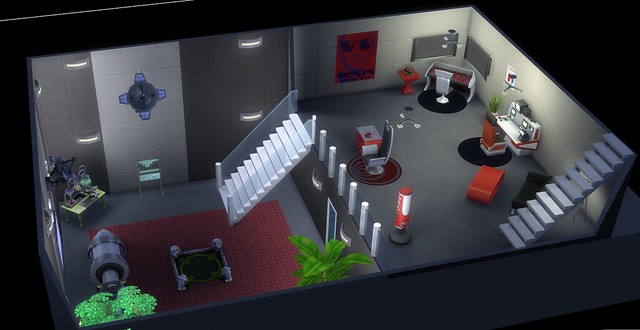
In the Career and Miscellaneous category, you will find a selection of unique rooms that must be unlocked through career achievements before they can be purchased. Click on a specific room to learn what your Sim must do to unlock the room. (note: there appears to be a bug in which some career rooms are not unlocking after the requirement is met. This has been reported to EA.)
If you don't have the time or patience to have your sim earn these rewards, you can always unlock the items with a new cheat! Open the cheat panel by pressing CTRL+Shift+C. In the box enter the following code: bb.ignoregameplayunlocksentitlement and hit enter. Then hit CTRL+Shift+C again to close the cheat box.
You will see that all of the previously "locked" career reward rooms are now unlocked and ready to be placed in your game. They aren't free…and some of the rooms are quite pricey…but since you have already demonstrated that cheating is not an issue, you can always use the "motherlode" cheat a few times just to be sure.
In addition to unlocking the styled career reward rooms, this cheat also unlocks individual career reward items as well, which opens up a whole slew of new objects to use in your décor.
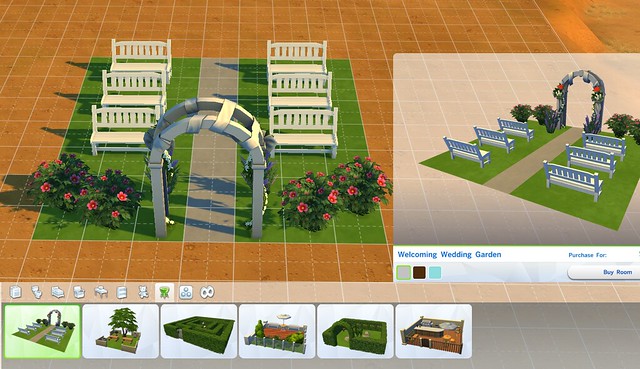
TIP: planning a wedding? The outdoor section of styled rooms includes a ceremony location all set up and ready to go!
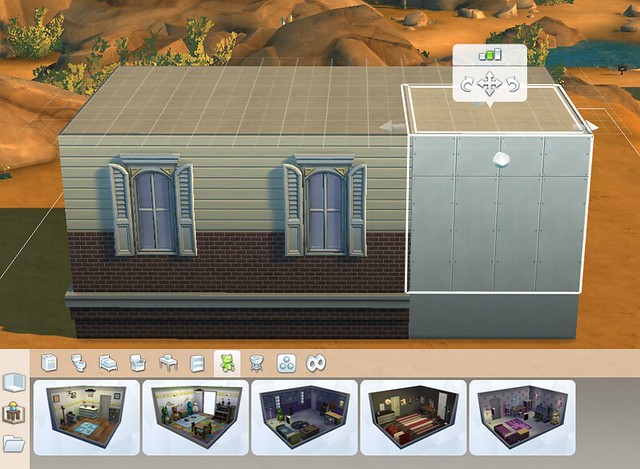
To avoid frustration it is best to place styled rooms at the beginning of the construction process. If you apply a styled room in a house with a completed exterior, the room will remove all of the features (wall coverings, window, foundation texture and so on) of your structure in the area you have applied it. When you apply a styled room to an already completed building, you will need to go back and redo all of the interior and exterior walls, windows, and doors around the added room.
Once you place a styled room, it behaves just like any other room unit. You can pick it up, move it, and rotate it as you please. You may also push and pull the walls to resize the room. Don't worry about the furnishings. When expanding a room, they will come along for the ride. If you make the room too small to accommodate all of the furnishings, the items that no longer fit will be placed in your family inventory (if you have Sims on the lot) or they will be sold back (if there is no household present).
Using Player Made Styled Rooms You are not limited to the styled room catalog. The Sims 4 Gallery is full of player-made styled rooms that you can import into your lot. There are filters to help you search by room type, size and price. When you find something you like you can click "place room" to bring it directly into the lot you are working on or you can click "save room to my library" to place it in your library for later use.
Wall Heights
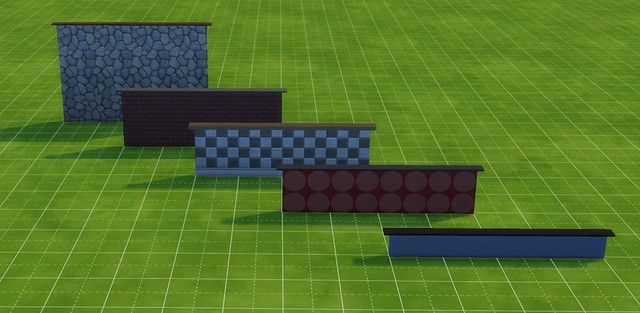
You are no longer limited to one uniform wall size. Walls can now be adjusted to 3 different heights. Just as with the foundation, this can be adjusted up or down at any time so you are not locked in once you make a choice.
Things to remember about wall heights:
• Wall heights will be the same across the same level. Everything on the first floor will be the same height.
• Wall heights can be different between levels. This means you can have tall walls on the first floor, but short walls on the second floor.
• You currently can't make a structure higher than four stories total. If you want to make your structure as tall as possible, use the tallest wall height for each floor.
Half Walls

The half wall tool allows you to place walls of varying heights that are not attached to the ceiling of a room. The heights which are currently available are one short height, three medium height, and one tall height. The varying heights allow you to pick and choose where to use the half walls.

Half walls act as fences in that sims can view and converse with each other over the wall, but cannot interact walk over or through the walls. Small objects can be placed on walls due to the slots available on the half wall trims. Half walls act as walls in that they cannot be placed on a curved surfaces like fences. They can be painted in any wall pattern.
To place half walls, you can either draw, enclose, or replace current walls. Making a room with half walls creates a floor, but does not create a ceiling. Half walls can be joined with other walls or fences.
Helpful Hints for Using Half-Walls
• Use the half walls to extend your trim for a polished roof or continuous fencing.
• Divide two rooms with half walls to create a communal space.
• Use windows to make cool glass fence designs.
• There are many creative ways to utilize the half walls to their full potential. Try using the varying heights to create easily recognizable boundaries, such as cubicles, or use different heights together as a funky back splash.
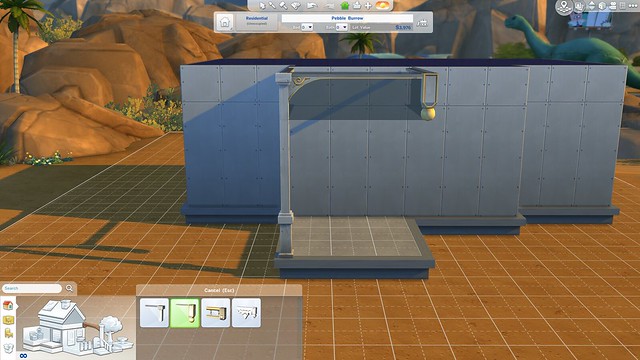
Basements
The basement tool allows you to add 2 additional floors to your structure underground, for a total of 6 floors. To add a basement, click on the basement tool located in the wall section of the catalog.


As you draw out the basement, you will see a green outline guide on the ground. Please note that once a basement is drawn, there is nothing above ground to indicate its location: you will have to go down a level by hitting Page Down to see it.
 
Things to know about basements:
• There are 2 levels available for building. To build a second basement beneath the first, make sure you are on the first basement level. Using the basement tool, draw out the sub-basement. You will have to hit Page Down again to see the new level.

• Sims will not be able to access a basement unless you add stairs.

• Once in place, basements behave similar to other room units. They can be picked up and repositioned, and walls can be pushed or pulled into place.

• You can select wall height for a basement just as with any other room. Want to burrow deep underground? Select the tallest wall height.

• Although the basement tool only allows you to draw a square room, you are not limited to this shape. To make irregular shaped basements, first place a basement square. Then go down to the basement level and, using the individual wall drawing tool, add walls to get the desired shape. Delete any interior walls as needed. Once in place, irregular basement shapes can be manipulated and moved just like any other room.

• The exterior walls of a basement room unit cannot be deleted. If you want to change the shape of your basement, you will have to push/pull or add to the existing shape.

• Windows and doors cannot be placed on exterior basement walls. You can create the look of exterior windows by placing an additional wall one square in from the perimeter and placing your windows there. Paint the wall behind the space and add lighting to further the illusion.


• Pools can be placed directly next to or even in a basement unit. Just be aware that a pool cannot be placed directly under another pool.

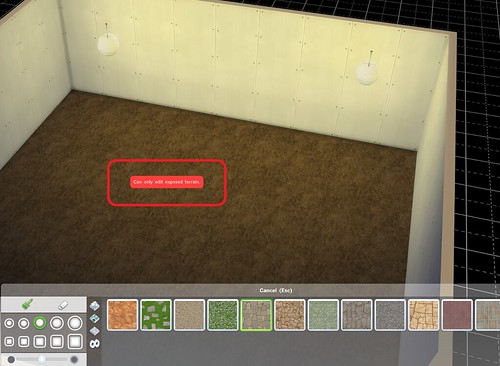
• Terrain paints cannot be used underground. Deleting the floor of a basement will reveal the dirt underneath, but it cannot be painted.
How To: Making Split Level Basements

Basement rooms have a few quirks that can make creating split levels frustrating. Follow these easy steps in order to get the look of an open, 2 story loft space in your basement:
1) Decide the area you would like to be open and draw a basement of that size. Then add the matching sub-basement underneath it.

2) Delete the floor of the first basement.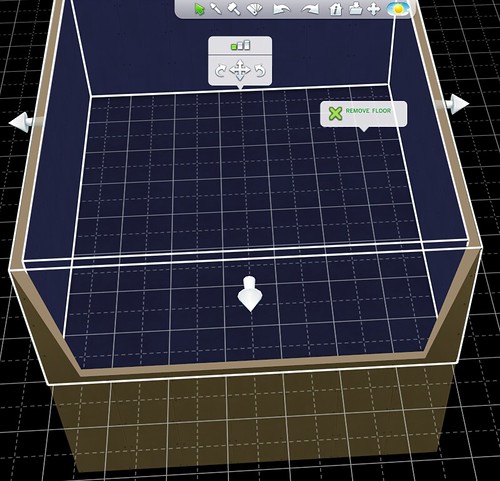
3) While on the first basement level, use the wall tool to draw in the "loft" area for that level.
4) Do NOT delete the wall separating the two spaces. This will make the floor reappear.
5) Replace the wall separating the spaces with fencing.
6) Add stairs and your split level basement is complete!
Open Basements
If you would like have an open pit on your lot (and, let's face it, who wouldn't?) you can do this by removing the ceiling of your basement. To remove the basement ceiling follow these steps:
1) Draw a basement
2) Make sure the basement is selected/highlighted as shown
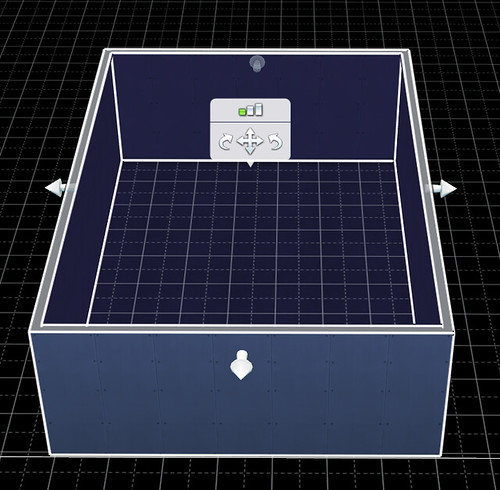

3) Hit Page Up or use the in game control to go up a level
4) You will see the outline of the basement. Click on the thick yellow line and remove the ceiling.

5) You now have an open basement. Add stairs and you are good to go.
6) Remember the pit/open basement does not have to be a square. Just adjust the shape of the basement underground before removing the ceiling.
Adding Decorated Rooms To Basements
Styled rooms from the build catalog and the Gallery can be added directly to a basement level. There is no need to draw a room in first. To place a decorated room as a basement follow these steps:
1) Make sure the camera is at the basement level. Use the Page Down control to go underground. It will be pretty obvious when you are there.


2) Select the room you would like to place from your library, the Gallery or the Styled Room section of the build catalog and click on the basement. There might be a slight delay and then the room will appear.
If a room has doors, archways, or a gate along the exterior wall, you will get an error message and will not be able to place the room. If you get this message, place the room above ground first, delete any doorways, and then place it below ground. Any windows located on exterior walls of a room installed below ground will automatically be deleted upon placement.

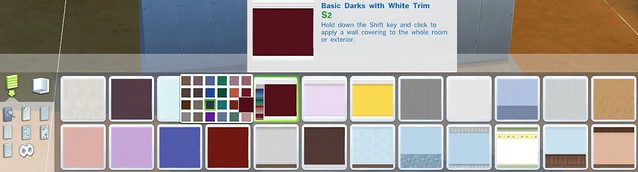
Wall Coverings
You can cover your newly made walls with a variety of textures and colors. The Wall Pattern catalog is accessed by clicking the section of wall highlighted in the picture below.

Wall coverings are sorted into the following categories:
• Paint
• Wallpaper
• Tile
• Paneling
• Masonry
• Rock and Stone
• Siding
You can use any wall covering on any wall. Click on the wall symbol and the texture you select will be applied to a single wall unit. Click on the room symbol and the texture you select will be applied to the perimeter of the room you select.
TIP: If you are in single wall mode, you can also cover the entire room quickly by clicking on the wall texture you want to use and hitting Shift as you apply it.
Click on a specific wall texture to see the different color choices that are available for that style.
Helpful hints for using wall patterns
• Some wall coverings come with vertical trim or edging. In the catalog, you will only see the trim on the right side. There will not be a "left side" section in the catalog, as these edges appear automatically and you cannot choose where to place them. There must be a wall at least 2 sections long on each side of the corner to make the trim edge appear.
In the example below, you will notice that the trim section is missing on the bottom left because that corner does not have 2 wall sections on either side of it. The only way to correct this is to adjust the shape of your building.
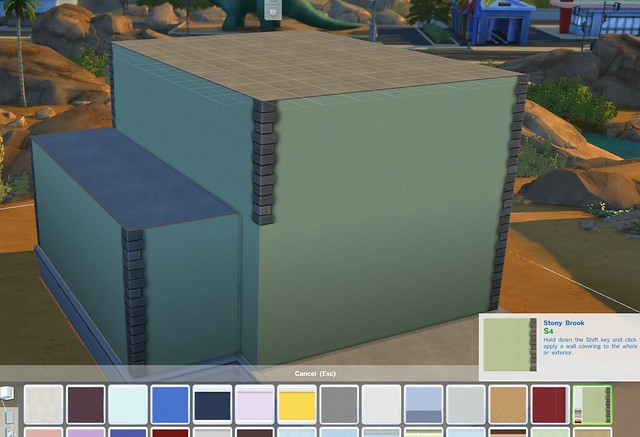
Something to keep in mind: regardless of whether the wall is an interior or exterior wall, the vertical trim sections to not apply to the inside corners of a wall…only the outside corners.

The automatic edging will also not appear on a corner that is adjacent to a stair unit. Once the stair unit is removed, the edging will reappear.
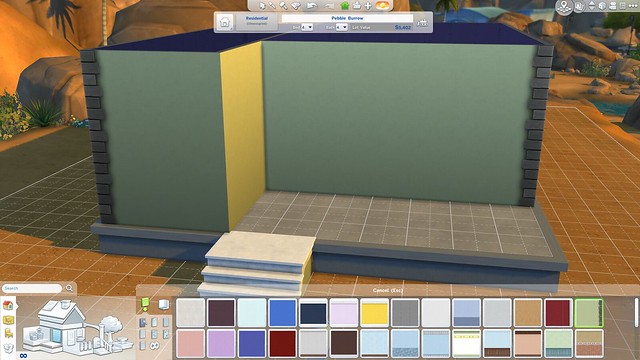
• You do not have to use the same wall covering all over your building, or even in the same room. Using more than one color and texture can add interest to your creation, so mix it up! Be aware that using many different wall textures can result in a chaotic, disjointed look.
TIP: if you are unsure about mixing wall coverings, start by covering everything in a single texture. Use a contrasting color to pick out details or draw attention to a particular feature of your building.
• Multiple wall coverings can also be used inside your building. Consider using a different texture to create an accent wall or alternating paint colors to make a dramatic striped wall effect.
• You do not have to limit yourself to one color per room. As with the exteriors, be aware that using too many colors and patterns in the same room can make it feel busy.
• Check to be sure you have not missed any wall sections by placing your view on "walls up" mode and looking around your building. Do a 360 all the way around the exterior and each interior room.
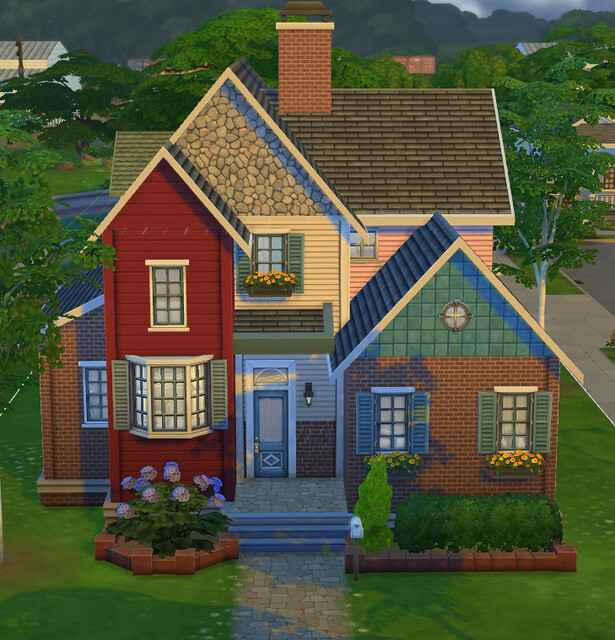
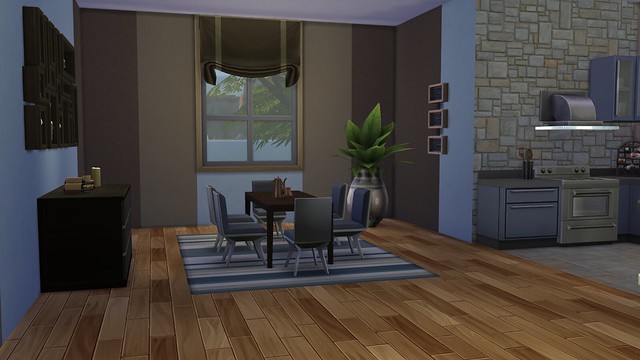
• Don't be afraid to use "exterior" wall textures on the inside of your house and vice versa. An exposed brick wall can enhance the look of an industrial style kitchen, while some of the interior paneling styles can give a faux Victorian look in the gables of your roof.
Floor Coverings
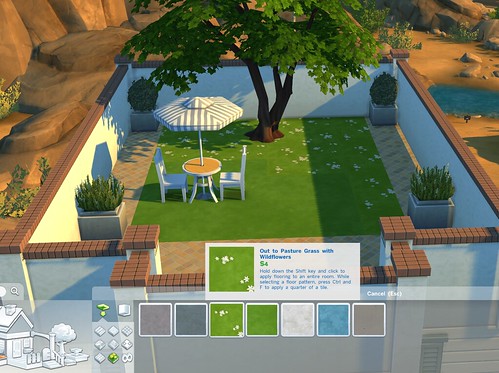
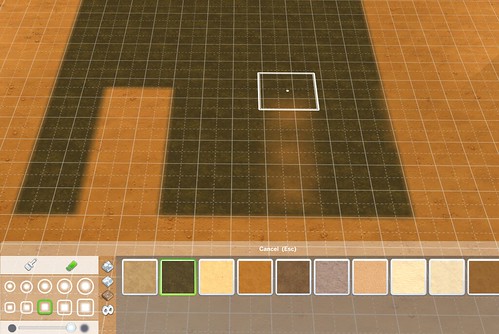
The floors of your decks and rooms can be covered in a wide variety of textures and colors. Click on the floor section in the image to open the catalog.

It functions just like the wall covering menu. You may choose to apply flooring by the individual tile or by the entire room. If you are in "by the tile" mode, you can still choose to fill the room by hitting the Shift key as you apply the flooring. Floor coverings may be applied to any deck, floor, or to the ground directly.
Floor textures are sorted into the following categories:
• Wood
• Carpet
• Tile
• Stone
• Masonry
• Linoleum
• Metal
• Outdoor
Helpful hints for using floor coverings
• Floor coverings are applied in square units; however, you can press Ctrl+F after selecting a floor texture to get a ¼ tile shape. Use the ¼ tile to get a diagonal edge or combine them to make a whole new pattern for your floor.
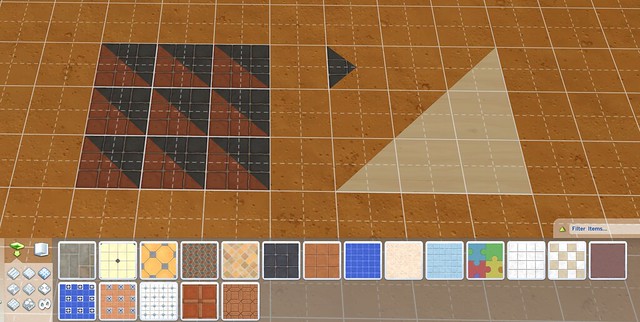
• Rotate floor tiles by pressing the < or > keys while holding the tile.
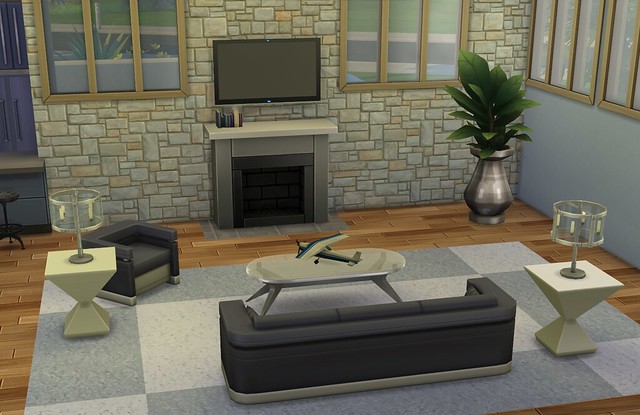
• You can mix different floor textures together to get some interesting effects. A few tile squares at the base of a fireplace mimics the look of a hearth. A section of carpeting placed over hardwood flooring becomes a custom floor rug. Don't be afraid to experiment and get creative!
• Flooring placed directly on the ground that is not part of a room unit can be deleted by the individual floor tile, meaning you can pick and choose which tiles you want to delete.
• Flooring applied to a room unit (walled room, deck, or fenced deck) can only be deleted by the room unit. It is an "all or none" proposition because it will take the entire floor along with it. Literally. If you want to replace a specific tile or the whole floor texture, cover it with a different floor tile. Do not delete it unless you want the actual floor itself to disappear.
TIP: If you accidentally delete a floor, select the room in question. You will see a yellow highlight around the bottom of the wall. Click on this and you will have the option to rebuild the floor. For decks, deleting the floor makes the entire deck disappear. To fix this, you can either use the Undo control at the top of the screen or you can re-draw the deck.
• The "outdoor" flooring section contains two faux grass tiles. Since terrain paint can only be applied to ground tiles, these come in handy for creating grassy areas in other places, such as a terrace, rooftop deck, or even an indoor atrium.
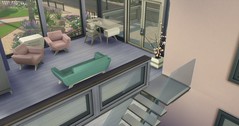
Decks

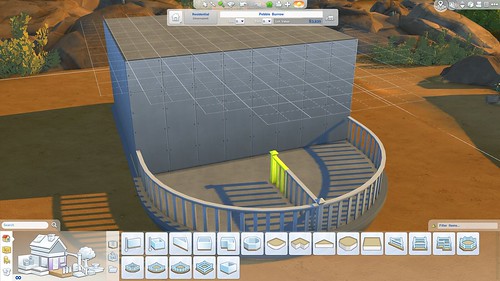
These are also considered "room units" by the game, despite the fact that they don't have walls. Use these for porches, decks and other areas you would like to have a foundation but not walls. A new addition is the curved shape. You can place a couple together to get a semicircle or circular shape.

• Decks can be pushed and pulled just like other rooms.
• If you place a deck and decide you want to add walls or fencing later, you can. Just be aware that you cannot add walls around the curved edge of the deck. There are no curved walls in The Sims 4.
• Stairs cannot be placed on the curved edge of a deck.
Fenced Decks

Fenced decks are exactly what you would expect: decks with fencing already placed around them. They can be pushed and pulled into place and the fencing will automatically adjust. You can also swap out the fencing style at any time.
Some other helpful things to know:
• Deleting the fencing between the two sections will join them into a single moveable unit. For maximum flexibility do not delete this section until you are done adjusting your shapes.
• You may delete any section of the fencing you like. The curved sections, however, are considered as a single section. This means you cannot delete only part of a curve.
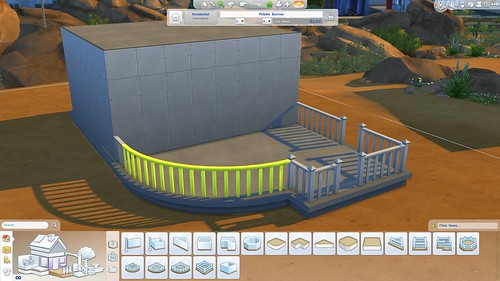
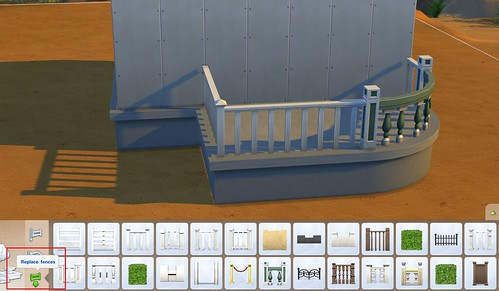
• All fenced decks come with the same default fencing. You can swap this out for any style or color found in the fencing menu. Click on the "replace fences" option and select the sections you wish to replace.
Stairs
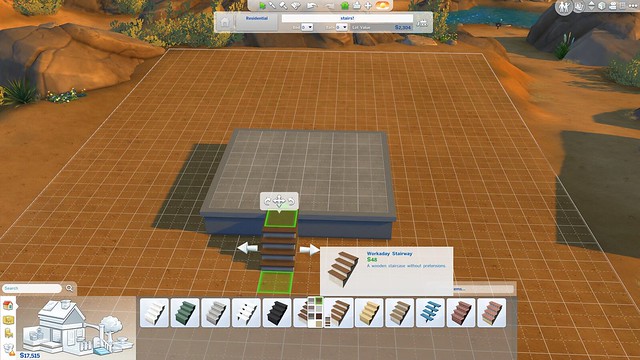
Now that you have a foundation in place, you need to add some stairs so your Sims can come and go. Click on the stair image to open the stair catalog.
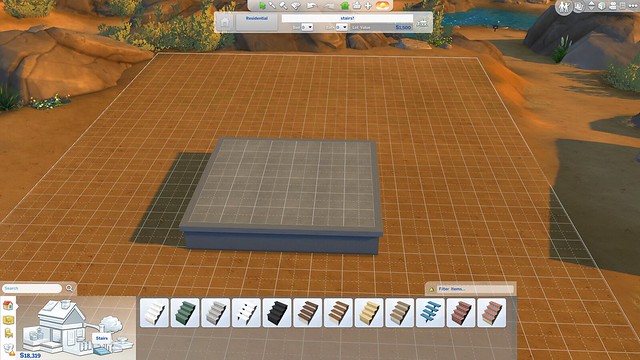
The stairs will automatically adjust to match the height of the foundation when you place them. Select the style you want to see the different color swatches available. Grab the arrows to push or pull them to the desired width.
What you need to know about Stairs:
• The cost of the stairs is based on how wide they are and how high they need to be.
• Stairs that are more than one unit wide can be used by multiple Sims at the same time. This means wider stairs work well in venues and larger households.
• Stairs cannot be placed on curved edges.
• Any wall texture can be placed on the sides of stairs.
• Sometimes the game hesitates for a moment when you are pulling stairs wider. If it seems like pulling is not working, give it a moment and see what happens before trying again.
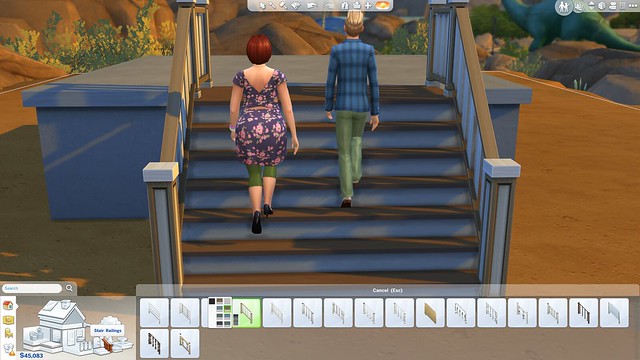
• Railings come in pairs only at this time. They will be applied to both sides of the stairs unless there is a wall next to the stairs.
• Railings for stairs are added by clicking the railing image to open the railing catalog. Just as with the stairs, they come in a variety of colors and styles.
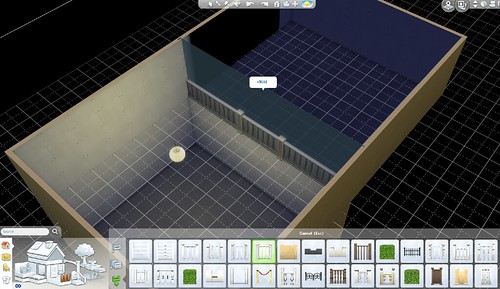
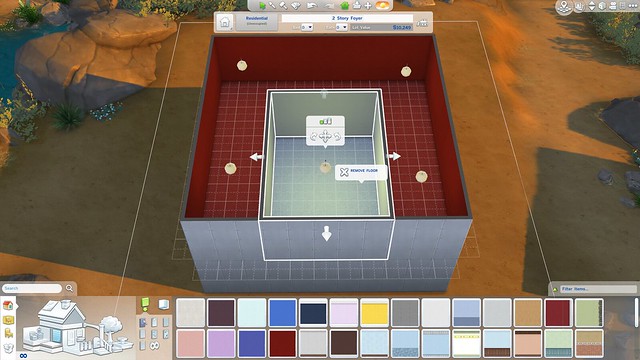
How To: Loft and Two Story Foyer
Step 1: Since the game recognizes room units and deletes floor tiles as a room unit, you need to make sure that the second floor area you want "open" is its own room. The space that you want to use on the second floor should be another room. You can subdivide it later.
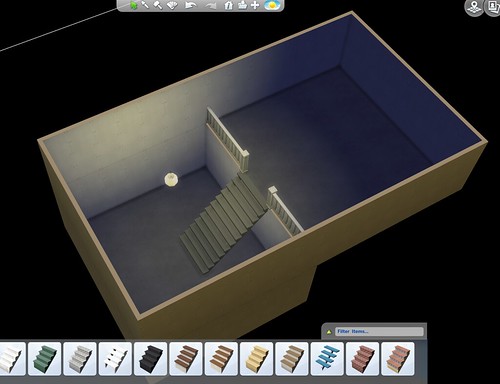
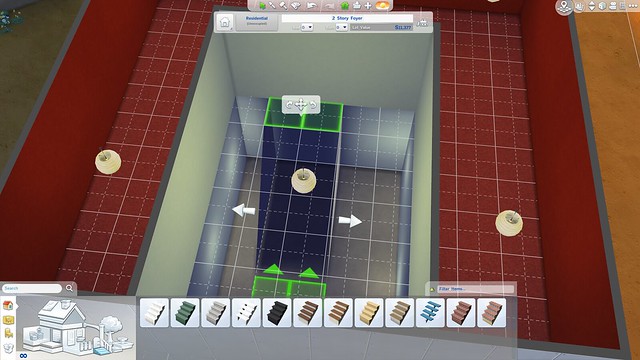
I have placed brightly colored floor tiles and paint so you can see the areas clearly Step 2: Delete the floor tile of the area you want to be open to the first floor. Add your stairs.
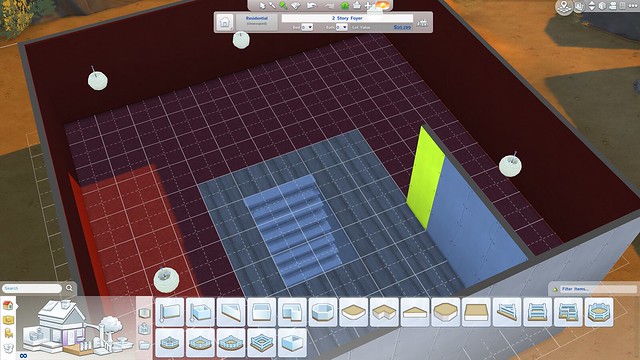
Step 3: Delete the walls around your landing or loft. You will see the floor tiles in the "open area" auto fill. Don't worry about it.
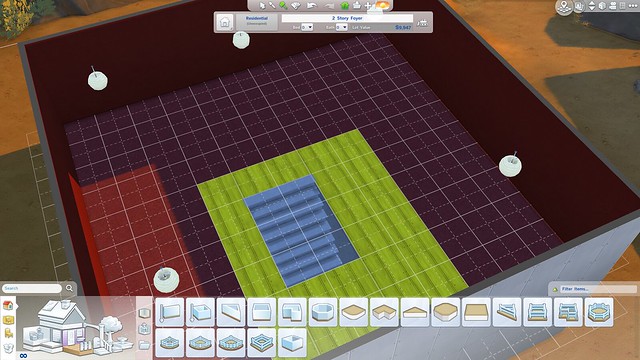
Step 4: Demolish the floor tiles in the area you want to keep open. They won't come back this time.
Step 5: Add railing around your landing and divide up the space as you see fit. Decorate accordingly. You now have a loft or a two story landing!
NOTE: if you have a roofing section cutting through the open space of your loft or landing, it will show. The game uses room units to determine roofing collision. (More on that in the Roofing section) This means this technique works best in areas where roofing does not cut into the space.
Fencing and Gates
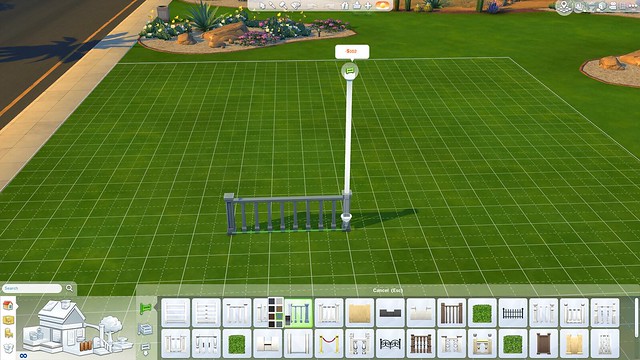
Click on the image of the fence to open the fencing menu. You will see a variety of styles and a couple of different ways to apply them. As with other items, click on a specific style to see the different color swatches that are available.
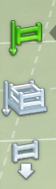
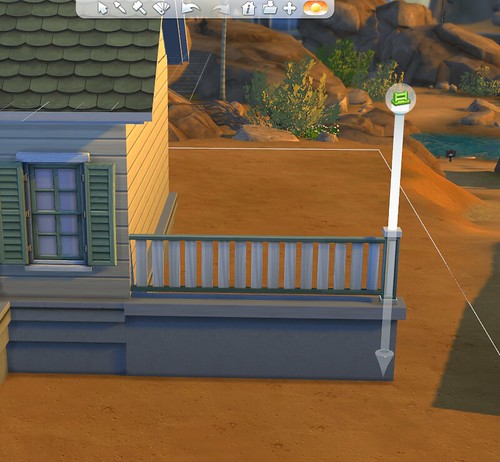
Click on the top image to draw in a fence free hand. Fences can be drawn anywhere on a lot, inside or outside, as long as it is one unit in from the lot edge. Use them for deck railings, landscaping, and as room dividers.
TIP: when you start drawing a fence next to a foundation, the game will continue the foundation along with the fence for that section only. If you don't want this to happen, start drawing from the outside in towards the foundation.
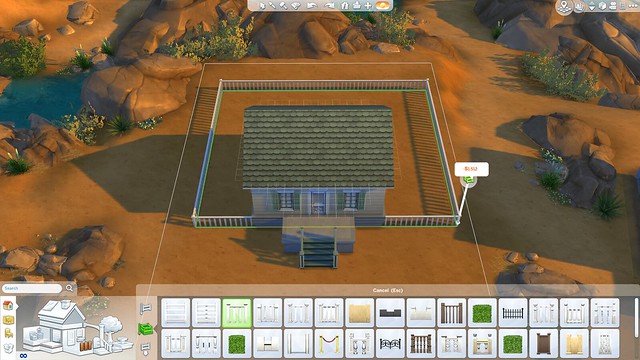
Click the middle image to draw a 4-sided enclosure by dragging the cursor diagonally from one corner to the other. This is a fast, convenient way to fence in a yard. You don't even have to worry about any other structures that might be in the way. The fence will adjust for them automatically!
Once a fence is placed, each section becomes an object that can be picked up, rotated, moved and manipulated. You can delete the entire section or just one unit at a time. Be aware that the game considers the curved part of the fencing to be one "unit" so it's an "all-or-none" when it comes to deleting curves.
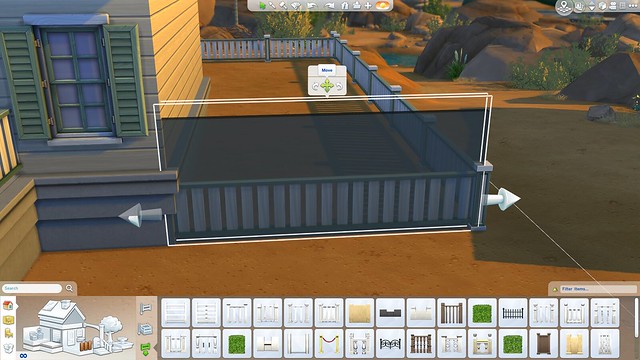
If you decide to go with another color or style, click the handy Replace Fences button and choose a different look. The fence sections will be highlighted in gray and you just click on the ones you want to replace. No more demolishing and redrawing.
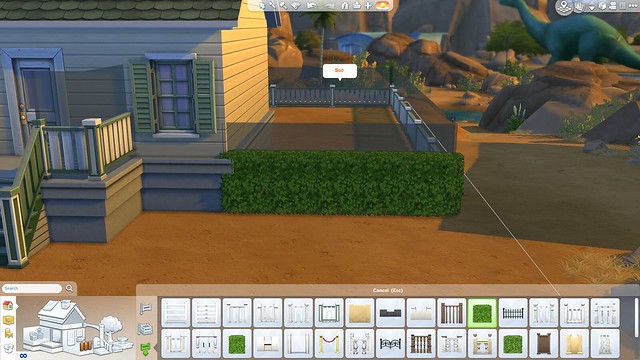
There has to be a way in and out of your enclosure. If you don't plan on just leaving gaps, you may want to use a gate. Click on the gate icon to check out the options available. Gates can be applied along any section of fencing (indoors or outdoors) except those that are directly next to a wall or foundation. When you pick up a section of fencing to move it, the gate will come along for the ride.

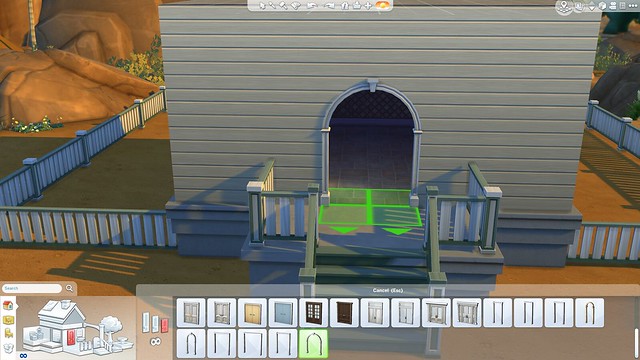
Windows and Doors
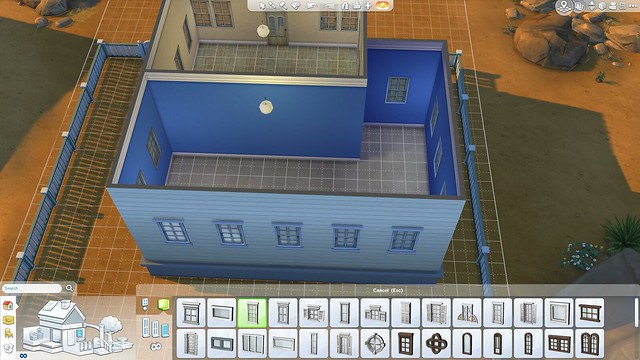
To get started with windows, click on the window image to open the window catalog. As always, clicking on a particular style will reveal if there are alternate color options available. There are two ways to place windows: by the individual window and by the room.

The "by the room" option is a fast and easy way to get windows on your house. Click on "by the room", select the window you would like to use, and click on the room. The game will automatically place windows at regular intervals around the exterior perimeter of the room. It will not place windows on the interior walls.
If you use this option, you are not locked in at all. You can still delete or move any window by grabbing it and repositioning it at any point. In fact, you have so much more freedom when it comes to window placement in The Sims 4. Windows can be placed at any height on a wall. Just pick it up and place it.
What you need to know about placing windows:
• To get more precise control over where you place windows, with the window selected hit and HOLD the ALT key down as you position it.
• Although the "by the room" option won't place windows on interior walls, it doesn't mean you can't. You can individually place windows on any wall on your structure it will fit, including interior walls.
• Single unit windows cannot be centered between two wall panels. A single unit window will only fit on a single wall panel.
• Windows cannot be placed to overlap between levels of a structure. They must be fully on the first floor OR the second floor, and so on.
• You may only place one window per wall panel. There is no stacking.
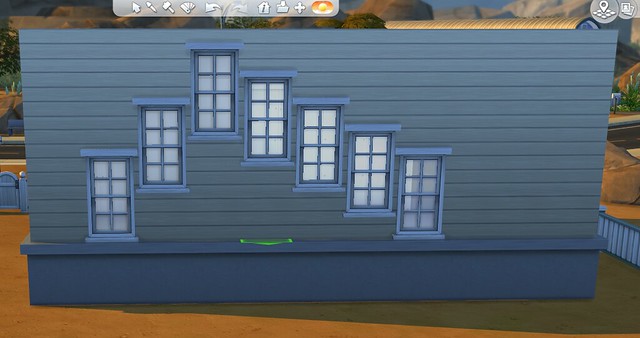
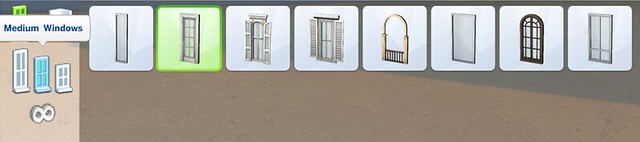
If you have used some of the taller walls for your structure, you might find that some of the windows are too small or not in proportion. Click on the medium or large window indicator in the window menu to reveal styles that are in proportion to larger walls. You can always place a smaller window on a larger wall, but never vice versa. The largest windows must always go on the tallest wall size.
TIP: Windows do not auto-adjust along with the wall height. They stay in the same place regardless of the wall height…so if you change your wall height and you have already placed windows, you might want to go back and see what needs to be moved.
To get started with doors, click on the door image to open the door catalog. You will see the option to choose short, medium, and tall door sizes. Most of the doors tend to fall in the "short" category and you will find that unlike other objects, there are quite a few doors that do not have different color options available.
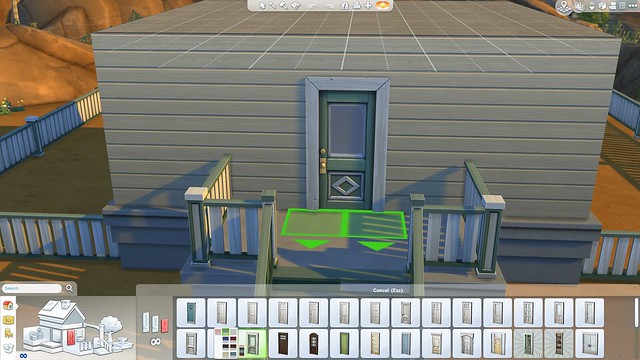
Click on any exterior door, while in live mode with an active Sim, to have the option to "set as front door". This will make that door the main entrance to the structure and the one that visitors will use.
TIP: When placing the front door, it is important to ensure that the green arrows on the bottom face outward. Sims who visit will knock on the side of the door with the green arrows…which means that if you place the door with the arrows placing inward, visitors will actually come into your house, knock on the door, and stand there inside the home waiting for you to "invite" then in.
TIP: There is also the option to lock doors. Locking doors is useful for keeping unwanted sims out of private rooms, such as the bathroom or workplace. Some doors already keep out certain sims, so check the descriptions in the catalog.
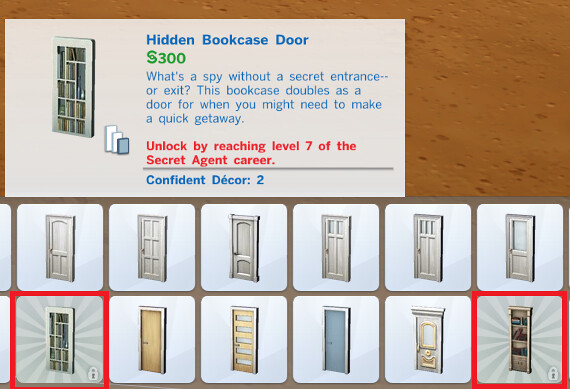
You will notice that in the door catalog…and in other parts of the build/buy catalog…there are some items that are locked. They have a slightly different background. These are reward items that are unlocked by completing certain goals. You can click on them to see what it takes to unlock them.
The door catalog also includes archways. They are located at the end of the catalog, so it is possible to miss them. There is only one archway scaled for medium walls and one for tall walls.
Roofing
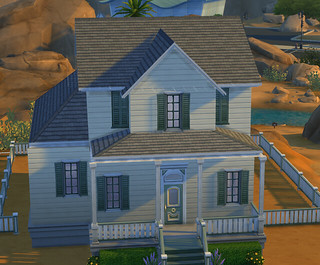
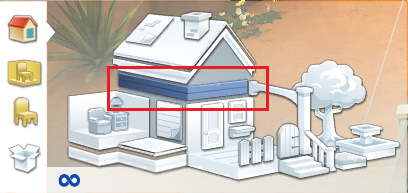
Now that we have a structure and way for Sims to get in and out of it, we need to put a roof over their heads. Roofing is one of the things most builders…both novice and experienced…find a bit frustrating. Luckily, the new roofing system in The Sims 4 is easier than ever and offers some creative solutions to old roofing problems.
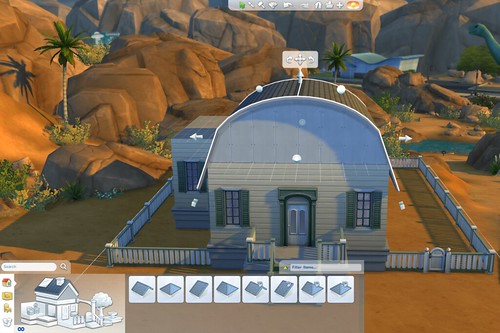
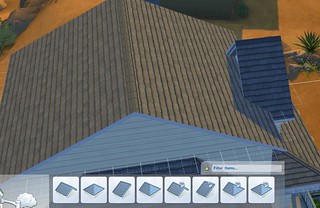
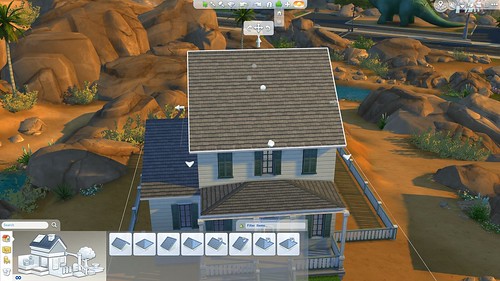
Click on the roof in the image to open the roofing menu.

Here you will find the basic building blocks for roofing. And they really are building blocks. Each roofing section is an object…much like the room units…that can be picked up, moved and manipulated. The first half of the menu is straight roof sections and the second half is for diagonals.
If you are familiar with other games in the Sims franchise, you might notice there is no auto roof control. That is because these roofs are not drawn. They are built.
TIP: don't worry about the lack of an "auto roof" option. This new system is so easy that you absolutely can create something that looks as good as an auto-drawn roof. If you are not sure what to do, browse the Gallery and find a lot that has the kind of roof you want to build. Place it on an empty lot and pick apart the roof to see how it is made. You can literally pick up and move the sections to see how they fit together. Once you have an idea of how that roof is put together, give it a try on your own creation!
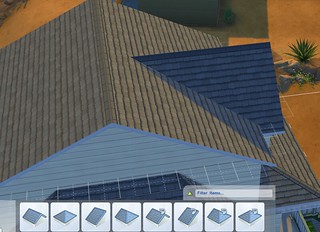
To build your roof, click on a roofing unit and place it on your structure.
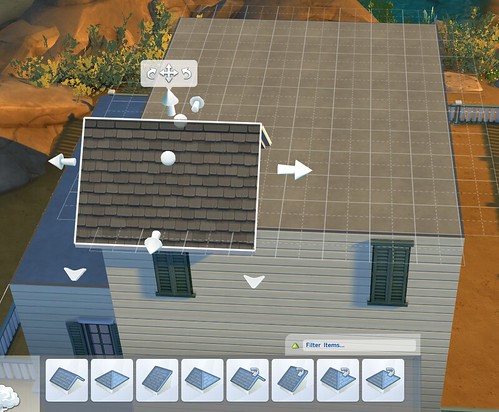
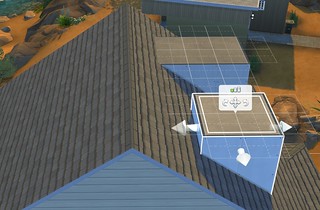
You will see a bunch of controls similar to the ones for manipulating room units.
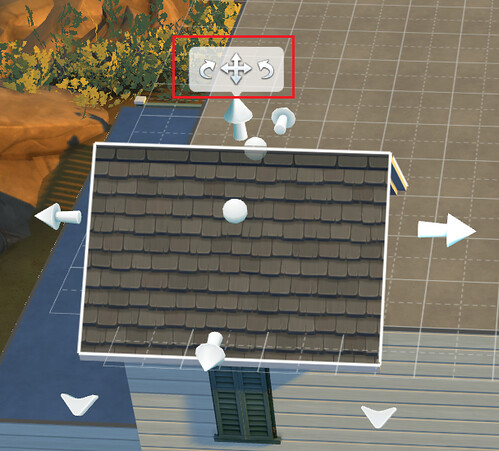
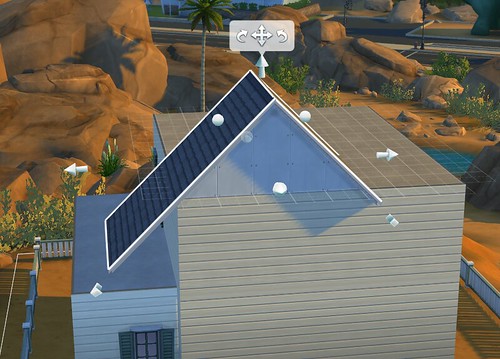
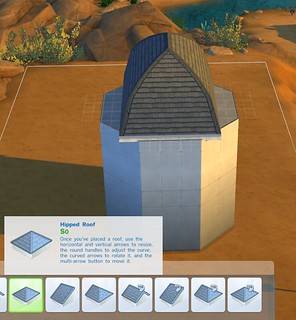
The plus sign graphic allows you to pick up and move the roof section anywhere on the lot. You have the freedom to place a roof section anywhere you like including on the ground and floating in the air. The curved arrows are for rotating the roof section. You can also select it and hit the < or > keys to rotate an object.

The arrows allow you to push and pull the roof into the desired shape. As you do this, you will see a green outline that indicates where the roof will end up. Use this footprint to help you line up edges.
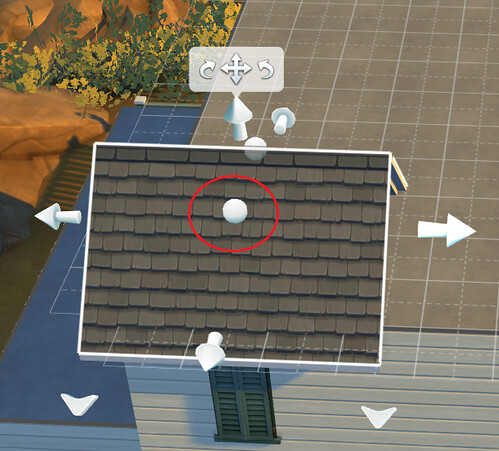
The ball shape controls the concavity and convexity of the roof shape, which is a versatile new feature. Pulling up on the ball makes the roof curve outward, while pressing down on the ball sinks the roof curve inward. You can mold the roof into many unique shapes using these tools.
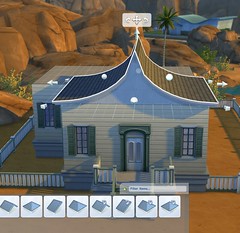
Some shapes are actually a combination of the curve and the height. You can get a more pointed arch, for instance, by making a curved roof and then pulling up on the height. Finally, push down slightly on the ball control to get the shape you desire.
The shorter arrows at the bottom of a roof section are for adjusting the eaves (or overhang) of the roof.

What you need to know about using the eaves adjustment tool:
• Pulling down (to lengthen) or pulling up (to shorten) the eaves will produce a uniform result on both sides of the roof.
• The hipped roof shape does not have eaves. At this time, there is no way to adjust the overhang on the hipped roof shape.
• If you would like to adjust only one side of the roof overhang, press Shift while grabbing the eaves arrows for the side you want to adjust.
• Have roofing cutting into your walls? You might be able to correct this by shortening the eaves.

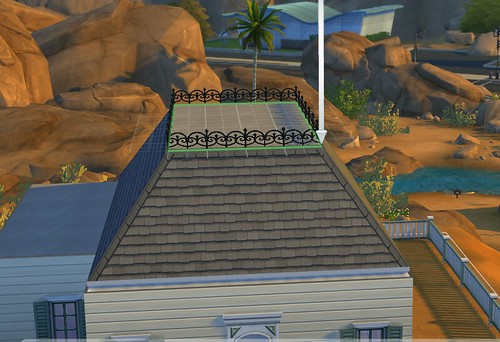
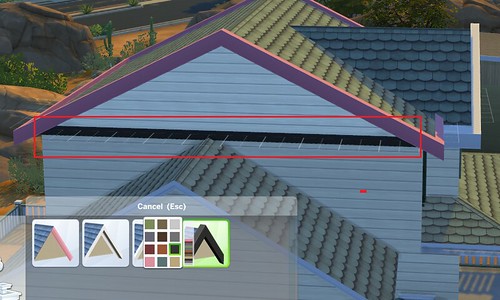
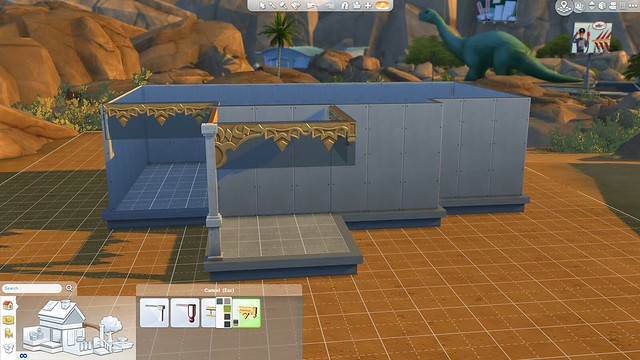
How To: Creating a Mansard Roof
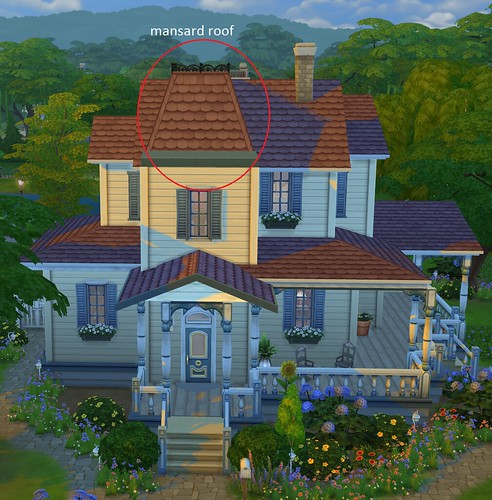
Mansard roofs are angled but have a flat top. They are often used in French style homes and Victorians.
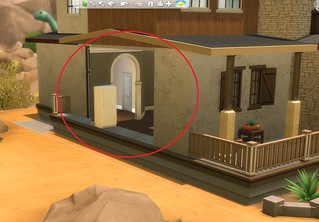
Step 1: On the area you want to apply the roof, draw a room centered on the space leaving 2 spaces all the way around. (I have colored this area red to make it easier to see) If you want a more upright angle on your roof, draw the room only 1 unit in from the edge.
Step 2: Place a hipped roof so that the center seam of the roof aligns with one of the walls of the room
Step 3: Raise the height of the roof until it matches the height of the wall.
Step 4: Repeat this process for each side of the room.

Step 5: Finish off your mansard roof with a small decorative fencing for a polished look.
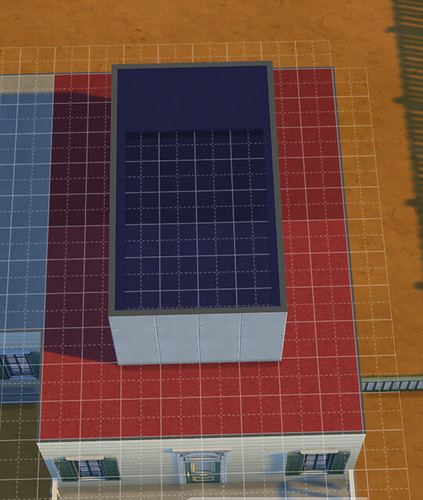
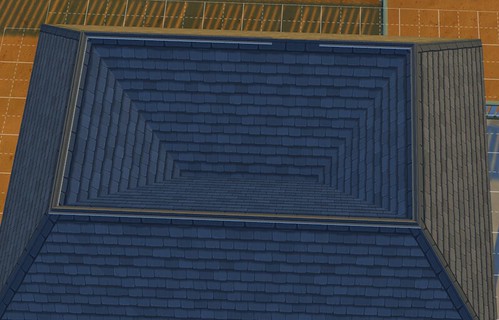
Roofing Collision
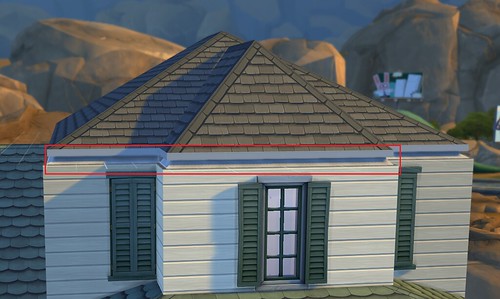
It is very important to know that the game uses walled room units to determine roofing collision. This means that if a roofing section intrudes into a complete walled room unit, the collision is cancelled out and the roof disappears. The space inside the room remains intact and useable. The portion of the roof outside of the walled room unit also remains intact. A great example is the mansard roof we just built. From above it would look like this if there wasn't a room there:
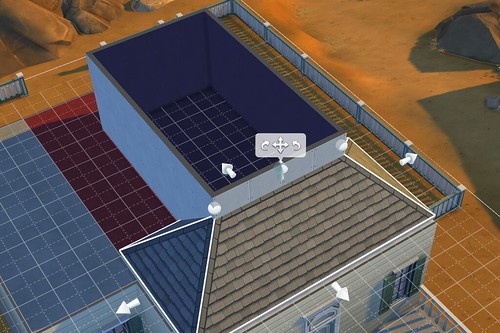
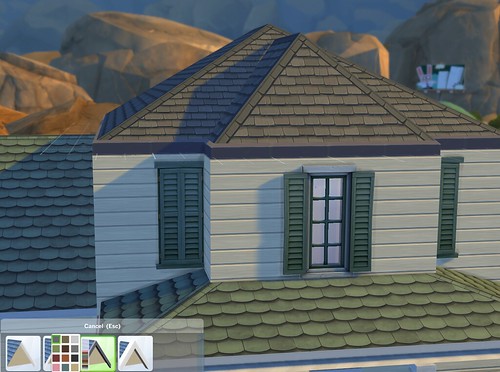
However, since there is a complete walled room unit there, this is what it actually looks like:
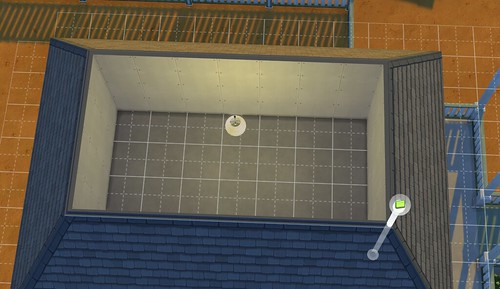
The room we used as the guide for the roofing is an intact, whole space that is completely usable. Because of the way room units work with roofing, you can make an attic, too. Anywhere you can fit a room unit under your roof becomes space your Sim can use.
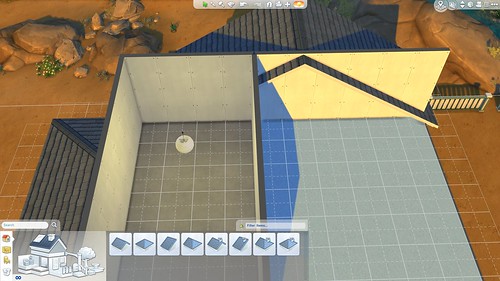
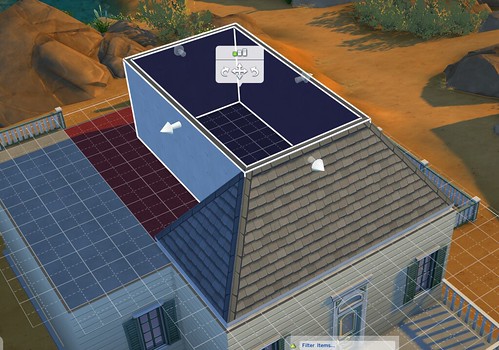
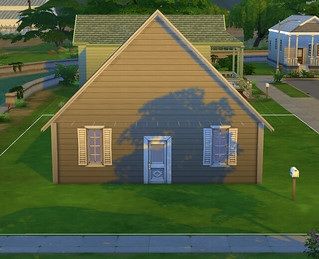
On the right is an incomplete room unit, so the roof shows through the wall. On the left is a complete wall unit and the roofing intrusion is hidden.
TIP: if you find that you can see a roof section on the inside of your structure, the first thing to do is check and see if you have a complete walled room unit without any breaks in it. The next thing to do is to place a room unit where you want the roofing to disappear. Use the square or L-shaped room units and push and pull into shape. Do not use a single wall and draw It free hand. This should help the game recognize the space as a complete unit and hide the intrusion.
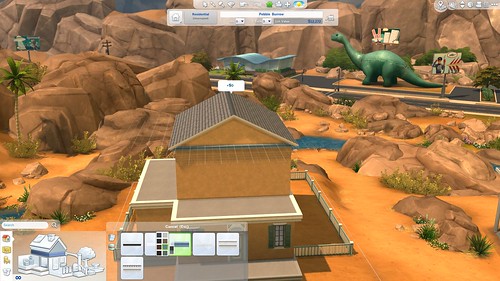
Roofing Textures
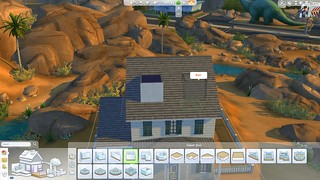
Now that you have a roof on your structure, the next thing to do is to apply the texture. You may have noticed that when you selected the roofing units there were no swatch options to pick the color of the roof. That is located in the roof pattern menu. Click on the swatch of roofing in the image to see the different textures available.

There are many different textures and styles to choose from. Don't forget to click on each style to see the different color options. To apply, just choose a texture and color and click on the roof section you want to change.
Because the roof is not a single drawn unit, but built of separate units, you can color each roofing section differently if you desire. We have never had the ability to do this before! Don't be afraid to mix it up. You can even add an accent to the eaves, or edges, of your roofing!
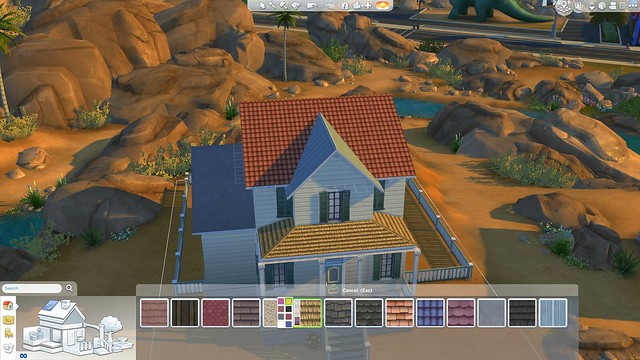
Roofing Trim
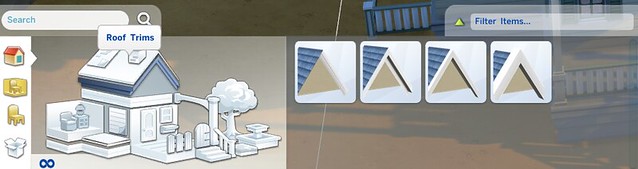
Click on the eaves of the house image to open the roof trim menu. Here you will find a variety of ways to accent the edges of your roofing. Some are very subtle and add a thin edge of color to your roof:
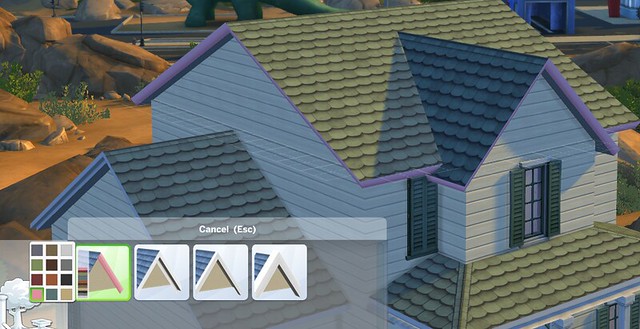
Others offer a thicker, more dramatic way to emphasize your construction:
As with the roofing textures, you have the freedom to apply different colors to the different roofing sections. Try mixing different roof colors, textures and trims to get a unique look for your creation.
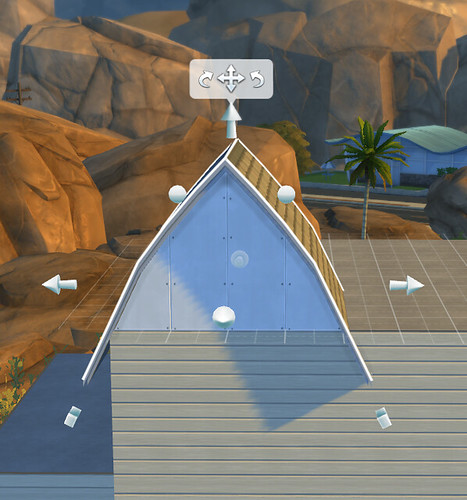
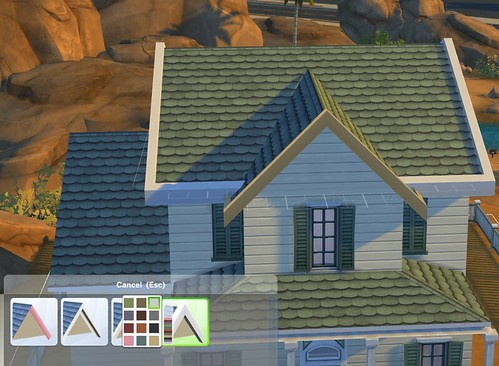
You can also apply a different color to the base of the roofing section if you want to emphasize the gables of your structure. Just click on the base of your roof where it connects to the wall below it to add another design element.
TIP: when using the hipped roofing, you might have noticed there seems to be a bit of a gap between the roof edge and the wall below it.
Use a roof trim to cover the gap and tidy up the look of your structure.
Roofing Tips
• Give your structure some interest by using more than one roof shape. Even if your structure is a basic box, breaking up the roofline by combining two or more different shapes can make things more attractive to the eye. Adding a roofed porch can also keep your home from looking too boxy.
• Try to keep your roof in proportion to the walls of the house. If the roof is too big/tall it will overpower your structure. Experiment with raising and lowering the height of your roofing until you find a level that looks harmonious.
• Try to tie all the sections of the house together for a unified look. When covering a side section or room addition, avoid roofing that makes it look like a separate structure. Choose a roof that connects the addition to the main body of the house.
• Make sure all of the sections of your roof fit together well. Look at from all angles. In the example below, the section on the left stops too soon and looks cut off. Extending it until it blends with the main body of the roof gives a more complete, polished appearance.
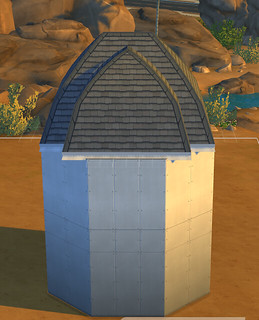
• Since there currently is no octagon or conical roof shape, topping an octagonal room calls for some creativity. Try combining more than one roof section. To get this look, apply a hipped roof section and pull up on the ball shape to give it more of a dome shape. Then cross it with another roof shaped the same way.
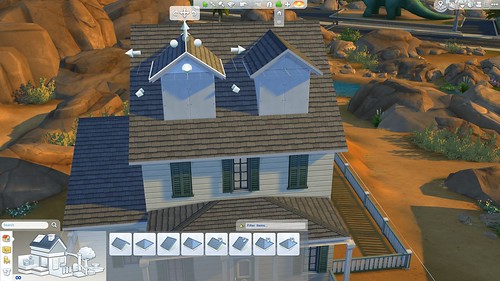
How To: Dormer Windows
Step 1: Place a gabled roof so that an angled edge faces the direction you want to place the windows.
Step 2: Place a room unit where you would like the windows to be. Make sure the room extends back to meet the roof.
Step 3: Place a roof on each dormer and make sure the height of the dormer roof is not taller than the main roof.
Step 4: Cover the walls with whatever wall texture you desire (it doesn't have to match the rest of the house) and add windows.
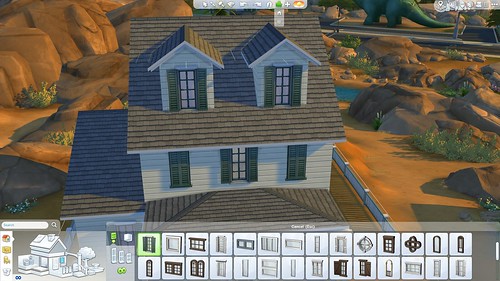
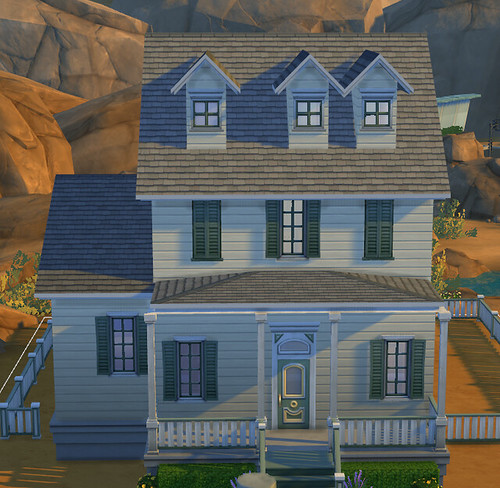
TIP: Dormers look best when they are spaced evenly and in proportion to the rest of the building. If the top of your house looks too busy, you might need smaller (or fewer) dormers.
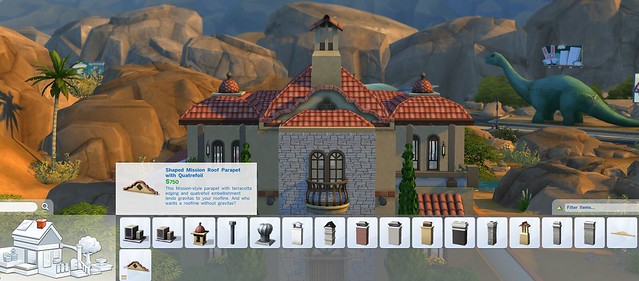
Roof Sculptures
Another way to accent your roof is with roof sculptures. Click on the image of the chimney to access this menu. In addition to the chimneys, you will also find several other decorations and accents such as vents, air conditioning units, cupolas, and parapets. It is important to know that all of these roof sculptures may be placed anywhere on the lot, including the ground.
Chimneys
Chimneys are now completely separate items from fireplaces. (fireplaces are located in the buy catalog in the "decorative" section). What you see is what you get: placing a chimney on the roof does not auto draw anything through the rest of the house. This gives you the freedom to place fireplaces wherever you like without fear of a chimney cutting through a room. You may place a chimney anywhere you like including on the ground or inside a room. Regardless of where you place a chimney, when a fire is lit in a fireplace, smoke will come out of any chimneys on the lot!
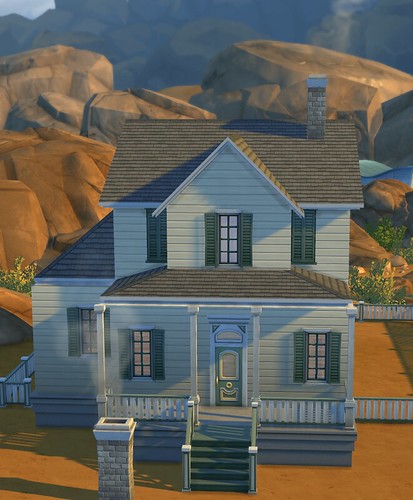
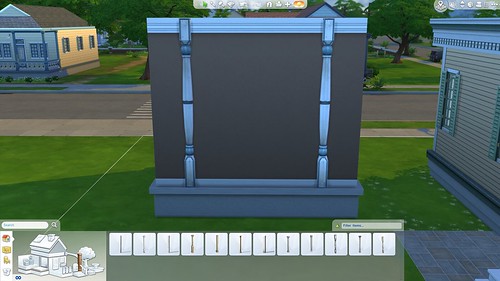
Columns
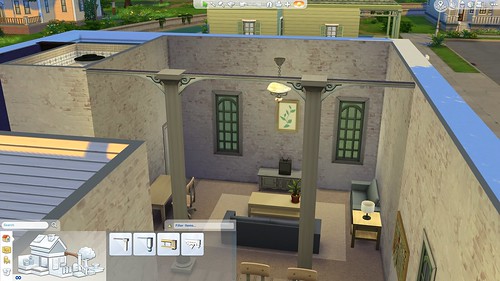
Click on the picture of the column to open the column menu. Even though your porches and balconies no longer require columns for support, they are a great way to accent you build.
Select a specific style to access the various color choices that are available. You might notice that there are no height choices for columns. This is because they are all one story in height. As you place them, they automatically adjust to match the wall height you have selected for that level. If you adjust the wall height up or down, the columns will automatically match.
Things to remember about columns:
• When a column is placed flat against a wall, it automatically becomes a pilaster (or half pillar). This means the other half of the pillar will not show through the other side of the wall.

• In order to place a column on the second (or third) floor of a building, it must be placed on flooring, such as a ledge or balcony. To do this, select the deck option in the room catalog and place the deck where you want the balcony to be. The result will be bare floor tiles on the exterior of your structure. Now you can place your columns and add a fence railing to complete the look.

• A wall section capped off with a column makes a polished room divider.

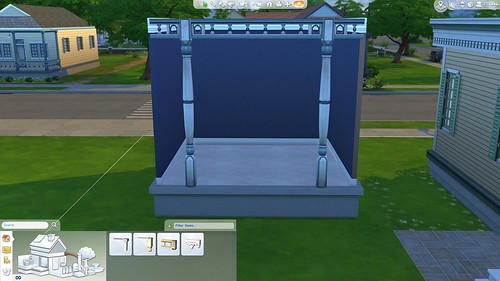
Spandrels
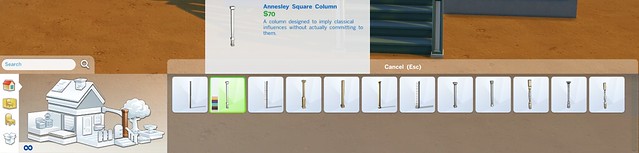
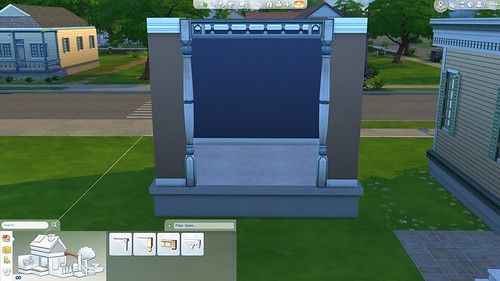
If you are wondering what the heck is a spandrel, the official definition is the space between two arches or posts. For the Sims 4, the definition is a decorative element that sits under the roofline and can be applied to the edges of any room.
Still confused? Click on the image of the beam like thing connecting the post to the house and see what pops up. Spandrels are a lovely decorative touch that can add an extra bit of color and design to your structure. Select the design you want to check for alternate color combinations. Spandrels work particularly well under the edges of porches.
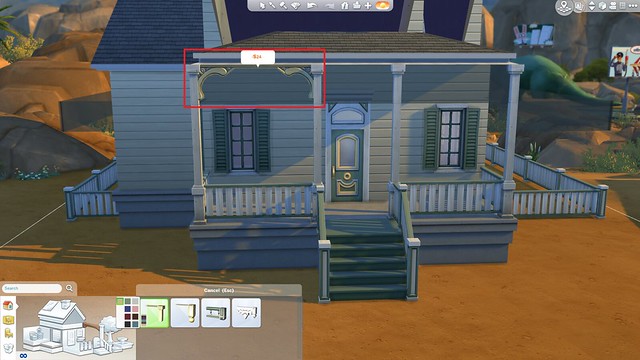
To apply a spandrel:
• Spandrels will only go on the outside edges of a room unit. The room unit does not have to have walls, it can be a deck. (see foundations).
• Click on the spandrel you want to use. If you apply it to a wall, the spandrel will take the place of the wall as demonstrated in the left side of the illustration.
• If the wall unit does not have walls, the game will highlight the area the spandrel can be applied in a dark gray as shown in the above picture. Click on the dark gray areas you want to apply the spandrel and it will appear.
• If the area you would like to apply a spandrel does not have the gray highlighting, it means the game is not considering that area the edge of a room unit. You will need to draw a deck or other room unit under the place you want the spandrel to go.
• Spandrels follow the shape of the room. To get a curved spandrel, you need to place a curved deck unit.
• Once a spandrel is applied, it will automatically adjust with the room unit. If you move the walls up or down, in or out, the spandrel will adjust accordingly.
• Spandrels are replaced by clicking on the new style or color you would like to use and then selecting the existing spandrel. The new color/style will be applied.
• Each section of spandrel is its own unit so you can have multiple colors and styles on the same structure.
TIP: if you can't see the spandrels you applied, make sure you have your view set to "walls up".
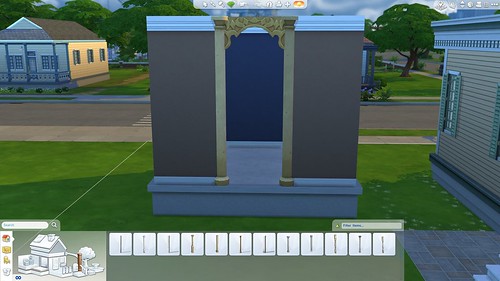
Unlike most other things in the catalog, what you see is not exactly what you get when it comes to spandrels. The presence or absence of a post or corner will affect how the same spandrel looks for most spandrel styles.
In the above example, the corner of the spandrel looks one way when a post is there and a completely different way when it is not. Experiment to get the exact look you want.
Don't forget you can use spandrels inside as well as outside…the only restriction is that they must be placed on a room unit edge.
How To: Custom Doorways and Room Dividers w/Spandrels
Step 1:Mark out the place on the wall you would like your doorway to be and place a column on each end.
Step 2: Add the spandrel across the top. The spandrel will replace the entire length of wall.
Step three: Replace the walls you want to keep, leaving just the doorway open.
Since the columns and spandrels both auto adjust for wall heights, you can do this on any size wall. Experiment with different spandrels and columns to get interesting looks for your creation.
It also gives you the freedom to make your doorway as large as you would like. You can use this method to divide a large room and define spaces.
Friezes
Other decorative element you can add to your structure is a frieze. A frieze is a band of sculpted or painted decoration usually at the top of a wall. In the Sims 4, it is definitely at the top of the wall, as that is the only place they can be applied!
Friezes will only be applied to the exterior top of a room unit. Remember, a room unit doesn't have to have walls, so these decorations do not have to be on a wall. You are free to experiment and get creative. To open the Frieze menu, click on the band around the top of the wall in the image.
The first thing you will notice is that some of the selections are grayed out. These styles require a taller wall height and you will not be able to use them without adjusting the wall height of your structure.
Friezes are applied to the upper perimeter of a room unit only. The entire exterior of the unit will be covered and if you delete the frieze, the entire thing will disappear as a unit. This means that if you don't want an entire wall covered by the frieze, but just a particular spot, you will need to make sure that area is a separate room unit.
Some other things to know about using friezes:
• Friezes come in a variety of colors as well as styles. Click on the style you want to see which options are available. The same color will be applied to the same room unit, but you can have multiple colors on the same structure.
• Friezes don't have to be up against the wall. Draw a deck room unit where you want to apply a free standing frieze.

• To get a curved frieze, first place a curved deck unit.
• Windows cannot collide with friezes. If windows are placed where the frieze will go, the window will be deleted. You will have to redo the windows at a lower level.
• Friezes can be placed on any floor of your structure.
• Roofing can be placed on top of a wall with a frieze. You don't have to have a flat roof if you use a frieze.
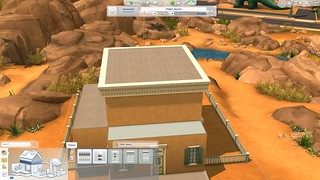
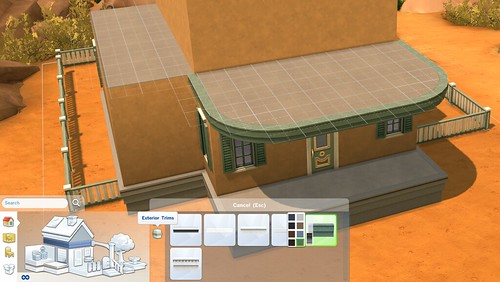
Exterior Trims
Otherwise known as a string course, the exterior trim might looks like a thinner version of a frieze. It is actually quite different.
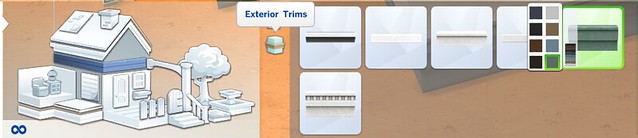
Open the exterior trim menu by clicking on this symbol in the frieze menu:
As you can see, the exterior trims are thinner and less ornate than the friezes. They make a fantastic polished edge for flat roofing and porches or a more modern way to emphasize the different levels of your structure. Like friezes, they are applied and deleted as a unit per room.
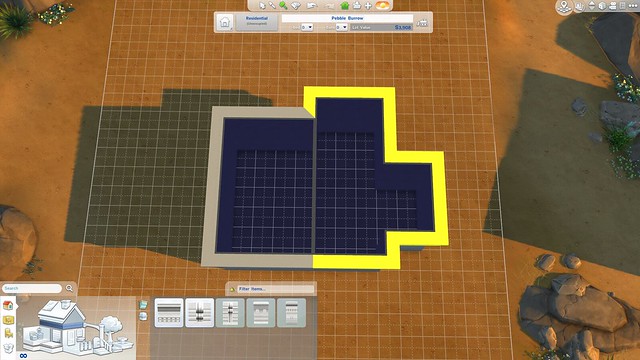
The most important thing you need to know about using the exterior trims is that they are NOT applied to the top of the room units. They are actually applied to the bottom of a room unit. This can be confusing because it is opposite of the friezes.
To apply exterior trim:
• Select the style and color you wish to use
• Go one floor above the place you want to apply it. To apply around the top of the first floor, you must place a walled room unit or a deck room unit on the second floor.
• Click on the second floor and the exterior trim will be applied between the first and second floor.
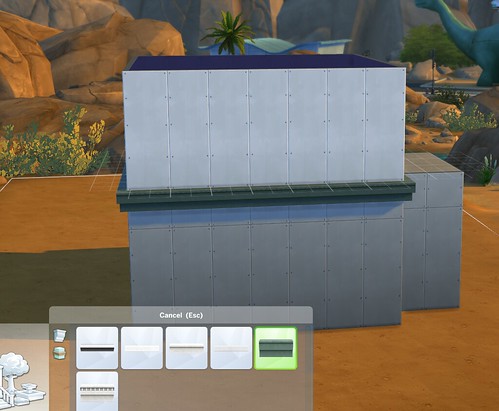
• If you want to have a one story structure or a porch with exterior trim, place a deck room unit on top of your first floor. It won't add to the height of your construction but it will give the game a place to apply the trim.

Then, click on the floor of the deck to apply the trim to the edge.
• To apply exterior trim under a roofing section: Before you place the roof, you should place a deck room unit on top of the structure. Add the trim by clicking on the floor of the deck, and THEN place the roof.
You can place the deck after placing the roof, but you might find it easier to see what you are doing without the roof in the way.
Wall Sculptures

Wall sculptures are another decorative element available to make your structure more interesting. These are different that the interior wall sculptures in the "buy" section of the catalog as they are intended to be exterior elements. Don't let that limit you! These objects do not have to be applied to exterior walls. You can use them anywhere you like so experiment and try new things. Don't forget to click on the object to see the different colors that are available.
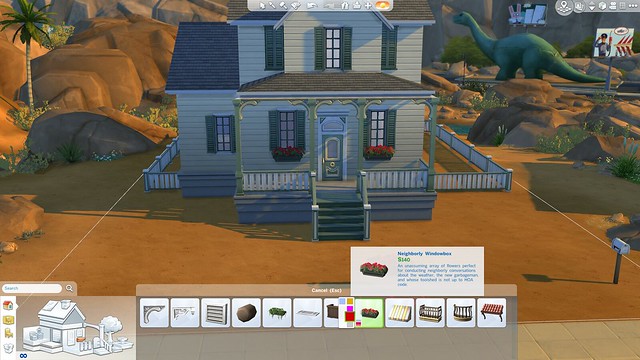
Landscaping
Now that we have our building constructed, it is time to add some landscaping. A little landscaping can enhance what you have built and make it look even better, so don't forget this important step. Click on the big tree to open the menu of plants, trees, and rocks that are available.
Outdoor Plants

Plants are sorted into the following categories:
• Trees
• Shrubs
• Flowers
• Rocks
• Planter boxes for Harvestables.
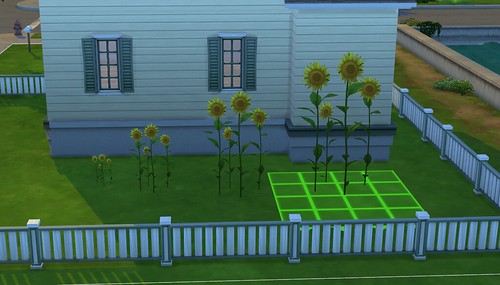
Things to know about Outdoor Plants:
• Many of the objects in this category can be placed on the ground AND in a room unit, enabling you to create indoor atriums, rooftop gardens, and anything else you can dream up.
• Trees cannot intersect with ceilings, so they do not work indoors, but they can be placed on rooftops and decks.
• Objects in this category can be resized using the "Make Bigger" cheat. To use: place the object you would like to resize. Grab the object and hit Shift and ] and the same time. You can repeat this process multiple time until the object is the size you desire. A variety of sizes can make your landscaping look natural and more realistic.
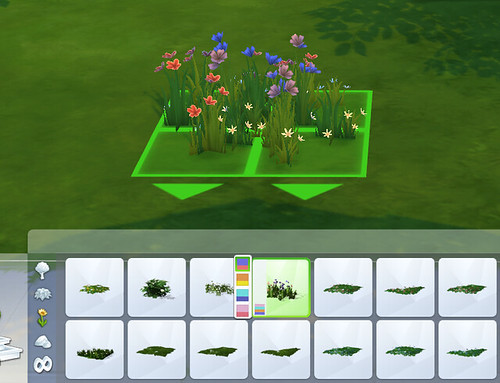
• Many of the flowers come in a variety of colors. Click on an individual plant to see if there are alternate colors available. The rocks also come in 3 different shades, so you have a nice variety to work with.
• Landscaping should add to what you have built, not detract from it. Make sure trees and other plants are not blocking the best features of your construction from view.
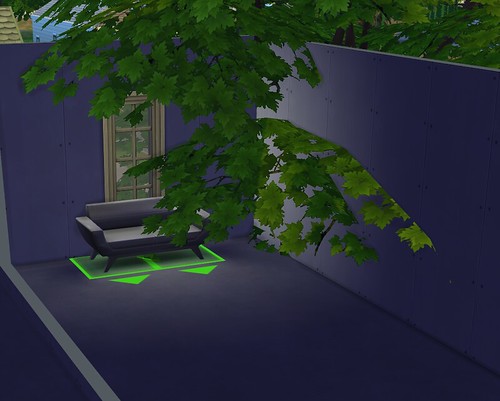
• When you place large trees near a building, check to see if branches are poking through your walls. They won't keep you from using the space, but it doesn't look very good and it will make it difficult to see what your Sims are doing.
Fountains
Fountains are a fun way to add a splash to your landscaping with a water feature. Click on the image of the fountain to open up the menu of options available.
Building a Fountain
Step 1: Design your shape. Fountains behave similarly to rooms. Once placed, you are able to pick them up and move them, push and pull them into shape, and rotate them. They must be placed on the ground and will not apply to room units. Fountains cannot intersect room units but they can be placed directly next to foundations and walls. Want a castle with an actual moat? You can do it with fountains.
You can combine several units at the same, so you are not limited to the shapes in the menu. Be aware that once fountain sections are joined together, they become one unit. This means that if you make a mistake and want to delete a part of your design, the entire fountain will be demolished.
Step 2: Add trim. Once you have your shape in place, you can click on fountain trims to add a lip or edge around the perimeter. Each trim style comes in a variety of colors. The fountain trims are an "all or nothing" affair. The trim will automatically be applied to the entire perimeter of the fountain and deleting it will remove the whole thing.

Step 3: Add water emitters. Water emitters are animated water effects. Click on the emitters to see the large selection of sizes and effects. The footprint of the emitter will show you the area covered by the effect. The footprint must fit within the edges of the fountain pool in order to be placed. There are small, medium, and large effects. Once you select an effect you want, choose the color of the lights by clicking on the swatch. The default is a neutral white light, but you can pick a different color for each emitter if you would like.
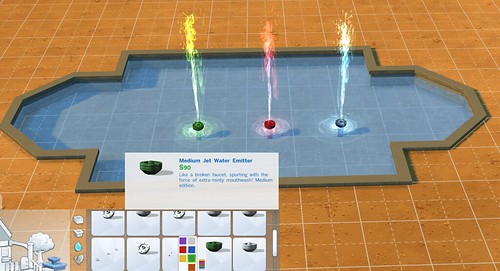
TIP: Emitters will not be active in build mode, so to see what your fountain will look like in action you will need to have a Sim on the lot while you are building and switch to live mode.
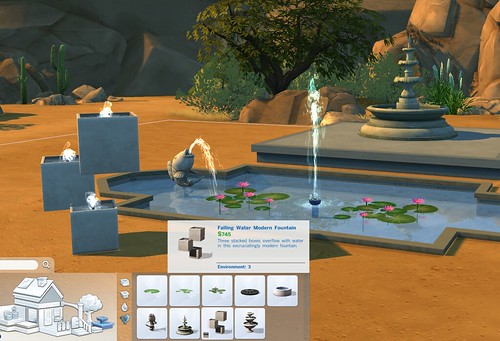
Step 4: Add fountain decorations. If you still feel like your fountain needs a little something extra, check out the items located in the decorations menu. You can add lily pads or a spitting fish sculpture. In this category you will also find the only emitter that doesn't require a cheat to be placed outside of a fountain. There are also some pre-made fountains.
If you want to get really creative with your fountains, consider using the MoveObjectsOn cheat. It will enable you to add anything you want (plants, statues, furniture) to your fountain. Read all about MoveObjectsOn here.
The premade fountains are a fast and easy way to add a water feature to your lot without going to the trouble of designing one yourself. Best of all, these fountains may be placed directly on the ground or on any room unit which means they can be used indoors. Unlike the emitters, you are not able to select lighting colors.
TIP: Tip: Apply wall and floor textures to the sides and bottom of your fountains for added flair.
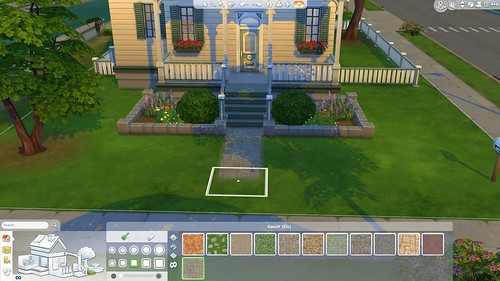
Terrain Paint
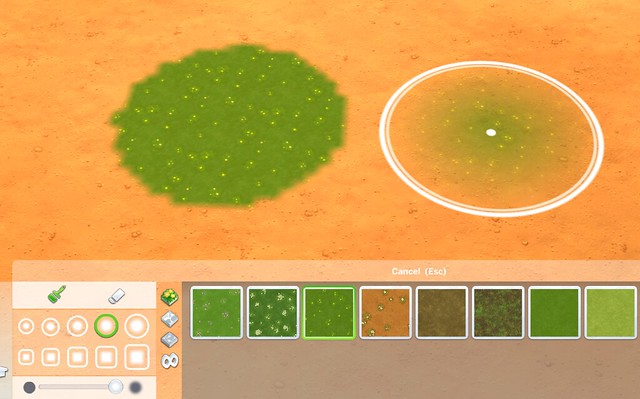
While there is currently no way to sculpt the terrain in The Sims 4, you can paint it. Terrain paint can enhance your landscaping and add additional decoration to your build. Terrain paint can only be applied to the actual ground. It cannot be applied to a room unit. Click on the small patch of grass near the fountain symbol to open the terrain paint menu.

Here you will see a variety of different effects and ways to apply them. Click on the brush symbol to activate the terrain paint brush. Below it, you will see the brush shapes you may use and a slider to adjust the strength/softness of application. The circular shape is great for making worm spots under trees and plants, patches of flowers or for softening edges. The square shape comes in handy for making straight edged shapes such as patios, planting boxes, or formal walkways.
The slider controls how much paint is applied in a single click. Slide it to the left to solidly fill in areas with paint with strong definition on the edges. Slide it to the right to get a lighter touch for subtle effects. On the softer settings you get more blurring around the edges, allowing you to blend and layer more effectively.
Click on the eraser tool to…you guessed it….erase terrain paint. The brush sizes and the strength sider also apply to the eraser tool. A large brush size on full strength is the fastest way to completely scrub clean a large area if you want to start fresh, while a smaller brush on a softer setting is better for cleaning up edges or softening an effect.
Tips for using Terrain Paints:
• Each click of the mouse applies another layer of paint while holding down the mouse button results in a continuous stream of paint. To get precise control, move to the area you want to paint and then single click the mouse slowly until you get the look you want.
• To get clean straight lines (such as a walkway or path) use the "move and then click" method. Overlap the footprint of the tool slightly with what you have already painted as a guide to keep lines straight. Once you are done, you can go back with the eraser and gently clean up any edges that are out of place.
• Terrain paint can make your landscape look more realistic. In real life, grass doesn't always grow right up to the edge of a tree…it thins out due to lack of sunlight and often the area closest to the trunk is just dirt. The same goes for the areas under flowers and plants. There is often mulch or compost under them. Mimic this effect by using dirt like terrain paint on a soft setting and shading in the area around trees and plants. Consider doing the same thing under kids play equipment to give the effect of high traffic areas.
• Unless you want a strongly defined area, consider using a very soft setting on the brush and building the color up slowly. This allows you to create a more natural look and it makes it easier to correct mistakes along the way.
TIP: Anything not covered in terrain paint will be the default texture of the lot you are using. This means that when you take a lot constructed on grassy lot and place it on a sandy lot, the terrain paint might need to be adjusted or things could look weird.
Building Pools

Shaping Your Pool
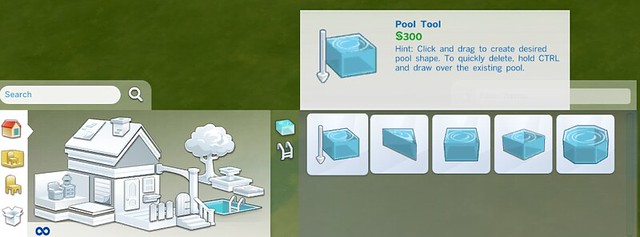
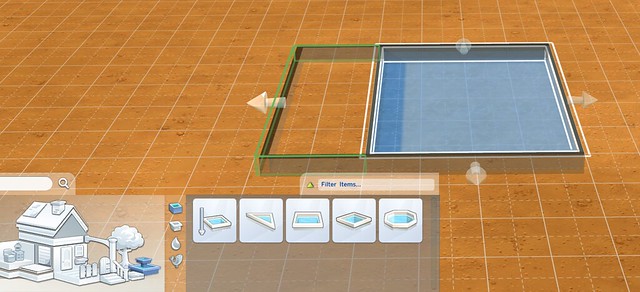
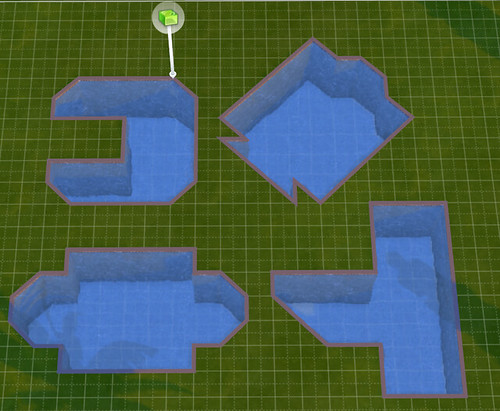
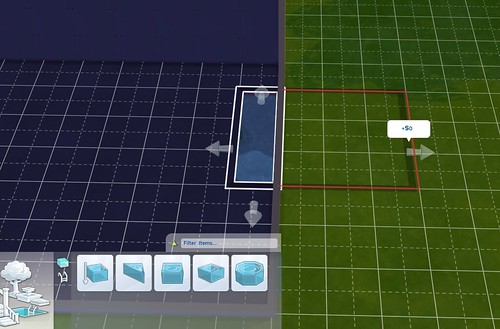
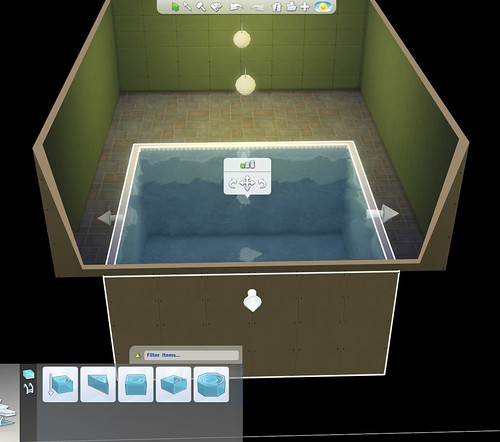
Access the Pool tool by clicking on the image of the pool in Build Mode. The Pool Tool allows you to draw a rectangular shape of any size by dragging the cursor out in any direction. The other options (Square, Triangular, Diagonal and Octagonal) allow you to place a complete pool room "unit" in that particular shape. Unlike walls, you cannot draw a pool free hand; you must use the tool or place one of the shapes.
Once you have placed a pool unit, you will find that they behave exactly like rooms. Select the pool unit to activate the sub menu of controls and manipulate the pool much as you would a room unit. You can rotate it, pick it up and move it to a different location and push or pull the walls into the desired shapes.
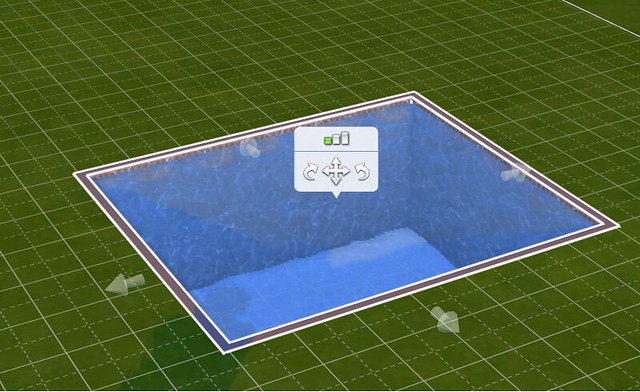
TIP: The shaped pool units are very small and must be pulled into the correct shape. If you find that the submenu is blocking your view or making it hard to grab the arrows, rotate your camera to a top down view. This makes it much easier to see what you are doing and to grab the walls.
You are not limited by these shapes. Once you connect two different shapes or room units, they become one solid unit. By combining them in different ways, you can make just about any form you can imagine and get a unique look for your pool!
While you are experimenting with different shapes, you might decide you need to delete part of the pool. If you use the sledgehammer tool, it will delete the entire pool. So if you only want to remove a section of your pool, hold down CTRL while using the Pool Tool. You will be able to delete sections of the pool one square at a time, enabling you to further sculpt the shape.
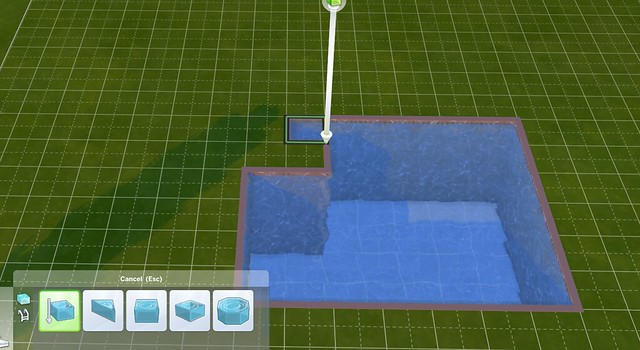
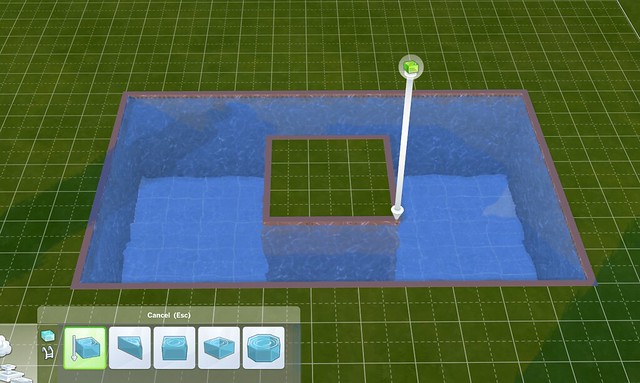
TIP: You can use this method to form an "island" in the center of your pool. Simply make the shape you want and then hold down CTRL with the Pool Tool active to draw in your island.
Pool Placement
You can place your pool in a variety of locations including in ground, on a deck, indoors, and on rooftop. You can even make your pool free standing. There are some limitations depending on the location you choose.
Lots Without Foundations
• You cannot place your pool on a deck. Adding a deck foundation for your pool will make everything else on the lot automatically have a foundation as well.
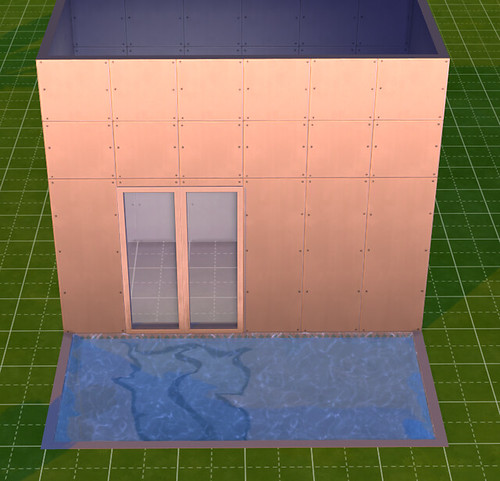
• You can place your pool right up to the edge of a wall.
• You may not place your pool under or through a wall.
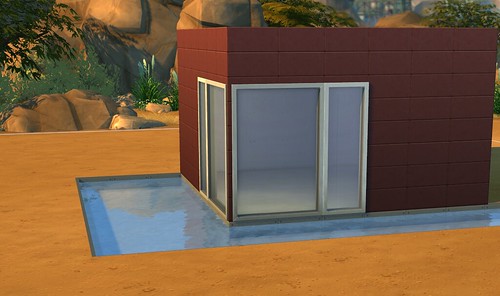
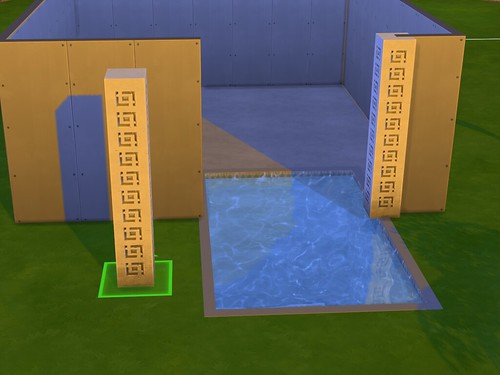
TIP: To make an indoor/outdoor pool you must first delete the walls where you want the pool to pass through. Add your pool. Cap off the ends of the wall with a column for a polished look.
Lots With Foundations
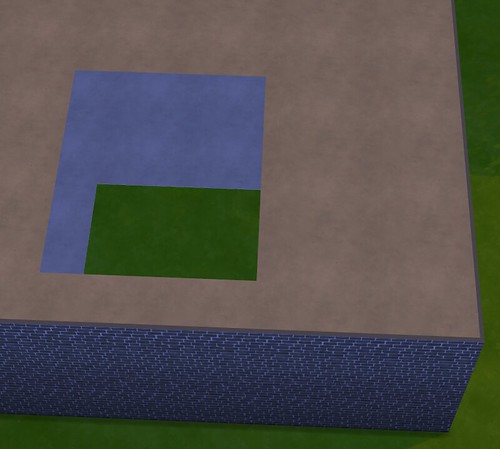
• You can place your pool in-ground OR on the foundation. You can also have both on the same lot, but you may not have a pool on a foundation and a pool in the ground touching each other. There must be a one unit space between them.
• In-ground pools may be placed directly next to any foundation that does not have a pool on it.
• To create an in-ground pool on a lot with foundations, make sure to start drawing your pool away from the foundation. If you start drawing a pool next to a foundation, the game will place the pool on a foundation automatically.
Pools Inside Rooms
• You may place a pool inside a room or house regardless of whether or not there is a foundation.
• You may not stack two pools on top of each other. If there is a pool on the first floor, you may not place a pool on the second floor directly over it.
• Pool walls inside houses function just like other walls. You may place windows and other objects on them. Only objects found in the pool section can be placed on the inside walls of a pool.
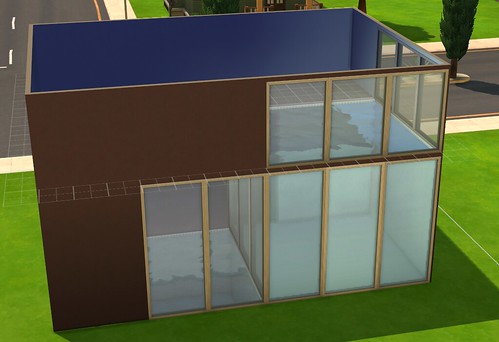
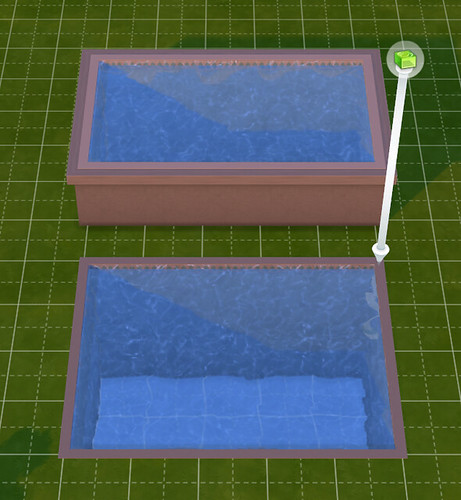
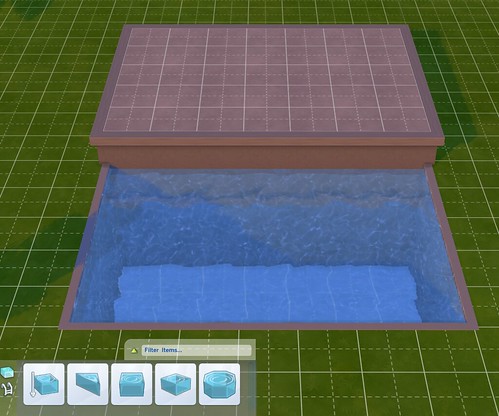
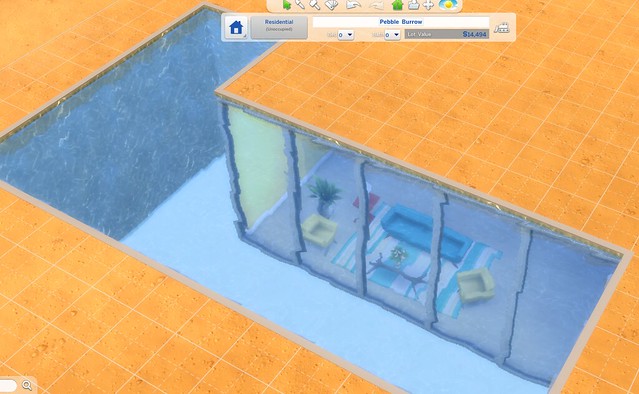
Note: If you place windows in your pool walls, you will not be able to see the sims swimming though the interior windows…only the exterior windows. From the outside of the structure you are fully able to see your sim swimming, but oddly enough, the pool will appear empty when viewed from the inside.
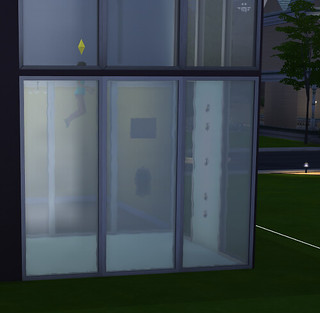
Same pool as seen from inside, but no sim! Pools in Basements
Pools can be added to basements just as any other room unit. You may draw them right up to the edge of the basement, but not beyond.

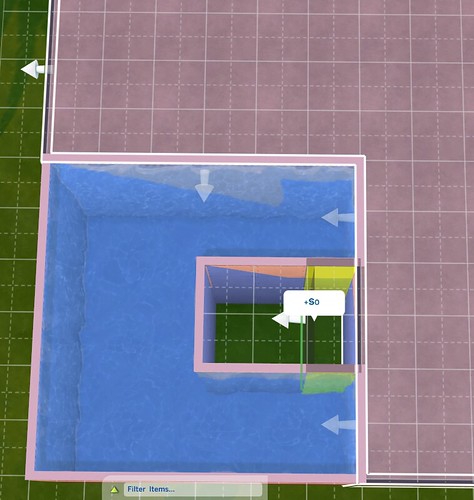
You may also draw a sub-basement directly next to the pool or even under a pool! Just be sure to give your sim a way to access the space, since conventional stairs cannot be placed inside a pool.• You may not stack pools on top of each other.
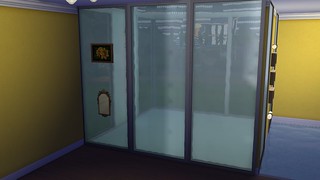
• You cannot place windows in a pool wall underground unless there is a room next to it. Here, windows in the pool wall act as a skylight for the basement room below.
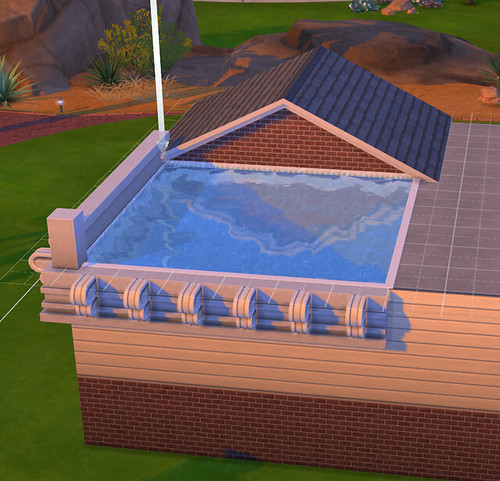
Rooftop Pools
You can place a pool on any level of a home, including the roof. Here are some things to be aware of when doing this:
• You cannot place a roofing section directly on top of any part of a pool.
• The roofing can be placed right up to the edge of the pool, but no more.
• Make sure you allow plenty of space for your sims to get to the pool.
• You may have a pool on every level of your home as long as they don't overlap. A pool on the first floor can be placed directly up to the edge of a pool on the second floor but no farther.
• Pools do not stack.
• Stairs can be placed directly next to any pool to allow access.
• When you delete or move a rooftop pool, you will be left with an odd looking empty hole in your structure. To get rid of this, the gap must be filled in with a room unit…either by drawing a new one to replace the space or by pulling the nearby walls over to cover the gap.
• If you use the Pool Tool + CTRL method to delete part of your roof top pool, there will also be a gap left over. Handle this the same way as if you deleted the whole pool: either draw a new room unit or pull a nearby wall over to cover the space.
• Rooftop pools do not prevent you from using friezes, exterior trims, fencing, windows or any other décor objects on the exterior of your home.
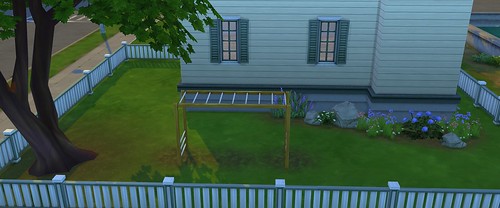
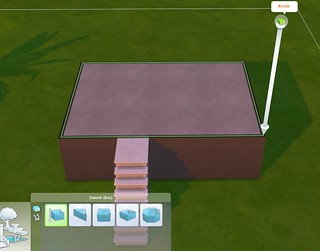
Free Standing Pools
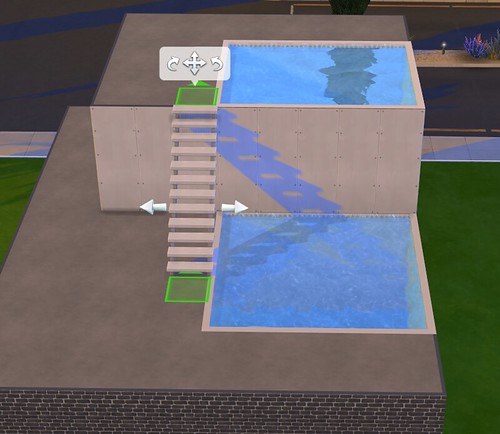
To get the look of a free standing pool, place a deck the exact size of the pool you desire, aise the height of the foundation to the appropriate level, and place a staircase. Remember, if you place a raised deck on a lot, every structure on the lot will have the same foundation height.
Next, draw the pool all the way out to match the edges of the deck.
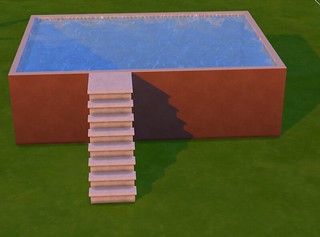
• Your sim will be able to use the pool with no issues. They will not, however, be able to sit on the edge of the pool. You will need to leave at least one unit of deck space around the edge of the pool for sims to be able to sit on the edge.
TIP: If you are the sim killing type, removing the stairs from a free standing pool will effectively prevent your sim from being able to exit the pool.
• The exterior walls of a free standing pool made in this manner are actually foundation walls, not regular walls. This means only the foundation textures can be applied to the exterior.
• Another great use for the free standing pool is to mimic the look of a hot tub. There are currently no hot tubs in The Sims 4. But a small free standing pool with a low foundation will give the appearance of a hot tub and your sim can still swim in it. Plants and fencing can help create the look you want.
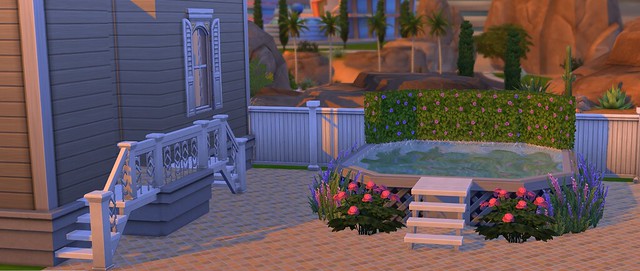
Pool Depth
As you are manipulating and shaping your perfect pool, you will notice that the submenu also gives you the ability to choose the depth of the pool! Select short wall for the shallowest depth, medium wall for a medium depth, and tall wall for the deepest pool.
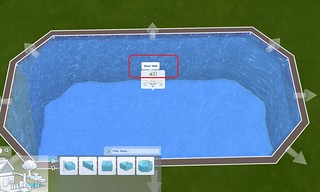
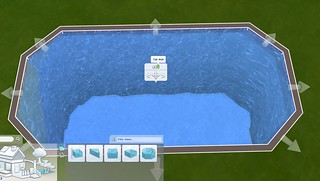
Things you need to know about pool depth:
• For a roof top pool, the pool depth matches the height of the walls. This means adjusting the pool depth will change the height of the walls for that level of your structure.
• Remember that if you change the depth of your pool (and the walls on that level) it could affect the windows on the exterior of your house. After making a pool depth adjustment, take a moment to check the exterior of your home and replace any windows if needed.
• The depth of the pool does not affect the sims in any way. Sims will not drown faster in a deeper pool and children are able to use all pool depths. It is strictly an aesthetic choice.
Pool Objects
Now that you have placed your pool, check out the Pool Objects category in the pool menu. Here you will find several different objects that can be placed in and around your pool.
NOTE: the objects in the pool objects category are the only things that can be placed inside a pool…with one exception: Lily Pads. The Lily Pads from the fountain décor section can be placed pools with no issues though. Sims will simply swim around them.
If you want to get really creative and don't mind using cheats, the MoveObjectsOn ON cheat is a wonderful way to add traditionally "non pool" items to your splash zone. Just be sure to playtest your pool to ensure that the new additions don't prevent your Sim from swimming. Learn more about the MoveObjectsOn cheat here .
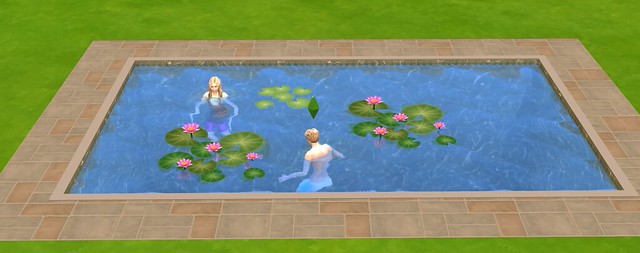
Things you need to know about pool objects:
• Pool ladders are not needed. Your sim can and will pull themselves out of the pool from any edge.
• Pool ladders can be placed on any edge of a pool, including diagonals.
• Pool lights are not limited to in-pool placement. All of these lights can be placed anywhere on your lot. Just as with other lights, clicking on them in Live mode opens up a submenu that allows you to choose the color and intensity of the lights.
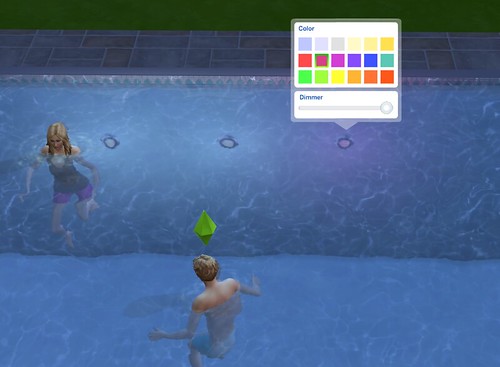
Note: Don't expect to see much from lights that are under water. Even at full strength, the color and intensity of these lights are strongly muted by the water effects.
• Click on the pool mosaic shapes to see the different color options available. Because these are objects, and not room units, the mosaics cannot be pushed or pulled into shape. But they can be layered over each other.
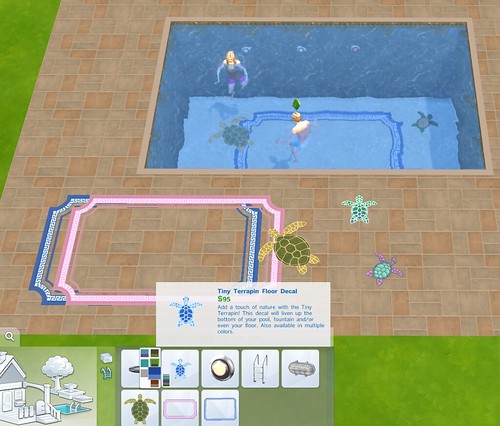
• Pool mosaics don't have to be placed in the water. They can be used to decorate any area of your home.
TIP: Consider using pool mosaics as an accent for your bathroom or kitchen floor. They also work great on patios or any place you want to add special flair. Get creative!

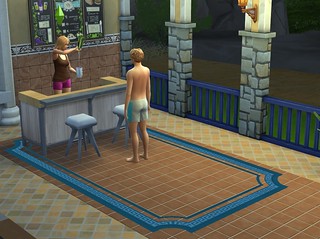
Other Ways To Decorate Your Pool
• Fences can be placed directly up to the edge of your pool. Just be sure to leave space for your sims to get in and out of the pool. (Unless trapping them is part of your evil plan!)
• Landscaping can also be placed directly up to the edges of your pool, including trees and shrubs. Perhaps your nature loving sim would like to take a dip in a hidden glen pool surrounded by trees and lush landscaping?
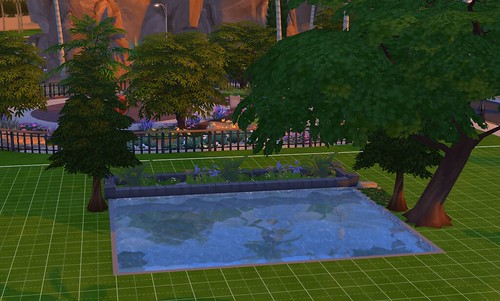
• Terrain paint can be sprayed right up to the edges of your pool. This is a great choice if you want a more natural or softer looking pool surround.
• Wall and Floor textures can be used in your pool. The pool update came with several new wall and floor textures to use in your pools, but you are not limited in any way. All floor and wall textures may be used on the sides and bottom of your pool. You can have a stone pool or a pool covered in wallpaper if that is what you desire.
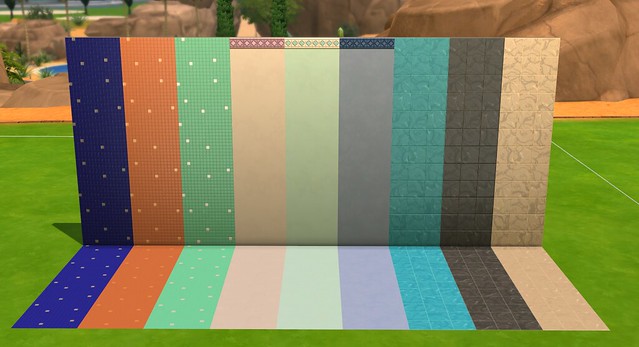
• Be aware that the effect of the water drastically mutes the color and appearance of any texture you apply to the inside of your pool. Even the most vivid walls will lose most of their appearance below the water line. In the image below, you can see how the bright red wallpaper with spots is barely visible in the pool.

• If the pool mosaics that come with the game are not to your liking, you can create your own by using floor tiles. Use a ¼ tile to create angles and various shapes: select the floor tile you want to use and click CTRL+F at the same time. Experiment to come up with an interesting design that enhances the look of your pool.
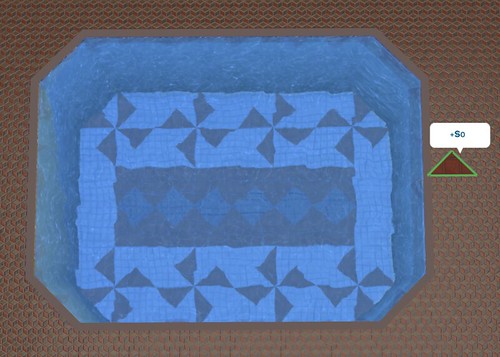
TIP: because the colors underwater are so muted, your custom mosaic will have more impact if you pick tiles with a lot of contrast. A black or red tile against a white, for instance, will show your design more clearly.
• Don't forget the area surrounding your pool. You can also create your own custom design for the edges. Use the ¼ tile and some contrasting tiles to accent the perimeter of the pool area and add another design element to your creation.
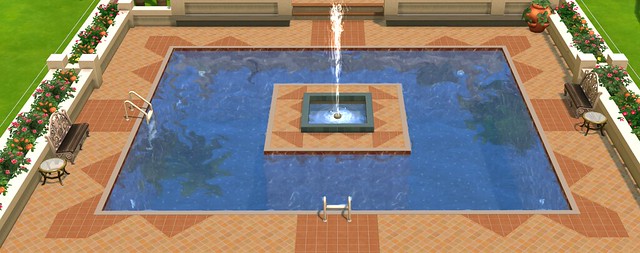
Pools With Fountains
• Fountains can be used to accent your pool's appearance but there are some limitations.
• Fountains and water jets cannot be placed in a pool directly. They must be placed on land.
• Fountains and pools cannot be directly next to each other. There must be at least one unit of space between the edge of the fountain and the edge of the pool.
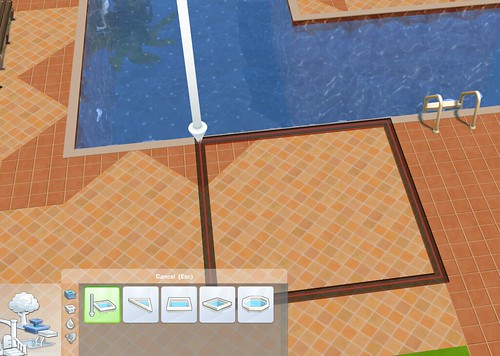
• The spray of a fountain jet cannot fall into the pool. If it does, the game will not allow you to place the jet in that location and the footprint of the item will be red and not green.
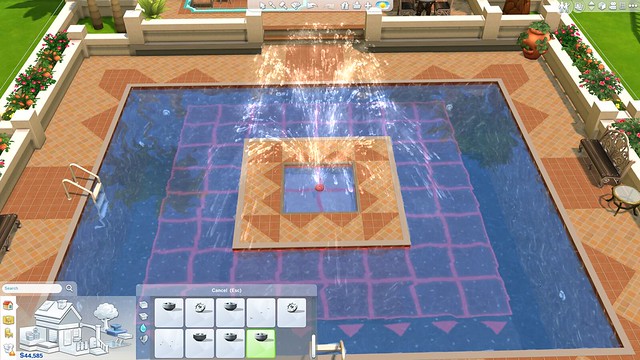
To get a water jet in the middle of your pool, you will need to create an island by holding down the Pool Tool and CTRL at the same time. Next, draw in your fountain shape using the fountain tool. Make sure you allow a one unit buffer between where you want the fountain to be and the edge of the pool. Select a water emitter and ensure that the water does not land into the pool. The more upright jets work especially well for this.
TIP: There is one fountain that can be placed right on the edge of a pool. It is the Spitfire Fountain, which is located in the Fountain Decorations section of the catalog.
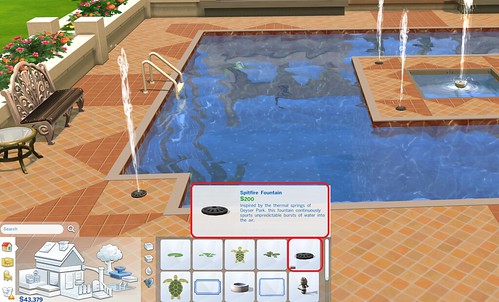
Saving and Sharing Your Pool
You can save and share a lot that has a pool on it just like any other lot. If you want to share your pool area as just a "Room", it is a little tricky.
Because pools are a room "unit" they can only be saved by themselves. When you select and highlight a pool to save or share on the Gallery, just the pool itself (and not any of the surroundings) will be saved. Any textures you applied to the interior of the pool will be saved and transfer.
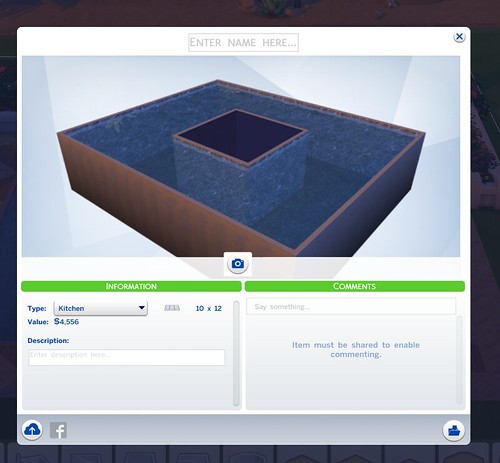
Placing a pool on a deck does not allow you to save the surrounding items. The game considers the deck and objects one room and the pool itself a whole other room. In this example, clicking on the deck to save the room results in everything except the pool being included. That is because the pool is its own room.
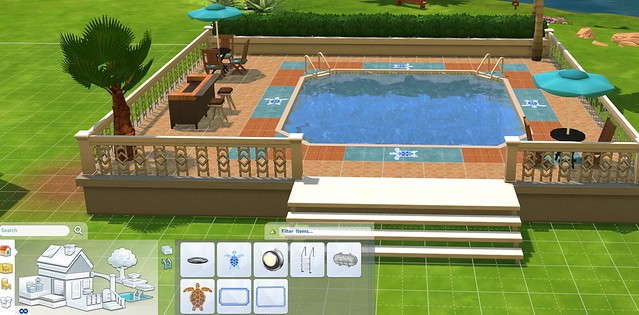
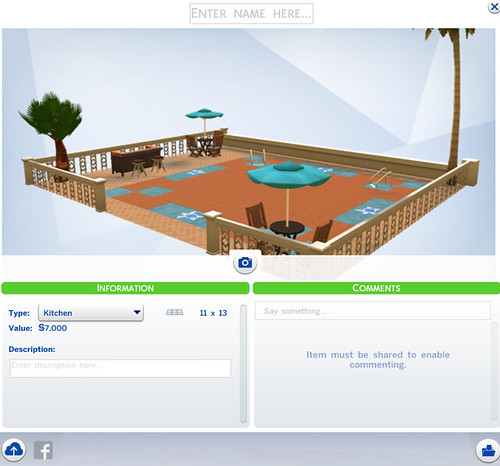
If you come up with a really cool pool area that you want to share on the Gallery as a room, you will need to do it as 2 parts: one for the deck surrounding the pool and one for the pool. Consider naming them part 1 and part 2 to make it easier for people to find them and mention the other part in your description as well.
Remember to experiment with different shapes and textures to give your pool a fun, unique look. Don't be afraid to try unusual combinations. And be sure to have a sim on the lot to test the routing. Switch over to Live mode and ensure sims can get in and out with no problems. Come on in….the water is fine!
Putting It Together
Not sure where to get started when it comes to landscaping? Here are some tips!
Step 1: Before getting started, check to be sure your structure is located on your lot properly. Do you have enough space for a back yard? Is the house too close to the street? You can pick up and move the house, but not the landscaping, so it will save you a lot of time and hassle if you are happy with the location of your building before you start landscaping.
Step 2: Place your largest objects first to allow enough open space for them. Think trees, fountains, decks and any other large scale features. If you plan to share your creation on the Gallery, you might want to hit "save lot" to make sure these items are not blocking the best features of your build.
Step 3: Add your high traffic areas. Create a way to get to your structure from the sidewalk by adding a walkway with floor tiles or terrain paint. Draw a path from the front to the side yard. Define an outdoor patio area (if you plan to have one)
Step 4: Add some flowers and shrubs. There are no rules so don't be afraid to try mixing different plants together. Try to choose an arrangement that is in keeping with the style and location of your structure. A modest starter might have just a few bushes while a fancy mansion calls for more elaborate gardens. The idea is to enhance what you already have. You can draw the eye to your front door with a mix of brightly colored flowers. A clean line of plain bushes might emphasize the strong lines of your modern structure.
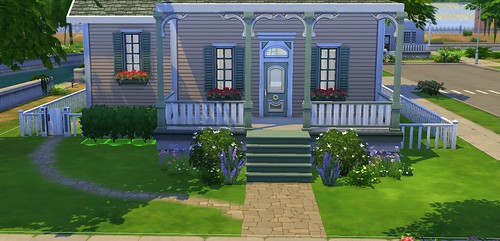
TIP: for a more formal look, enclose your flower beds with low edging from the fencing catalog. To keep things casual, use rocks or just terrain paint to indicate flower beds.
Step 5: Add some finishing touches with terrain paint. Use a dirt pattern on a soft brush strength to shade the areas under trees and plants were grass won't grow. Fill in flowerbeds with mulch or gravel textures or soften the edges of your path with a border of flowering grass paint.
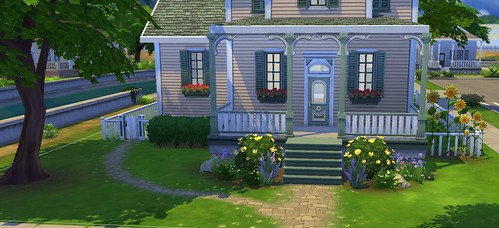
Furnishing Your Home
Now that you have the outside of your build taken care of, it is time to go inside and check out all of the great objects and items you can use to furnish it. Objects are sorted "By Room" or "By Function".
Objects by Room
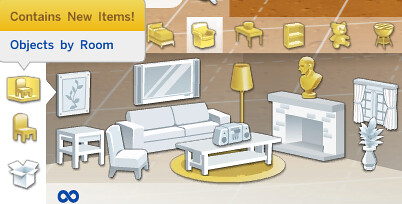
Using Objects by Room is a convenient way to quickly gather all of the objects you need for a specific kind of room. Click on the room symbol in the lower left corner to open the Objects by Room. There are symbols for each type of room such as kitchen, bathroom, or bedroom. Selecting a room type opens an illustration of the types of objects you might find for that room function. You are not at all limited by these suggestions. You can place any object in any room you like.
TIP: things looking a bit bare? Not sure where to start when it comes to furnishing a kitchen? Try looking in the Objects by Room catalog for suggestions of things you could consider adding to your room. When there new objects in a category, they will be highlighted in yellow to make them easier to find. Click on any object in the room to bring up the menu of similar objects.
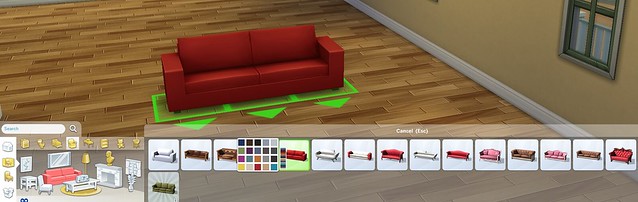

When you select a particular style, there will be swatches to indicate the colors available for that item. In addition to the colors, description, and price, you will also see some helpful facts regarding how the object affects your sims and their environment. This can be valuable information to have when making your decorating decisions.

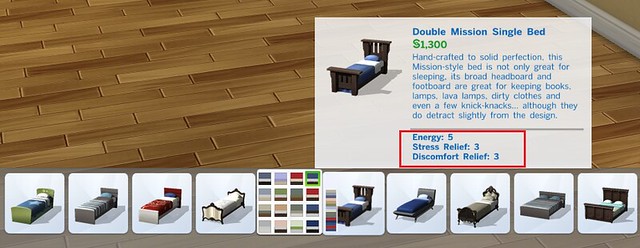
Objects by Function
Another way to find objects is by function. Click on the chair icon to access this mode. You will see a pop up menu of the different sections of the catalog.
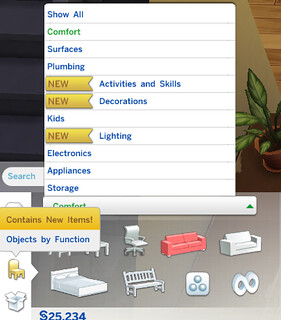

Objects are also sorted by function into the following categories:
• Comfort: includes things like chairs, sofas, and beds
• Surfaces: includes tables, counters, desks, and shelves
• Plumbing: sinks, toilets, showers and baths
• Activities and Skills: skill building objects such as the chess set or treadmill
• Decorations: includes indoor plants, rugs, curtains, wall art and sculptures. (Fireplaces are also found in this category.)
• Kids: includes children's furniture, skill objects, and decorations
• Lighting: all variety of lights including lamps, wall lights, and outdoor lighting
• Electronics: includes TV's, stereos, and computers
• Appliances: refrigerators, stoves, microwaves and the like
• Storage: includes bookshelves and dressers
TIP: be sure to check out the miscellaneous (misc.) group in each category to find fun, interesting or unusual objects that don't appear in any other sub-section. Miscellaneous surfaces, for instance, includes picnic tables and backyard patio tables with umbrellas.


Once you select a main category, you will find images representing the various sub-sections. Clicking on displays, for instance, will then show you all of the different types of shelving available.


As always, any alternate color options for a particular object will be shown when you choose the item.
Kitchen Counters and Cabinets
In addition to alternate color options, the counters and cabinets in the Surface section also have alternate shapes and appearances to choose from. To view, you must first turn off automatic counter placement.
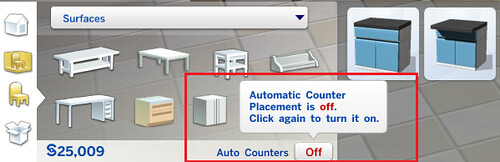
Automatic counter placement is a simple way to install cabinets. As you rotate the counters into place, the game will automatically connect them. If you are familiar with The Sims 3, it is the same method of application.
Turning off Automatic Counter allows you to place each cabinet or counter manually and opens an additional sub-menu of alternate shapes and appearances. Click on the color swatches of a specific style to see the sub-menu of alternates.


You will discover that in addition to rectangular shapes, the kitchen islands also offer curved sections. You may connect these sections in a multitude of ways to get a unique look for your kitchen. Stoves or sinks can also be incorporated into your island seamlessly.
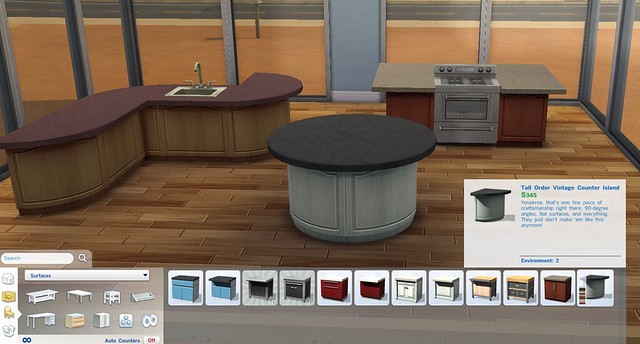

TIP: counters are not just for kitchens. You can use counters to make an entertainment unit, a serving counter in the dining room, or a modern desk surface in a den or bedroom. Think outside of the box…and outside of the kitchen. Just remember that in order for a Sim to sit at the surface, you must use an island counter.

The upper kitchen cabinets also have multiple configurations for you to experiment with. With auto cabinets turned on, you will only have one choice per style, but with auto cabinets turned off, clicking on the color swatches will open a sub menu of different shapes to work with including a tall floor-to-ceiling cabinet and a very short cabinet to give refrigerators a built in look. You must click on a particular shape to see what it will look like in game as some of the upper cabinets have glass fronts with dishes showing through.
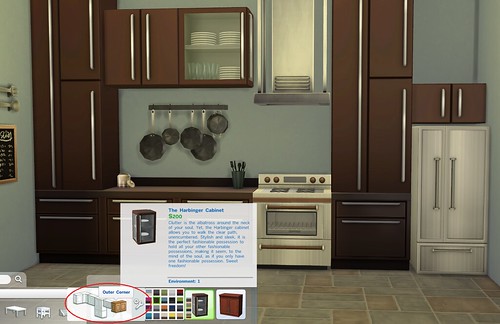
As with the counters, you can use these cabinets anywhere you like. Consider using them in a bathroom for a built in effect, or as a media center in your living room.
Lighting
The lighting is another set of objects with an additional menu to explore. The lighting menu can only be accessed in live mode. If you are building without a Sim on the lot, you will need to move one in if you plan to change the lighting scheme.
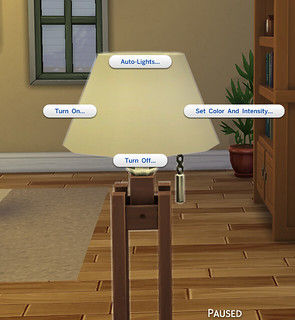

While in live mode, click on any light to open the menu. You will have the following choices which can be applied to the particular light in question or all lighting on the lot:
• Turn off
• Turn on
• Auto Lights – When auto light is on it means that light ( or set of lights) will only turn on when a Sim is present and awake in the area of the light. When there are no Sims present or the Sims are sleeping, the lights will automatically turn off. Having auto lights on during gameplay can be an added way of keeping track of your sims. With auto lights turned off, the lighting will stay the same all the time.
• Set Color and Intensity – Click on this to change the color and intensity of this light (or all lights on the lot). You will find an array of different colors that can be used.
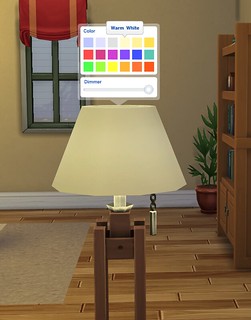
Try experimenting with colors to give your rooms a festive or unique look. Remember, you can have a different color in each light or you can keep them all the same. It is up to you.
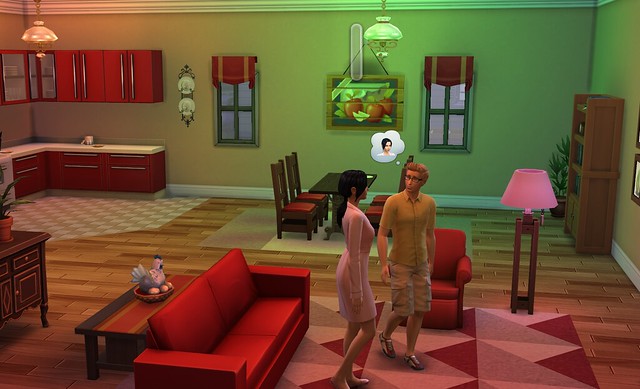

Under the color swatches, you will find a slider for the dimmer. This allows you to set how strongly the light is emitted in order to get the exact mood and look you desire.

The cast of the lighting will change the colors of objects in your room. Do your white objects look a bit dingy or yellow? Try changing the lighting to a cooler white to correct this.
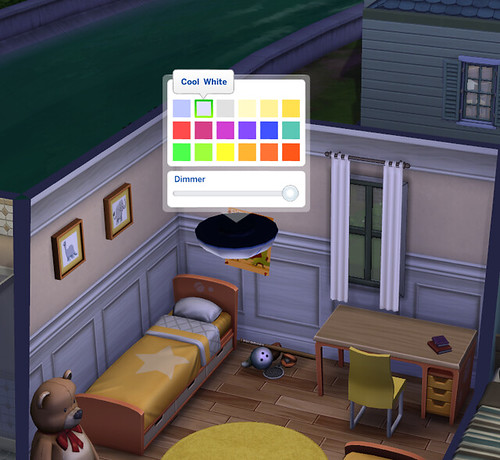

Search Function
Still can't find what you are looking for? The search function is a fantastic innovation guaranteed to make building much easier. Can't remember where the trashcans are located? Looking for a stack of books? Just start typing in the name or description of whatever you are looking for in the search box, and the game will automatically bring up anything that has those letters in the name. To help pin point your search, it tells you both the name of the object and where in the catalog it is located.
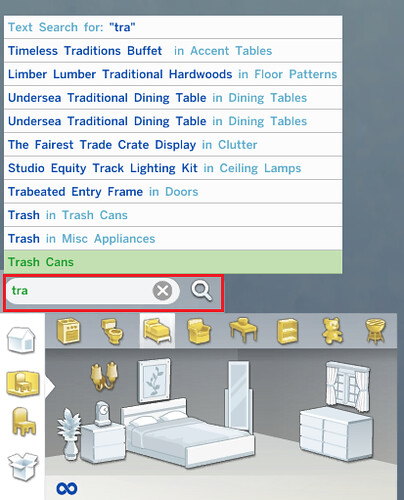

Click on any of the listings and you will be shown that object and its place in the catalog.
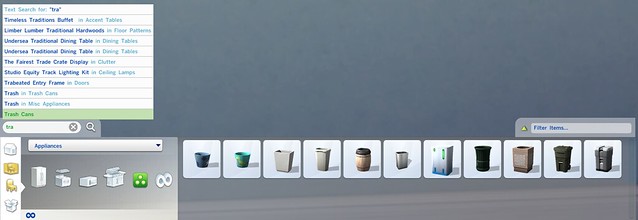

Some things to know about the Search Function:
• Hit the x button in the search field to clear out your old search and start a new one.
• You don't have to know the exact name of the object to find it. In fact, you don't have to know the name at all. You can use a descriptor word such as modern or small to narrow your search.
• The Search function can save you a lot of time and frustration, so don't hesitate to use it.
• The search function will find any object in the Build catalog, including outdoor and construction items. It is not limited to furniture.
• The search function can be used from any Build mode screen. It doesn't matter if you are in Objects by Room or if you are in the Roofing menu.
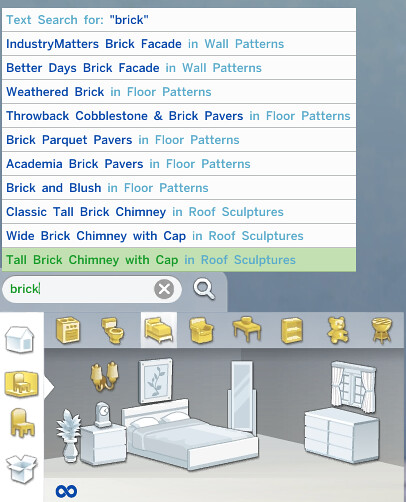
Filters
Another handy way to save time and easily locate objects is the filter system. You will see the filter option on the right side of the control panel while in Build mode (image91) 
or while in Objects by Function.
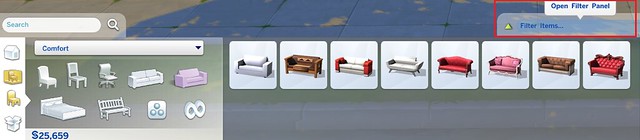

Open the filter panel to access the different ways to pinpoint your search. You can filter by style, by colors, or by content. You can use one or all of these filters at the same time. When a filter is active, the build buy catalog will only show you those items that fit the categories you have selected.
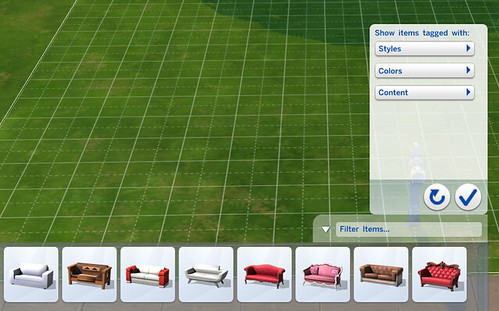

The following filters are available in game:
• Style – To filter by style, select one or more of the listed styles in the list. You may select as many or as few as you like. With the filter now active, the catalog will only show you those items that fit that tag.
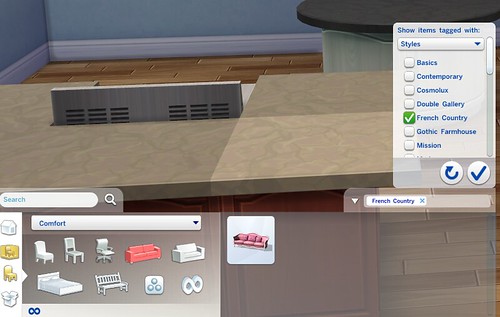
TIP: Using the style filter can be tricky and often frustrating. The modern tag, for instance, yielded almost no objects even though there are plenty of things in the build and buy sections of the catalog that I would consider "modern". What you consider "contemporary" and what the game considers "contemporary could be two completely different things. Proceed with caution.
Colors – This is an extremely helpful filter to use when you are decorating your house! Click on the color filter and select the color (or colors) you are looking for and when you browse the catalog, you will only see items in those colors.

The convenient part of this is that you don't have to click on individual styles and check the swatches to see which colors are available. Everything that is blue will be right there in front of you. This works for construction items too. If you are considering a particular paint color, using the filter for your search will help you see all of your options in one place. It can make decision making and decorating so much easier.
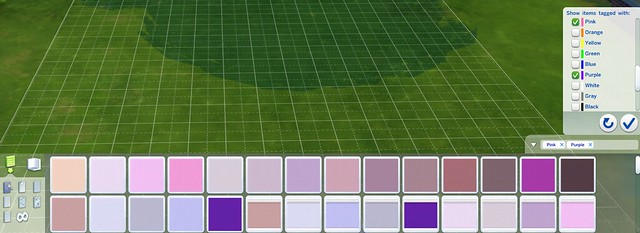
Content – The final filter you may employ is the Content filter. Content currently offers two tags: purchased and unlocked. Purchased will no doubt become much more useful in the future when DLC is released. In the meantime, "unlocked" can be a handy tool to locate objects your household has unlocked through achievements.
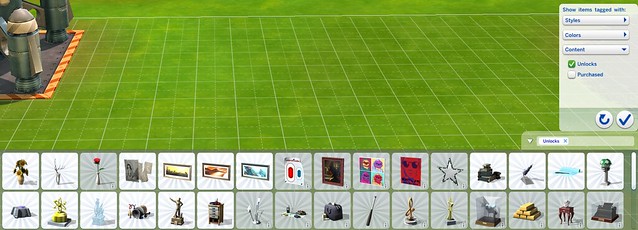
Hidden Content: Buy Debug
Another place to look for stuff to use in your game is the Debug menu. If you are not familiar with the debug objects, these are items that appear in the game but are not normally available in the buy catalog.
To access this collection of interesting objects, hit CTRL + SHIFT+ C to open up the cheat menu and type in bb.showhiddenobjects

Then, go to the search function and type in debug in the search field. When you hit enter, the entire catalog is unlocked and shown…including the debug items. You can find many collectibles, books, and unique objects to use in your buildings.
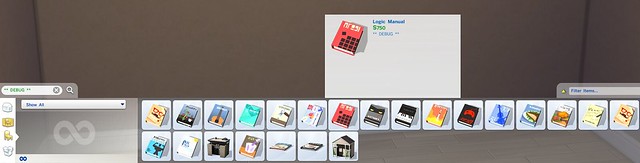

Unlocking the debug objects will not unlock career or aspiration rewards. Many debug items make excellent "clutter" objects to make your home seem more realistic or to set a particular scene. If you plan to share your creation, be aware that the debug items do not transfer.
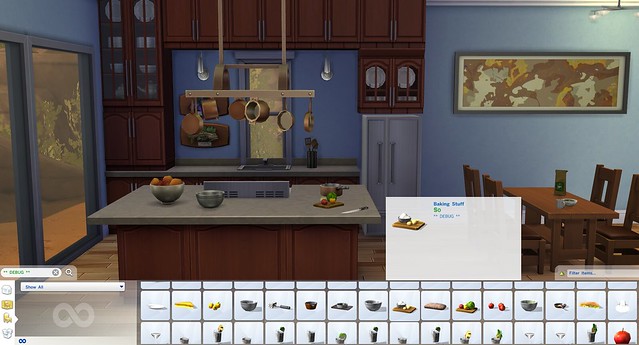

Buy Debug: Invisible Lighting
Another handy set of objects you will find in the debug section is the invisible light set. Sound confusing? These allow you to shine light on an area without a visible light source. If you feel that the dining room is too dark and you don't want 5 chandeliers in the room to clutter things up, you can use the invisible lighting to brighten things. You can also use them to highlight a dark corner or emphasize a feature on a wall.
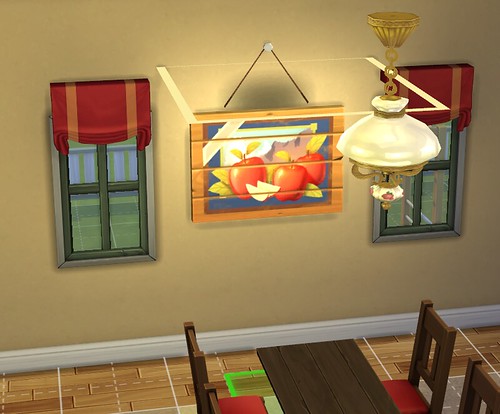

To access the invisible lighting, first go to the miscellaneous section of the lighting catalog. Then hit Ctrl+Shift+C at the same time to open the cheat menu and type in the bb.showhiddenobjects command. You will then see the invisible lighting in the miscellaneous section of the lighting catalog.
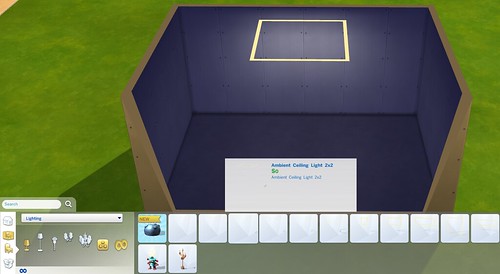
The thumbnail doesn't do a great job of showing you what the individual lights look like, so you might need to grab them and place them in the world to get a good look at what you are dealing with.
Things to know about the invisible lighting:
• These are debug items so the will not transfer if you share your creation in the Gallery.
• These lights are not adjustable in any way. There is no lighting menu for them and you cannot place them at different heights.
• Invisible lights do not collide with Sims or other objects. Sims can pass through them with no problem. You will, however, see some odd lighting effects when that happens.
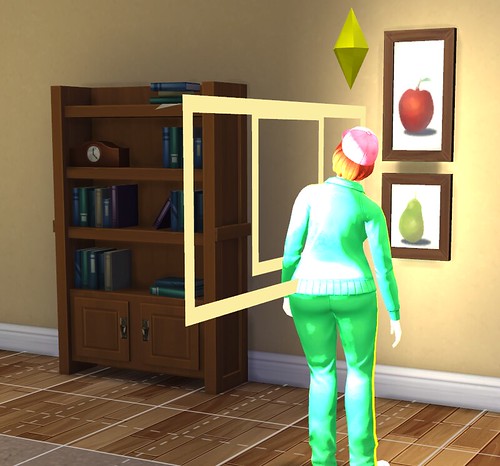

• The wall lights do not actually apply to the walls directly but in front of them.• Currently, the invisible lights emit a very subtle amount of light from above. You may need to layer several of them to get the level of illumination you need. Luckily, they don't have a cost so your budget won't take a hit.
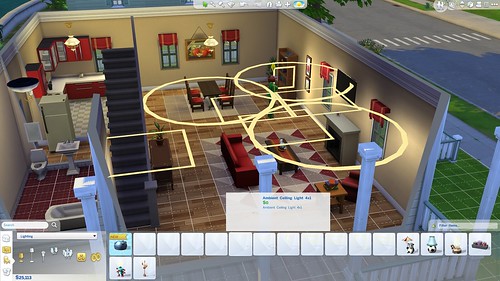

TIP: you can use invisible lighting outdoors as well as inside. Is the exterior of your home a bit dark at night? You can add some invisible lighting to impart a subtle glow and increase visibility.
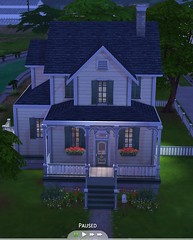
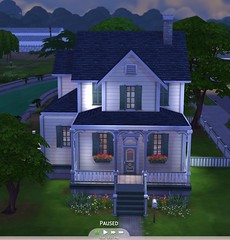
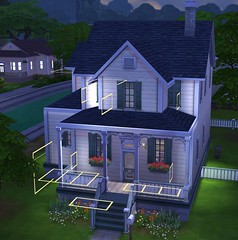
Object Placement
Now that that you know where to find everything, it's time to figure out how to use and place them. When you start placing objects in your lot, one of the first things you will notice is the "footprint" for the object highlighted. This footprint will show you how much space to allow for that object.
When it is green, everything is fine. If it turns red, the object cannot be placed because there is not enough room for the object to be used by Sims or it is colliding with another object.
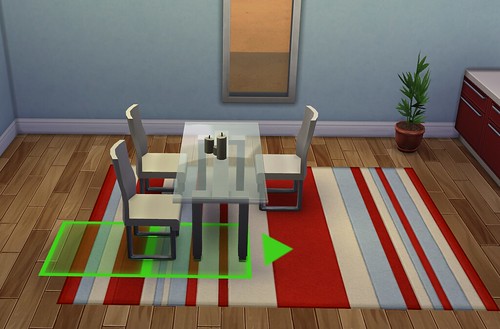
Pay attention to the arrows on the footprints as they indicate the front of the object. The footprint is a great guide as to whether or not a Sim will be able to use the item where it is placed. In the example below, it seems like the chairs are too close together…and way too close to the fireplace…to be usable. However, the footprint is green. Pop into live mode and it turns out a Sim can use the chair without being blocked.
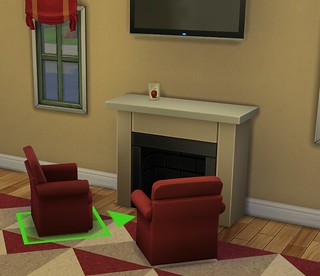
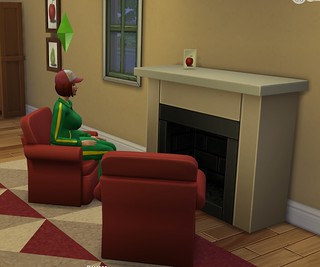

Things to know about object placement:
• To get more precise control, you can hold down the ALT key while grabbing the object.
• Wall objects (including curtains, paintings, lighting, and other décor) can be placed anywhere on a wall. Anywhere. That includes placement between two wall units (something windows cannot do) and multiple objects on the same wall unit.

• The game prioritizes wall objects over windows. This means you can place wall objects on or over windows with no problem and no cheats.
 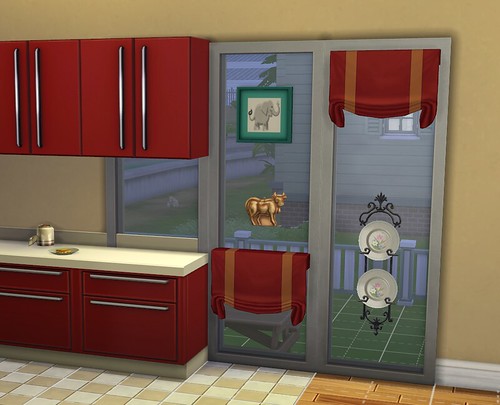
• Beds no longer need a full unit on each side for Sims to access both sides of the bed. A half unit is all that is required. This allows the use of full sized beds in smaller spaces.
• Two story rooms no longer require separate light placement for each level. Lighting effects can travel across room levels and don't stop at each floor. If you place a light at the top of a two story room, the lighting will go all the way down the room.

• If you want to change the size or shapes of your furnished rooms, you don't have to delete everything and start over. If you delete a wall, anything on the wall will disappear; however, if you push or pull the walls, any objects that can fit in the new space will remain intact.• When you move walls or adjust rooms, the game will let you know if something is going to be deleted by your action. Things that will be deleted will highlight in yellow and things that will go along for the ride will not. In the example below, we can see that the counter, wall, and flowers will be deleted if we bring the wall in, but the wall sconce and the floor plant will move along with the wall and stay.
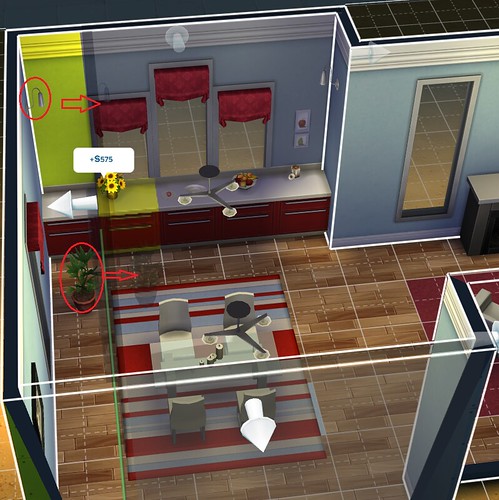

When you make a room bigger, nothing is deleted. Objects on walls will follow the walls, but other things may need adjusting.

MoveObjectsOn Cheat
When you find that you can't place something where you would like or you have an idea to create something truly unique, you might want to break out the most awesome cheat in a builder's toolbox: MOO. MOO stands for Move Objects On and if you are not familiar with it, it is worth trying. MOO allows you to completely disregard all of the game's rules of object placement and place objects wherever you want.
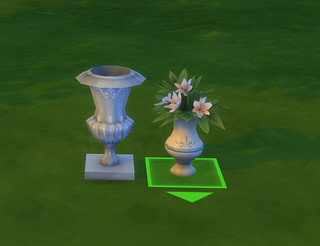
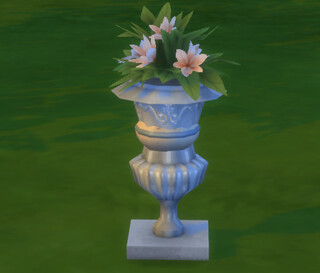

You can float them in mid-air, layer or stack objects, blend items together to create something new…the possibilities are mind boggling. Of course, with great power comes great responsibility. Using MOO comes with some warnings to keep in mind if you don't want to cause routing problems or graphical glitches. So before you start Moving Objects, keep these things in mind:

• MOO is best used on decorative and non-functioning objects. Wall art, sculptures, landscaping and the like are all ideal candidates for some creative moving of objects. This is the best way to minimize weird glitches and odd effects. Things your sims use a lot, such as beds, toilets, or chairs are much more likely to cause issues if you do not follow the game's rules for object placement. If you decide to use functioning objects in your MOO creation, be sure to playtest them thoroughly before sharing.
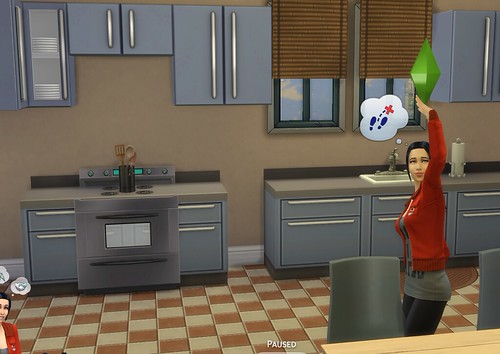

• Some objects, such as windows and doors, do not respond well to MOO. Once again, proceed with caution. You will find that while MOO allows you to place one panel windows across two wall units, or place two individual windows on the same wall panel, the results are less than desirous.
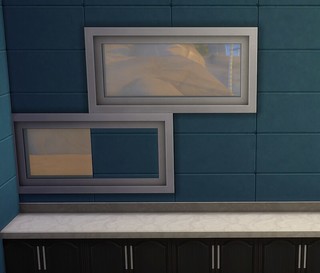
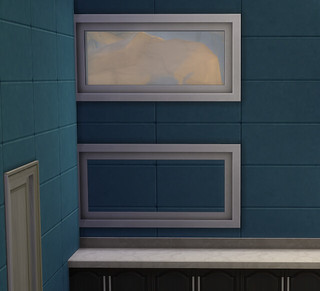
 
You can, however, overlap windows to create a new look. You just have to keep one panel windows on one panel only and keep the two windows on the same level.
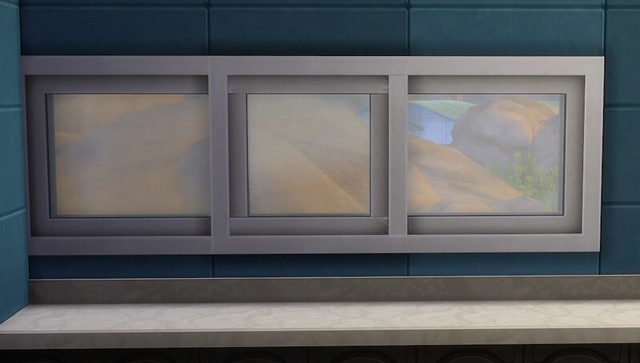

• You may see some slight graphical glitches or movement in the area where two or more items overlap. This happens as the two textures fight each other and is unavoidable. It is up to you to decide if it is a deal breaker or not.

• Having the freedom to place things wherever you like also means they might show up where you wish they wouldn't. You can snug an object closer up to a wall, but be mindful that you might be placing part of the object through the wall. This could prevent a sim from using whatever object is located there or just look weird. When you use MOO to place an object, do a quick 360 all the way around to check for these problems.
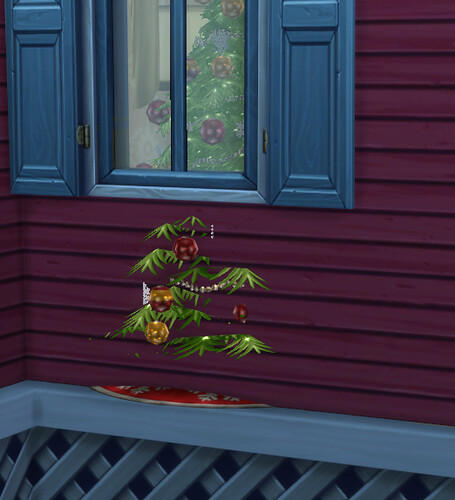

Using MoveObjectsOn
Now that you know what to watch out for, let's get to MOO-ving objects! Open the cheat box by pressing CTRL+Shift+C at the same time. In the box, enter bb.moveobjects on and hit enter. You will get a message saying the Move Objects cheat is now on. Close the cheat box by hitting CTRL+Shift+C again.


When you are done using the cheat, don't forget to go back and turn it off! Open the cheat box and enter bb.moveobjects off. You will get a message telling you the cheat has been turned off.
Once MOO is active, you will find that the footprints for items are still visible, but they no longer limit or prevent you from placing an item where you wish.
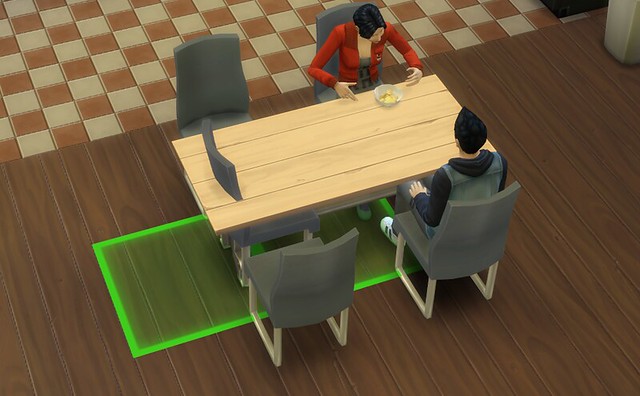

To get even more control over your placement, hit ALT while grabbing an item. This allows complete off grid placement so you can nudge an item into the exact place you want it to be. Want that end table to be closer to a chair? With MOO and pressing ALT, you can get it exactly where you want it. You can put "presents" under the Christmas tree at just the right angle. You will find that some objects on slotted surfaces, such as coffee tables or counters, resist off grid placement with MOO and the alt button. With patience, you can nudge some things into place. Just keep moving the object around on the surface very slowly while holding alt.

Moo-ving Items Up & Down
You can also manipulate the height placement of objects. To do this, select the object you want to move and click on 9. The object will move up incrementally, so keep hitting 9 until it is at the height you desire.

❗ If you have your game set to "Sims3" camera controls, you need to hit CTRL+9 at the same time.

You will find that once you get the object to the correct height, you will need to press the ALT key (while the item is still highlighted) to further nudge it into place.

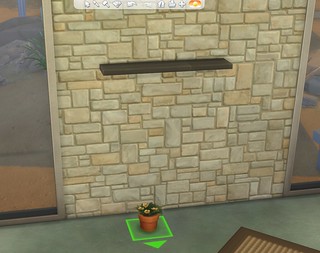

 
Using this method, you can combine objects to create new wall displays and to place objects on shelves that don't normally fit on them. Those empty shelves no longer have to be empty! For a more natural, cluttered effect, rotate items slightly when grouping them together.

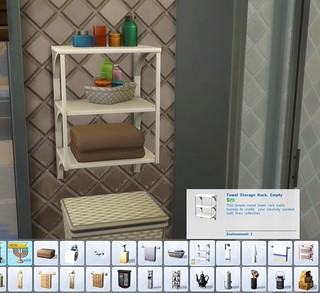
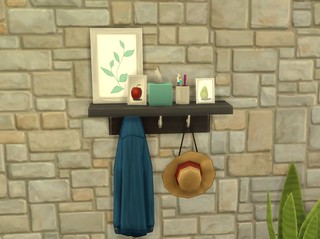

What Can You Do With MoveObjectsOn?
It might be easier to ask "what can't you do?" because MOO opens up a whole new world of possibilities when it comes to building and decorating in The Sims 4. Here are just a few simple ideas to get you started:

• Make your own unique fencing. Combine pillars or sculptures with fencing to create a whole new look.
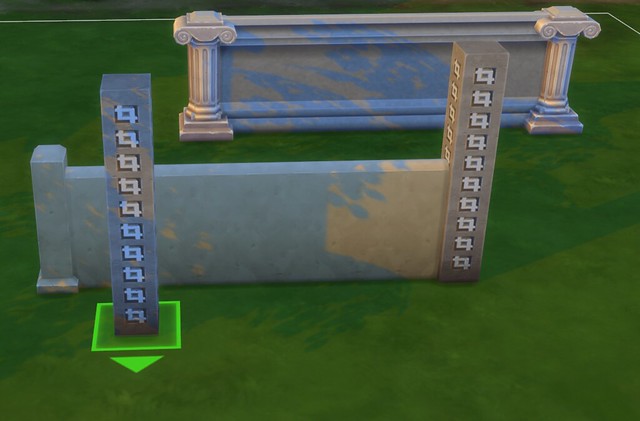

• Create new houseplants and floral arrangements by combining plants with other objects. Bring the exterior plants and flowers inside!
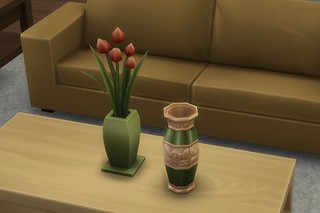


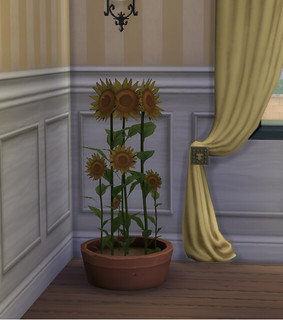

• Create your own unique furniture by combining objects in new ways.

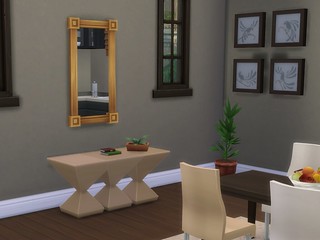

• Layer your landscaping for a lush, more natural look. Remember to rotate plants slightly as you place them to keep things from looking too artificial and repetitive. You can also layer two plants together to make your own botanical creation.

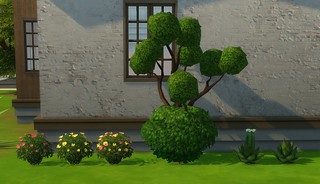

• Combine clutter objects to give your home a "lived in" look.
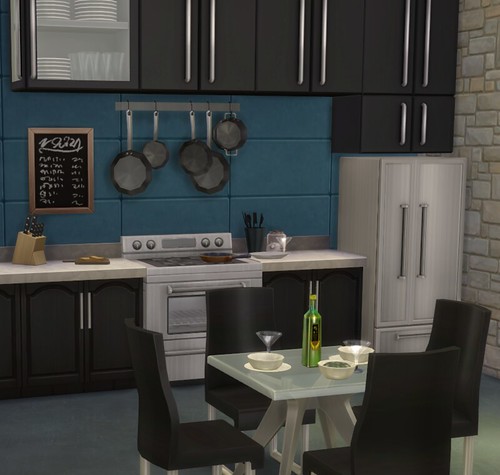

• Design a whole new look for your pool or fountain. With MOO, you can place just about anything in or near water features.
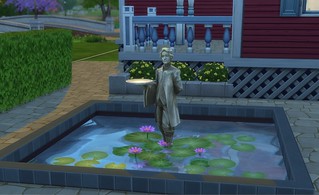
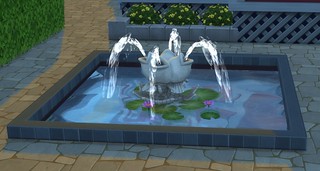
Enhance your pool with landscaping or sculptures to get the look you want. Children's toys can now be pool toys too, although they can't be used while in the water. As with all MOO objects, be aware that sometimes Sims will not be able to use oddly placed items.
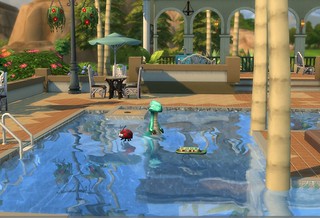
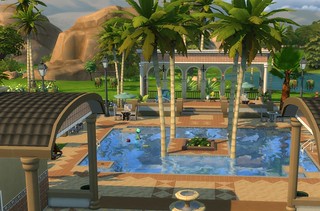
There is so much you can do with the MOO cheat it would be impossible to cover it all. Hopefully these basic ideas show some of the possibilities open to you.

Sharing or Downloading Lots With MoveObjectsOn Effects
Before you share a creation with MOO effects, be sure to thoroughly playtest the lot and any objects you have moved. Some things seem to function just fine regardless of location, but others cannot be used by sims.
Placing a mirror higher than the default height, for instance, doesn't prevent a sim from using it. They might look a little odd talking to a wall, but they are able to gain skill points and access all interactions regardless. Other objects do not function properly which will make sims frustrated and cancel out of queued actions.
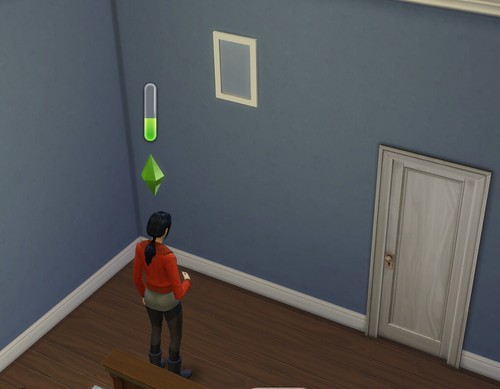

MOO effects DO transfer but with one important exception: if a lot is loaded directly from the Gallery into your neighborhood while you are in Manage Worlds (map view) the MOO'd objects will disappear. In order for the MOO to transfer, you must place the lot from Build Mode. This means go into the location you wish to place the lot first, then place the lot (either from your library or the Gallery directly)
Another way to ensure that everything transfers is to have the MOO cheat active when you are downloading a lot with MOO effects. When sharing a lot with MOO effects on the Gallery, be sure to mention it in your description along with the instruction to place lot from Build Mode. This will allow other simmers to see your creation as you intended…with no missing objects or glitches.
NOTE: Players are reporting that MOO effects seem to be vanishing at unexpected times, such as when lots are changed or when a game is saved and reloaded. EA is aware of this and the team is looking at it. For now, be aware that any lot with MOO effects might experience issues with disappearing objects.
Decorating
Not sure how to get started when it comes to furnishing the interiors of your buildings? Don't forget about the styled rooms in the build catalog and the player created rooms in the Gallery. They can be a great kick start for your own design and a good source for ideas. You can take any styled room and move things around or change the color scheme to make it your own.
The "objects by room" section of the catalog can also be incredibly helpful to act as a blueprint for what your room might need. If you decide you want to do it all yourself, here are some basic steps to get you going in the right direction:
Step 1 Place the largest or "main" object first. This will serve as the focal point to build the room around. For the living room, it would be the sofa. In the kitchen, the counters. For bedrooms, the bed.
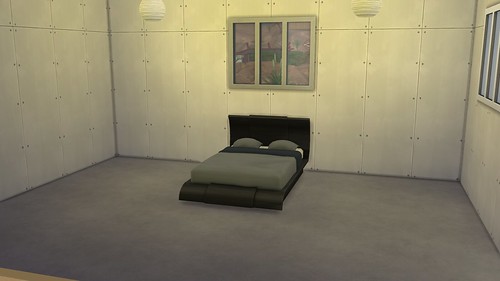
Step 2 Next place other large furniture items such as tables, chairs, or book cases. Try to keep the room balanced. Don't forget to add at least one skill builder whenever possible.
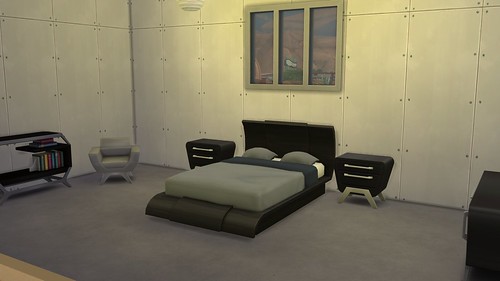
Step 3 When you have the furniture placed, choose your wall coverings and floor coverings. Use the colors of the furniture as your guide. Choose one or two colors similar to that found in the furniture and a completely different color as an accent. Remember, you don't have to use the same wall covering on all of the walls. You can mix it up.
 
Step 4 Last, fill out the room by adding lighting, curtains, rugs, and décor objects. Choose items that are in keeping with the furniture and feel of the room for a cohesive look.
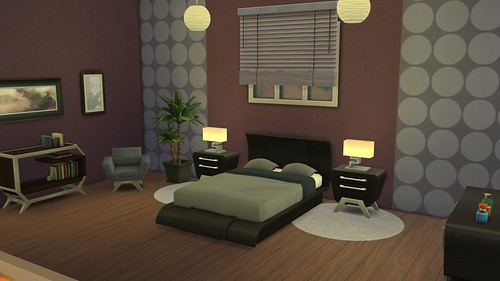
Decorating and Furnishing Tips
• Use the style and color you choose for your main object (bed, sofa, kitchen counters) to set the tone for the rest of the room. Build the look of the room around that item.
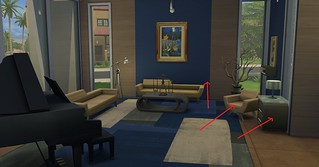
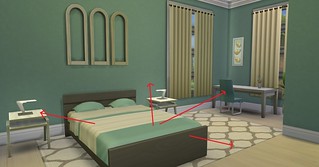
• If you are working on a Community lot, follow the "shopping list" provided in the lot information panel. (See Lot Type) Choose the biggest items on the list and place those first to use as a guide for the rest of the lot. Venues attract crowds, so be sure to leave plenty of open spaces for Sims to congregate.
• Empty rooms can be dark, making it hard to see what you are doing. Try hanging a couple of temporary ceiling lights (the Snoboll Pendant Light seems to throw off the most light) just so you can see what you are doing. You can replace them with other light sources later.
• Consider using multiple light sources to illuminate your room. You can use the invisible lighting along with other lights at the same time to get the appropriate brightness. Don't forget to adjust the color and brightness on visible lighting to match the mood of your room.
• Areas that open up to each other should have a similar color scheme/style to avoid feeling too disjointed and mismatched. The image on the left feels chaotic because three very different rooms open into each other. When this happens, treat them more as one large room and use the same style and similar colors for a more harmonious feel.
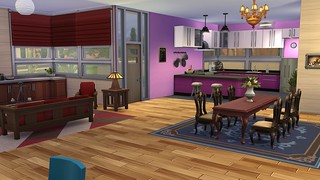
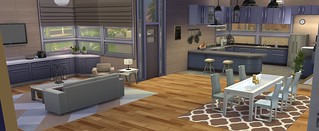
• Save yourself frustration and pick the wall and floor coverings after you choose the furniture. It might sound counter-intuitive, but there are more color options for wall textures than there are for beds. The odds of you finding paint that goes with the bed you chose is much higher than finding a bed to match your walls.
• The more colors you have in a room, the more busy and active it will feel. Try starting with one main color and one or two accent colors to keep a room cohesive.
• Consider the Sim who will occupy the space and use them as the inspiration for the look. Let your sims' personalities shine through. A feminine, flirty Sim would decorate her space much differently than an aggressive Bro. A foodie Sim in the culinary career track will want a nice big kitchen, while an artistic Sim might need an inspiring place to paint.
• Don't forget the extras in the Decoration category. A rug, a nice plant and a couple of pictures on the wall can make a room go from so-so to so nice! And, as you add things that increase the environment score, you will find that your Sims get a mood boost from being in the room.
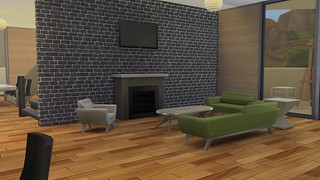
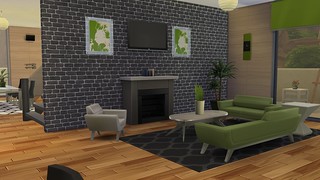
• Clutter can make your rooms feel realistic and lived in. Check out the clutter section of the catalog and the Debug hidden items for these items.
Functional Design
It's not all about appearance. It is just as important for a building to work well for your sims. Think about how Sims will use the objects when placing them. Having a dining table on the other side of the house from the kitchen just means a long walk and wasted time for your sims.
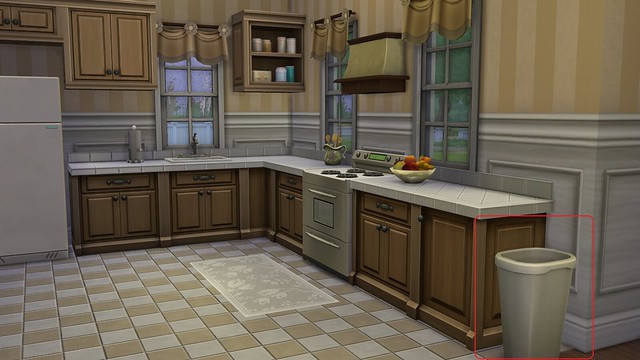
Will other Sims be constantly waking your Sim up when they use violin you placed in the bedroom? Anticipate how Sims will use objects so you can place similar things together or close by. If you place a bookcase, make sure a comfy reading spot is nearby. Don't make your Sim walk to the other side of the house to scrape the food off the dishes and keep a trashcan in the kitchen. Try to keep bedrooms free from activities that make a lot of noise.
Consider multitasking when furnishing your lot. Having the ability to learn two skills at the same time doesn't mean much if the objects to do it are not in the same room. For every skill object you place, try to see if there is a way to place a complimentary activity nearby.
Try to add the more expensive skill building items to any community lot you are building. Sims on a budget will appreciate being able to use things they can't afford at home.
Don't feel like you have to fill up every nook and cranny right away. Sims earn reward objects as they progress in their careers and though gathering collectibles and crafting. Leave a little space for the objects they will accumulate over time.
When you are all done, don't forget to put the walls all the way up and do a 360 around each room. It is a good way to see if you placed something wrong or if you left a wall blank. If you plan to share your creation, move a few Sims in and a have them try everything out. A day or two of playtime will quickly reveal if you need any revisions. You can easily change things up with the new flexible build system.
I hope you have enjoyed your tour through Build Mode. As you can see, there are tons of new tools and features that make building faster and easier than ever before…while still allowing you to express your creativity.
With all of the possibilities, this guide is just the tip of the iceberg. There is no way to cover everything you can do in build mode, but hopefully this information will provide a solid base to begin your own building adventure. Use it as a starting point to see what you can do.
Don't be afraid to experiment and put your own personal stamp on your Sim's environment. Get in there and start building!
Sims 4 How To Use Design Tool
Source: https://simsvip.com/the-sims-4-building-guide/
Posted by: newelldary1945.blogspot.com
0 Response to "Sims 4 How To Use Design Tool"
Post a Comment